Using the PostGIS extension on a Database for PostgreSQL
PostGIS is an extension to the PostgreSQL database management system developed by the Canadian company Refractions Research Inc. The extension allows storing and managing Geographic Information Systems (GIS) objects in PostgreSQL. It is available on Scaleway Databases.
PostGIS was published under the GNU GPL license, which means that the solution is available as open-source software, differently from other GIS systems, which are closed-source software. Spatial data types refer to shapes such as point, line, and polygon. Spatial databases fully integrate spatial data with an object-relational database. PostGIS includes support for GiST-based R-Tree spatial indexes and functions for the analysis and processing of GIS objects.
- "How close to my office is the nearest metro station?"
- "What is the shortest route from my home to the shopping mall?"
- "Where should a new hospital be built to be as near as possible to as many people as possible in a city?"
The answers to these frequently asked questions used to be provided by specialized GIS (Geographic Information Systems) applications. However, these were not a viable solution for dealing with massive spatial datasets (for example: a dataset that includes all the routes in Europe). This is where modern systems like PostGIS step in.
Before you start
To complete the actions presented below, you must have:
- A Scaleway account logged into the console
- Owner status or IAM permissions allowing you to perform actions in the intended Organization
- A Database Instance
Creating a new database for PostGIS
- Connect to your Scaleway console and enter the Managed Databases section.
- Choose your Database Instance by clicking on its name.
- Click the Managed Databases tab, then on Create Database.
- Enter the name of the new database. In this tutorial, we use
townssurvey. - Click the Users tab, followed by and Update Permissions.
- Grant your user permission to access the newly created
townssurveydatabase.
Enabling the PostGIS extension
-
Connect to your Database using the
psqlclient:psql -h <rbd_host> --port <rdb_port> -d townssurvey -U <rdb_user>Enter the password for your database user when prompted.
-
Once connected enable the
postgisextension for the database:CREATE EXTENSION postgis; -
Verify that everything went well, by running the following command:
SELECT PostGIS_version();You will see an output like the following example, which indicates that the extension has been correctly installed on the database:
townssurvey=> SELECT PostGIS_version(); postgis_version --------------------------------------- 3.0 USE_GEOS=1 USE_PROJ=1 USE_STATS=1 (1 row) -
Log out of the PostgreSQL shell when the database is ready.
\q
Optimizing the Database Instance for GIS database objects
PostgreSQL is designed to run in very different configurations, from small test or development setups to large databases handling millions of rows. GIS database objects are large in comparison to plain text data. Scaleway Databases are optimized for performance by default, but it is possible to fine-tune them for some parameters.
- Enter the configuration section of your Database Instance in the Scaleway console.
- Choose your Database Instance from the list, and click it to see the Database information page. Then click Advanced Settings. The advanced settings tab displays.
- Click to configure the parameters of your PostgreSQL server.
- Save the configuration by clicking on the check mark symbol (✔). The configuration of your Database Instance is updated:
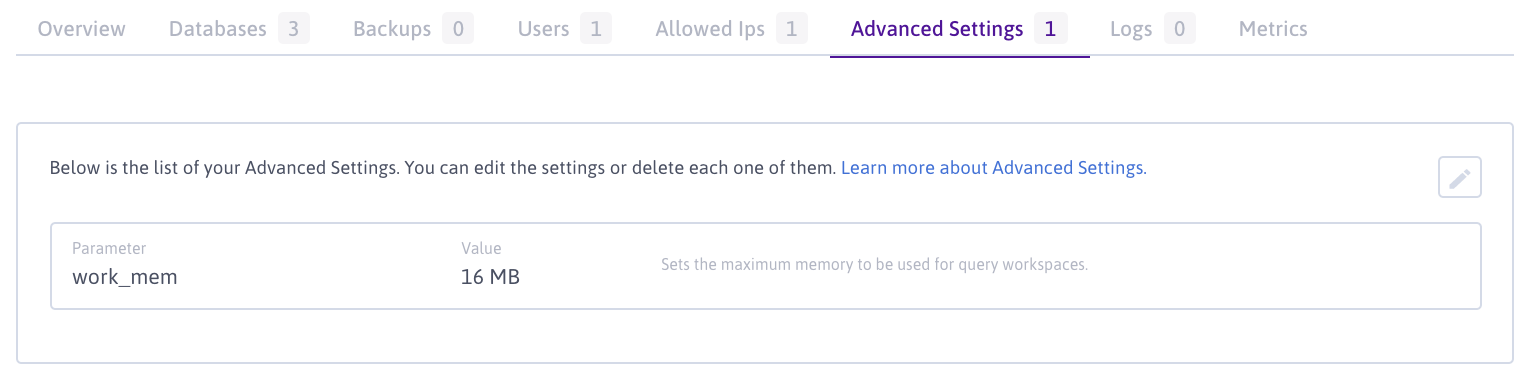
Your Database Instance is configured now, and it is time to load some spatial data.
Downloading and converting a dataset
To get familiar with spatial data, you can download demo data and enter it into the database.
-
Update and upgrade the system.
apt update && apt upgrade -
Install the required software for the following steps using
apt:apt install -y wget unzip postgis -
Create a directory to store the downloaded data and change to it:
mkdir -p /postgis/townssurvey && cd /postgis/townssurvey -
Download a dataset. We use a sample provided by MassGIS Data which contains information about the legal boundary for each of the 351 municipalities in Massachusetts.
wget https://s3.us-east-1.amazonaws.com/download.massgis.digital.mass.gov/shapefiles/state/townssurvey_shp.zip -
Unzip the downloaded data and list the unpacked data to view it:
unzip townssurvey_shp.zip && ls -
You will notice several
.dbf,.prj,.shx, and.shpfiles in the folder. These files together are called a ShapeFile, a common digital vector storage format for storing geometric location and associated attribute information for legacy GIS software.To import the data into the database, it has to be converted to SQL. To achieve this, PostGIS provides a tool called
shp2pgsqlwhich can automatically convert.shpfiles into readable.sqlfiles. Convert the fileTOWNSSURVEY_POLY.shpinto an SQL file by running the following command:shp2pgsql -d ./TOWNSSURVEY_POLY.shp > /postgis/TOWNSSURVEY_POLY.sql -
Import the generated SQL file into your database using the
psqlclient:psql -h <rbd_host> --port <rdb_port> -d townssurvey -U <rdb_user> -f /postgis/TOWNSSURVEY_POLY.sqlAn output like the following displays on the screen:
INSERT 0 1
INSERT 0 1
[...]
INSERT 0 1
INSERT 0 1
COMMIT
ANALYZE
The import has been completed successfully once the word
ANALYZEdisplays.
Querying spatial data
Now as some demo data is available in the database, you can start querying it.
-
Connect to the
psqlconsole:psql -h <rbd_host> --port <rdb_port> -d townssurvey -U <rdb_user> -
List the tables available in the database:
townssurvey=> \dtThe command above will return a list of two tables:
List of relations Schema | Name | Type | Owner --------+------------------+-------+----------------- public | spatial_ref_sys | table | _rdb_superadmin public | townssurvey_poly | table | rdb_user (2 rows) -
The table to query is
townssurvey_poly. To view a list of all available columns in the table, run the following command:townssurvey=> \d townssurvey_polyWhich returns a list as follows:
Table "public.townssurvey_poly"
  Column   |          Type          | Collation | Nullable |                    Default
------------+------------------------+-----------+----------+-----------------------------------------------
gid        | integer                |           | not null | nextval('townssurvey_poly_gid_seq'::regclass)
town       | character varying(21)  |           |          |
town_id    | integer                |           |          |
pop1980    | bigint                 |           |          |
pop1990    | bigint                 |           |          |
pop2000    | bigint                 |           |          |
popch80_90 | integer                |           |          |
popch90_00 | bigint                 |           |          |
type       | character varying(2)   |           |          |
island     | integer                |           |          |
coastal_po | character varying(3)   |           |          |
fourcolor  | integer                |           |          |
fips_stco  | bigint                 |           |          |
ccd_mcd    | character varying(3)   |           |          |
fips_place | character varying(5)   |           |          |
fips_mcd   | bigint                 |           |          |
fips_count | integer                |           |          |
acres      | numeric                |           |          |
square_mil | numeric                |           |          |
pop2010    | bigint                 |           |          |
popch00_10 | bigint                 |           |          |
shape_leng | numeric                |           |          |
shape_area | numeric                |           |          |
geom       | geometry(MultiPolygon) |           |          |
Indexes:
    "townssurvey_poly_pkey" PRIMARY KEY, btree (gid)
The
geomcolumn data type contains spatial data of theMultiPolygontype.As the data is now ready, we can find answers to questions like "What are the 10 towns located in the northernmost part of Massachusetts?".
To get the answer to this question, it is possible to query the spatial data in the database. As the town boundaries are not linear, there is more than one value for latitude. To get the latitude for each town, the centroid of each town has to be gathered using the
ST_Centroidfunction of PostGIS.The centroid's Y value is then extracted using the
ST_Yfunction and this value can be used as the latitude.As several cities have more than one entry in the database, the results are filtered using the
DISTINCT ONfunction from PostgreSQL.The following query returns a list of the 10 northernmost towns in Massachusetts:
SELECT town, ST_Y(ST_Centroid(geom)) as latitude FROM (
  SELECT DISTINCT ON (town) *
  FROM townssurvey_poly
) t
ORDER BY latitude DESC
LIMIT 10;
The result will look like the following list:
town | latitude --------------+------------------ AMESBURY | 953947.884028235 SALISBURY | 952906.606868324 MERRIMAC | 952462.995879863 NEWBURYPORT | 950674.541316222 WEST NEWBURY | 949284.811099743 NEWBURY | 945386.010693761 HAVERHILL | 944694.91004576 GROVELAND | 944664.684131484 CLARKSBURG | 943028.430506038 MONROE | 942395.280914487 (10 rows) -
Quit the database.
\q
Conclusion
You have enabled the PostGIS extension for PostgreSQL, imported sample data, and created your first queries. For more information about PostGIS, refer to the official documentation.
Visit our Help Center and find the answers to your most frequent questions.
Visit Help Center