Backing up your Synology NAS on Scaleway Object Storage using Hyper Backup
Synology Hyper Backup is a solution to back up your Synology NAS easily on Scaleway Object Storage.
A NAS is a network-connected device housing one or several hard disks to store all your photos, music, videos, and other data. The device sits in your home network. With different access rights, you can grant access to anyone in your network or make your files available by sharing them over your internet connection.
As the NAS holds huge amounts of your personal data, a good backup strategy is important. Synology has developed an application called Hyper Backup which allows automatizing the backup of their NAS devices on several external media. These media include external devices, another Synology NAS, a rsync server, or a public cloud service like Scaleway Object Storage.
Before you start
To complete the actions presented below, you must have:
- A Scaleway account logged into the console
- Owner status or IAM permissions allowing you to perform actions in the intended Organization
- An Object Storage bucket
- A NAS device supporting Synology Hyper Backup
Configuring Hyper Backup
-
Connect to the administration interface of your NAS and launch the Hyper Backup application.
-
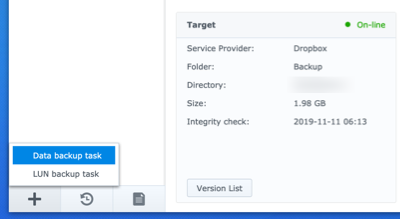
Click + to open the menu, then click Data backup task to launch the backup configuration wizard.
-
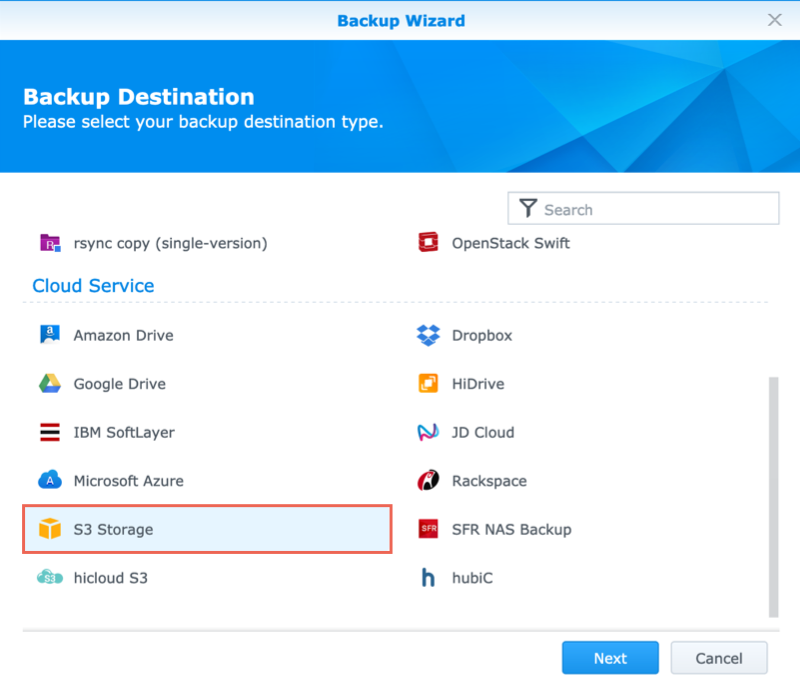
Choose S3 Storage as backup destination from the list:
-
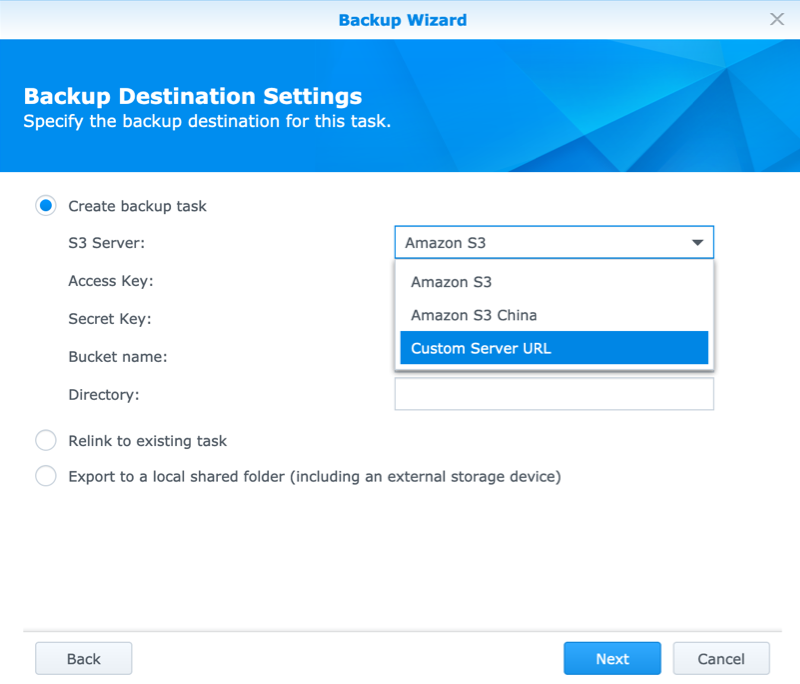
Choose Create backup task and select Custom Server URL from the drop-down list in the S3 Server section:
-
Enter the credentials for your Scaleway Object Storage bucket:
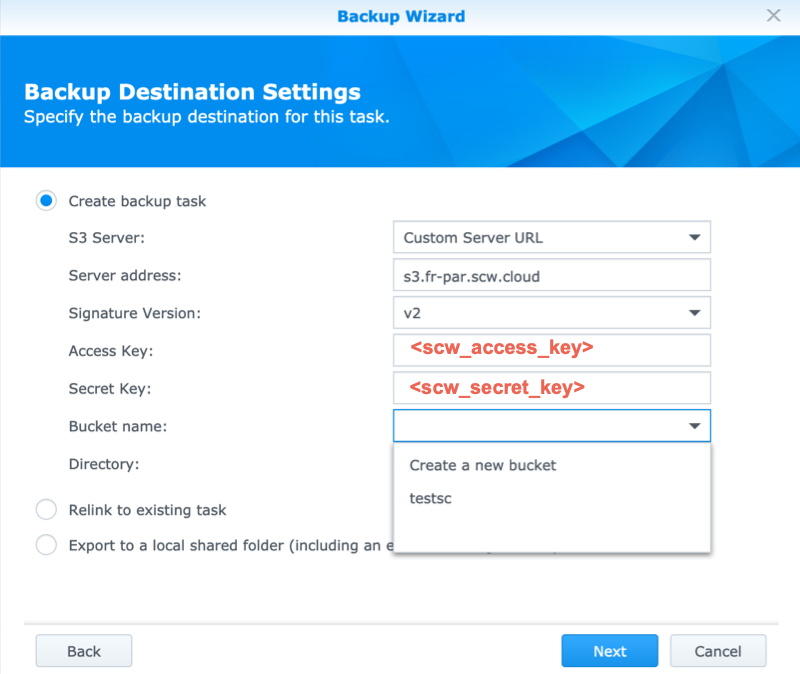
- Server address: The address of the Object Storage endpoint
It can be eithers3.fr-par.scw.cloudfor buckets in Pariss3.nl-ams.scw.cloudfor buckets in Amsterdams3.pl-waw.scw.cloudfor buckets in Warsaws3.it-mil.scw.cloudfor buckets in Milan
- Signature version: Choose the value
v4from the drop-down list - Access key: The
access keyof your API key - Secret key: The
secret keyof your API key - Bucket name: Choose the bucket for storing your backups from the drop-down list
- Directory: The name of the directory for storing your backups. A default name is being generated from the name of your Synology device. That name can be changed if required.
Click Next to continue to the following step.
- Server address: The address of the Object Storage endpoint
-
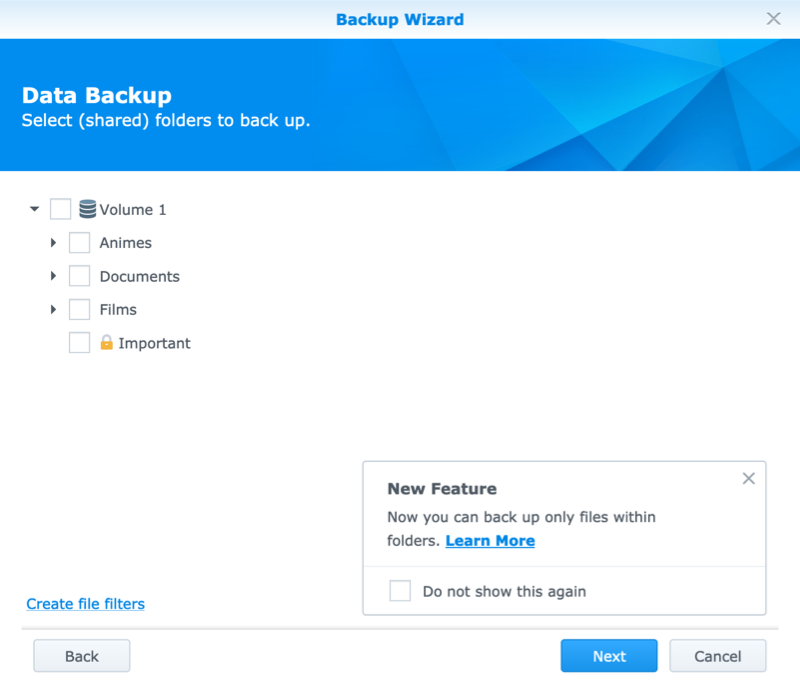
Select the directories of your NAS that you want to back up. Then click Next to continue to the following step:
-
Select the applications that you want to back up, then click Next to continue to the following step:

-
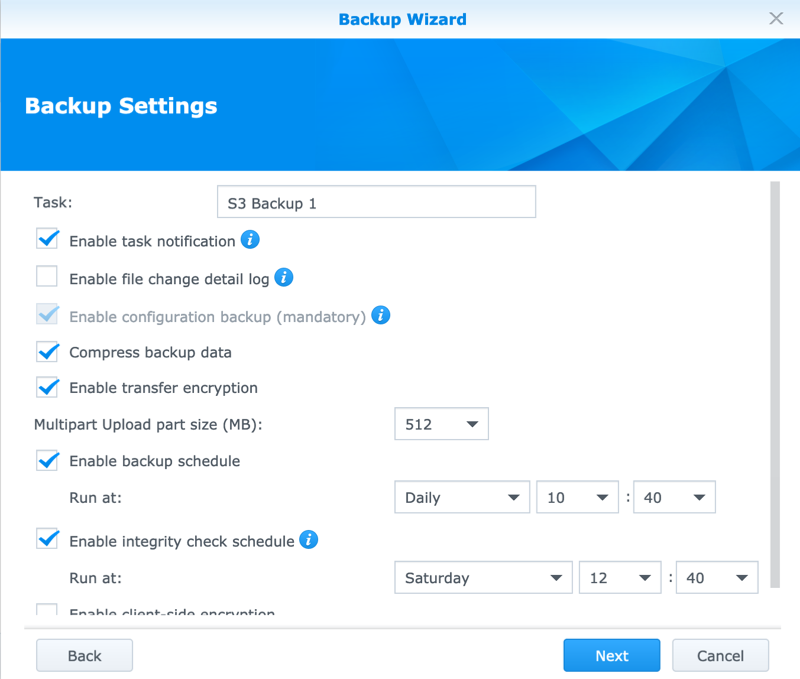
Configure the backup settings. You can customize the backup schedule and several options depending on your requirements. If you do not have special requirements, you can go with the default settings. Click Next to continue to the following step:
-
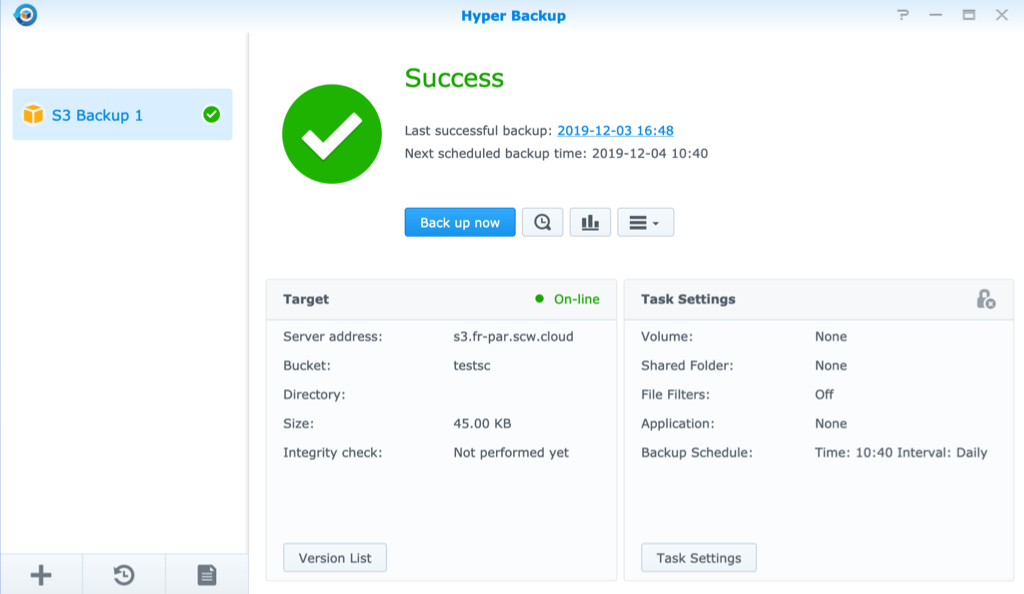
The backup configuration is now complete. The NAS will initialize the backup process and run a first backup. Once completed a Succeed message appears:
For more information regarding Hyper Backup, refer to the software specifications and the official documentation.
Visit our Help Center and find the answers to your most frequent questions.
Visit Help Center