Deploying WordPress with LEMP on Ubuntu Bionic Beaver
WordPress is a popular, free open-source blogging tool and content management system (CMS) based on PHP and MySQL. WordPress has seen incredible adoption rates and is a great choice for getting a website up and running quickly. After setup, almost all the administration can be done through the web frontend.
In this tutorial, you will learn how to install WordPress on a freshly created Ubuntu Bionic Beaver Instance with LEMP (Linux + Nginx - pronounced "engine x" + MySQL + PHP). Nginx is an HTTP server that, compared to Apache, uses fewer resources and delivers pages much faster, especially static files.
Before you start
To complete the actions presented below, you must have:
- A Scaleway account logged into the console
- Owner status or IAM permissions allowing you to perform actions in the intended Organization
- An SSH key
sudoprivileges or access to the root user- Installed LEMP
- An FQDN (Fully Qualified Domain Name) pointing to your Instance's IP address
- Secured your LEMP stack with TLS/SSL
Installing the stack
As a tutorial on LEMP is already available, you can follow the procedure at Installing LEMP on Ubuntu Bionic Beaver.
WordPress serves dynamic content and handles user authentication and authorization. TLS/SSL is the technology that allows you to encrypt the traffic from your site so that your connection is secure. To secure your connection, ensure that you complete the last stage of the tutorial linked above: Configuring SSL with Let's Encrypt.
Configuring Nginx to serve WordPress
You need to configure Nginx to deliver traffic to the future WordPress installation. In the LEMP tutorial we created a server block for example.com, serving the default Nginx page from our domain example.com. Here, we will create a server block wordpress which will serve a WordPress site from our subdomain blog.example.com.
-
Create a new server block for Nginx:
nano /etc/nginx/sites-available/wordpress -
Paste the following configuration. Make sure to replace the configuration at the
server_nameline with your domain.server { listen 80; root /var/www/wordpress; index index.php index.html index.htm; server_name blog.example.com; location = /50x.html { root /usr/share/nginx/html; } location / { # try_files $uri $uri/ =404; try_files $uri $uri/ /index.php?q=$uri&$args; } location ~ \.php$ { try_files $uri =404; fastcgi_split_path_info ^(.+\.php)(/.+)$; fastcgi_pass unix:/run/php/php7.2-fpm.sock; fastcgi_index index.php; fastcgi_param SCRIPT_FILENAME $document_root$fastcgi_script_name; include fastcgi_params; } location = /favicon.ico { access_log off; log_not_found off; expires max; } location = /robots.txt { access_log off; log_not_found off; } # Cache static files for as long as possible location ~* \.(ogg|ogv|svg|svgz|eot|otf|woff|mp4|ttf|css|rss|atom|js|jpg|jpeg|gif|png|ico|zip|tgz|gz|rar|bz2|doc|xls|exe|ppt|tar|mid|midi|wav|bmp|rtf)$ { access_log off; log_not_found off; expires max; } # Security Settings For Better Privacy Deny Hidden Files location ~ /\. { deny all; access_log off; log_not_found off; } # Return 403 Forbidden For readme.(txt|html) or license.(txt|html) if ($request_uri ~* "^.+(readme|license)\.(txt|html)$") { return 403; } # Disallow PHP In Upload Folder location /wp-content/uploads/ { location ~ \.php$ { deny all; } } } -
Test the configuration to ensure that it will function correctly:
nginx -twhich returns
nginx: the configuration file /etc/nginx/nginx.conf syntax is ok nginx: configuration file /etc/nginx/nginx.conf test is successful -
Enable the server block by symlinking:
ln -s /etc/nginx/sites-available/wordpress /etc/nginx/sites-enabled/wordpress -
Delete the Nginx default server block:
rm /etc/nginx/sites-enabled/defaultSteps 6 and 7 optimize your Nginx configuration for WordPress:
-
Open the Nginx configuration file:
nano /etc/nginx/nginx.conf -
Edit the following to optimize:
user www-data; worker_processes 1; pid /run/nginx.pid;- Add
use epollto the events block
events { worker_connections 4096; multi_accept on; use epoll; }- Add
client_max_body_sizeandserver_tokensoff directive. Setkeepalive_timeoutto 30 seconds.
# Basic Settings sendfile on; tcp_nopush on; tcp_nodelay on; keepalive_timeout 30; types_hash_max_size 2048; server_tokens off; client_max_body_size 100m; # server_names_hash_bucket_size 64; # server_name_in_redirect off; include /etc/nginx/mime.types; default_type application/octet-stream;- Make sure that the whole Gzip settings block is similar to
# Gzip Settings gzip on; gzip_disable "msie6"; gzip_vary on; gzip_proxied any; gzip_comp_level 6; gzip_buffers 16 8k; gzip_http_version 1.1; gzip_types text/plain text/css application/json application/x-javascript text/xml application/xml application/xml+rss text/javascript; - Add
-
Restart the server:
service nginx restart
Configuring PHP
If you want to upload files weighing more than 2 MB to your WordPress site, you have to increase PHP upload size variables in php.ini.
- Open the
php.inifile:nano /etc/php/7.2/fpm/php.ini - Press
Ctrl+Wand search forupload_max_filesizeand set it to 100M.1. Open thephp.inifile:nano /etc/php/7.2/fpm/php.ini - Press
Ctrl+Wand search forupload_max_filesizeand set it to 100M. - Restart PHP.
sudo service php7.2-fpm restart
Setting up the MySQL database
In this section, we will create the database user and tables.
-
Log into the MySQL shell using your MySQL root password.
mysql -u root -p -
Create a WordPress database, along with a user in the database. First, let's make the database (feel free to give it whatever name you like):
MariaDB [(none)]> CREATE DATABASE wordpress;The output displays:
Query OK, 1 row affected (0.00 sec) -
Create a new user. Replace the database, name, and password with whatever you prefer:
CREATE USER wordpressuser@localhost;The output displays:
Query OK, 0 rows affected (0.00 sec) -
Set a password for the new user:
SET PASSWORD FOR wordpressuser@localhost= PASSWORD("password");The output displays:
Query OK, 0 rows affected (0.00 sec) -
Grant all privileges to the new user. Without this command, the WordPress installer will not be able to start up:
GRANT ALL PRIVILEGES ON wordpress.* TO wordpressuser@localhost IDENTIFIED BY 'password';The output displays:
Query OK, 0 rows affected (0.00 sec) -
Refresh MySQL:
FLUSH PRIVILEGES;The output displays:
Query OK, 0 rows affected (0.00 sec) -
Exit the MySQL shell:
exit
Installing the WordPress files
- Navigate to the site root directory:
cd /var/www/ - Download the latest version of WordPress:
wget http://wordpress.org/latest.tar.gz - Extract it from the archive:
tar -xzvf latest.tar.gz - Give the permissions of
/var/www/wordpresstowww-datauser. It will allow future automatic updating of WordPress plugins and file editing with SFTP.chown -R www-data:www-data wordpress/ usermod -a -G www-data www-data
Completing the installation through the web interface
Now that the server configuration is complete, we can finish up the installation through the web interface.
In your web browser, navigate to your server's domain name or public IP address:
http://server_domain_or_IP/wordpress/
-
Select your language.
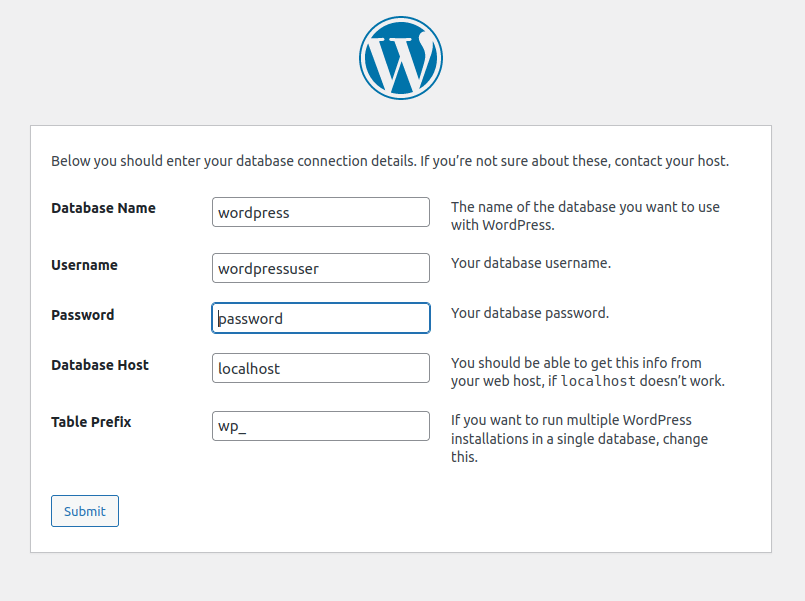
You are asked to enter your database information. Before doing so, go back to the terminal to complete the next steps.
-
Open the WordPress configuration file from your terminal:
nano /var/www/wordpress/wp-config-sample.php -
Edit the information for your database under
MySQL settings, to replace the default values with those you configured while setting it up. In our case, it looks like this:// ** MySQL settings - You can get this info from your web host ** // /** The name of the database for WordPress */ define( 'DB_NAME', 'wordpress' ); /** MySQL database username */ define( 'DB_USER', 'wordpressuser' ); /** MySQL database password */ define( 'DB_PASSWORD', 'password' ); /** MySQL hostname */ define( 'DB_HOST', 'localhost' ); /** Database charset to use in creating database tables. */ define( 'DB_CHARSET', 'utf8' ); /** The database collate type. Do not change this if in doubt. */ define( 'DB_COLLATE', '' ); -
Save and exit the file, then return to your web browser.
-
Enter the database information for WordPress:
-
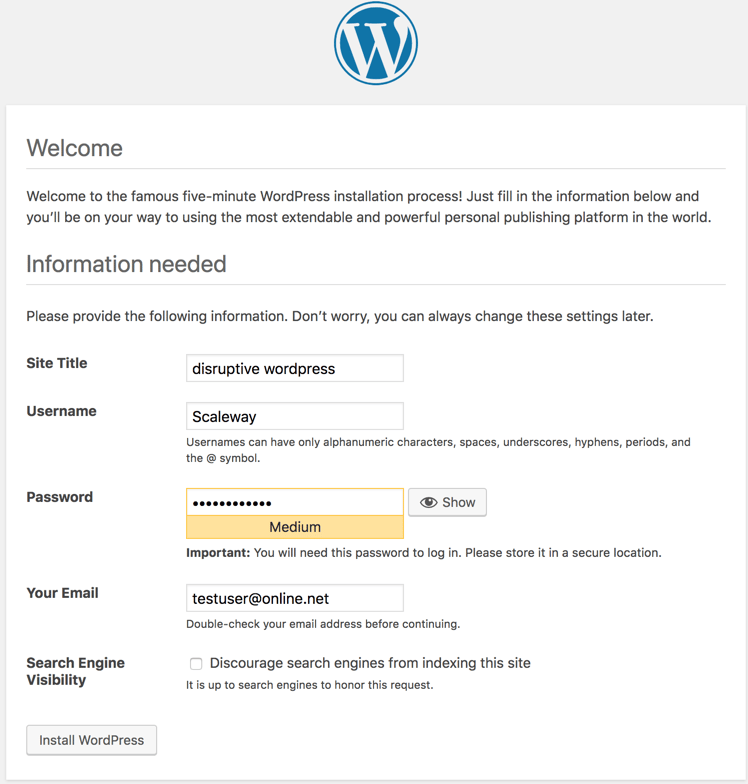
Complete the five-minute WordPress installation process.
-
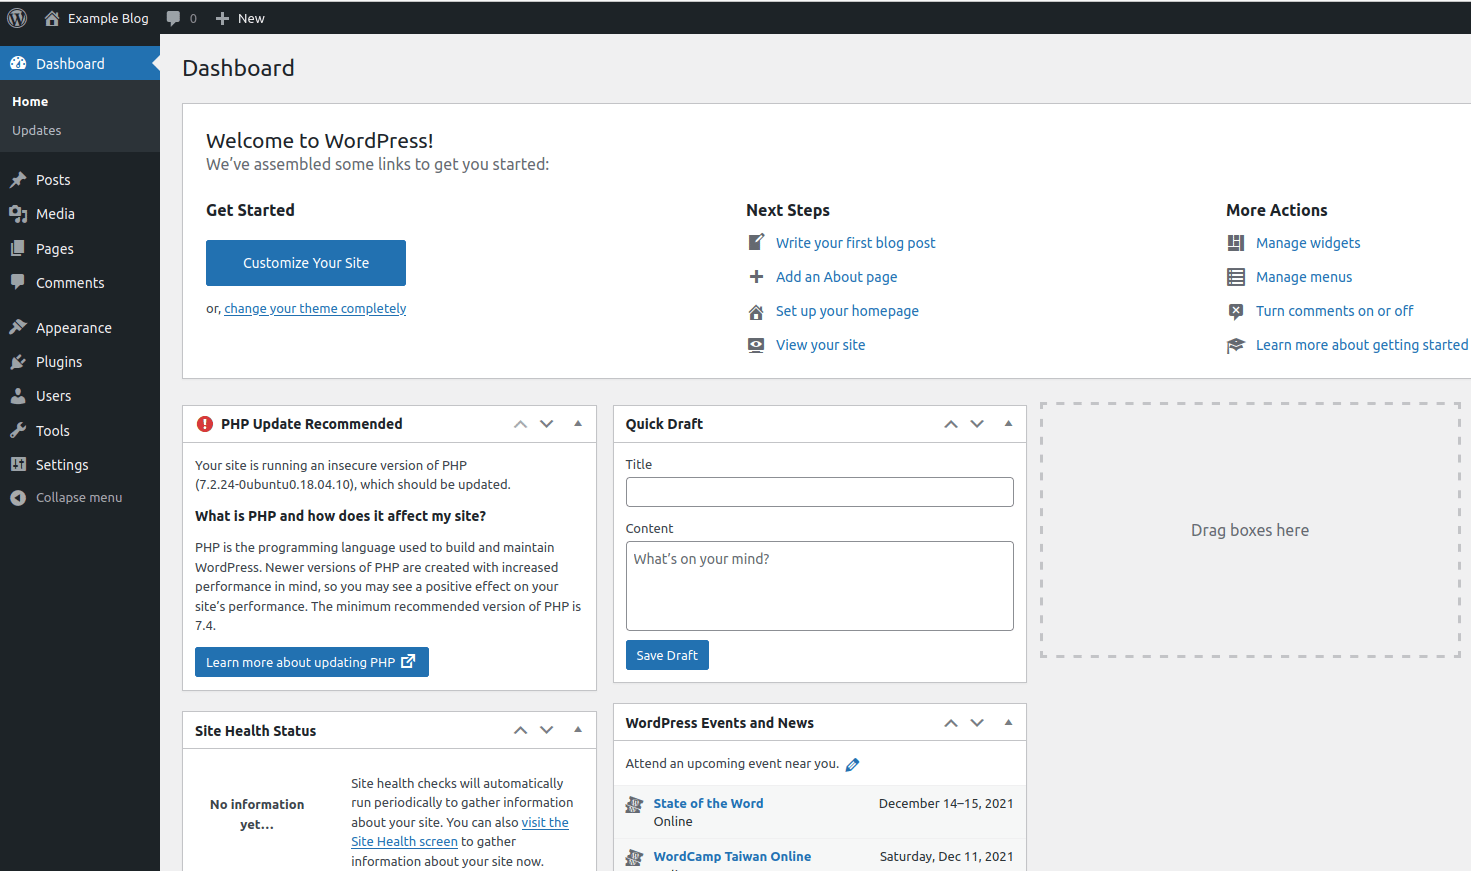
Log in. Your dashboard displays.
Visit our Help Center and find the answers to your most frequent questions.
Visit Help Center