How to create and manage a VPN gateway
A VPN gateway is one of the essential building blocks of a Site-to-Site VPN:
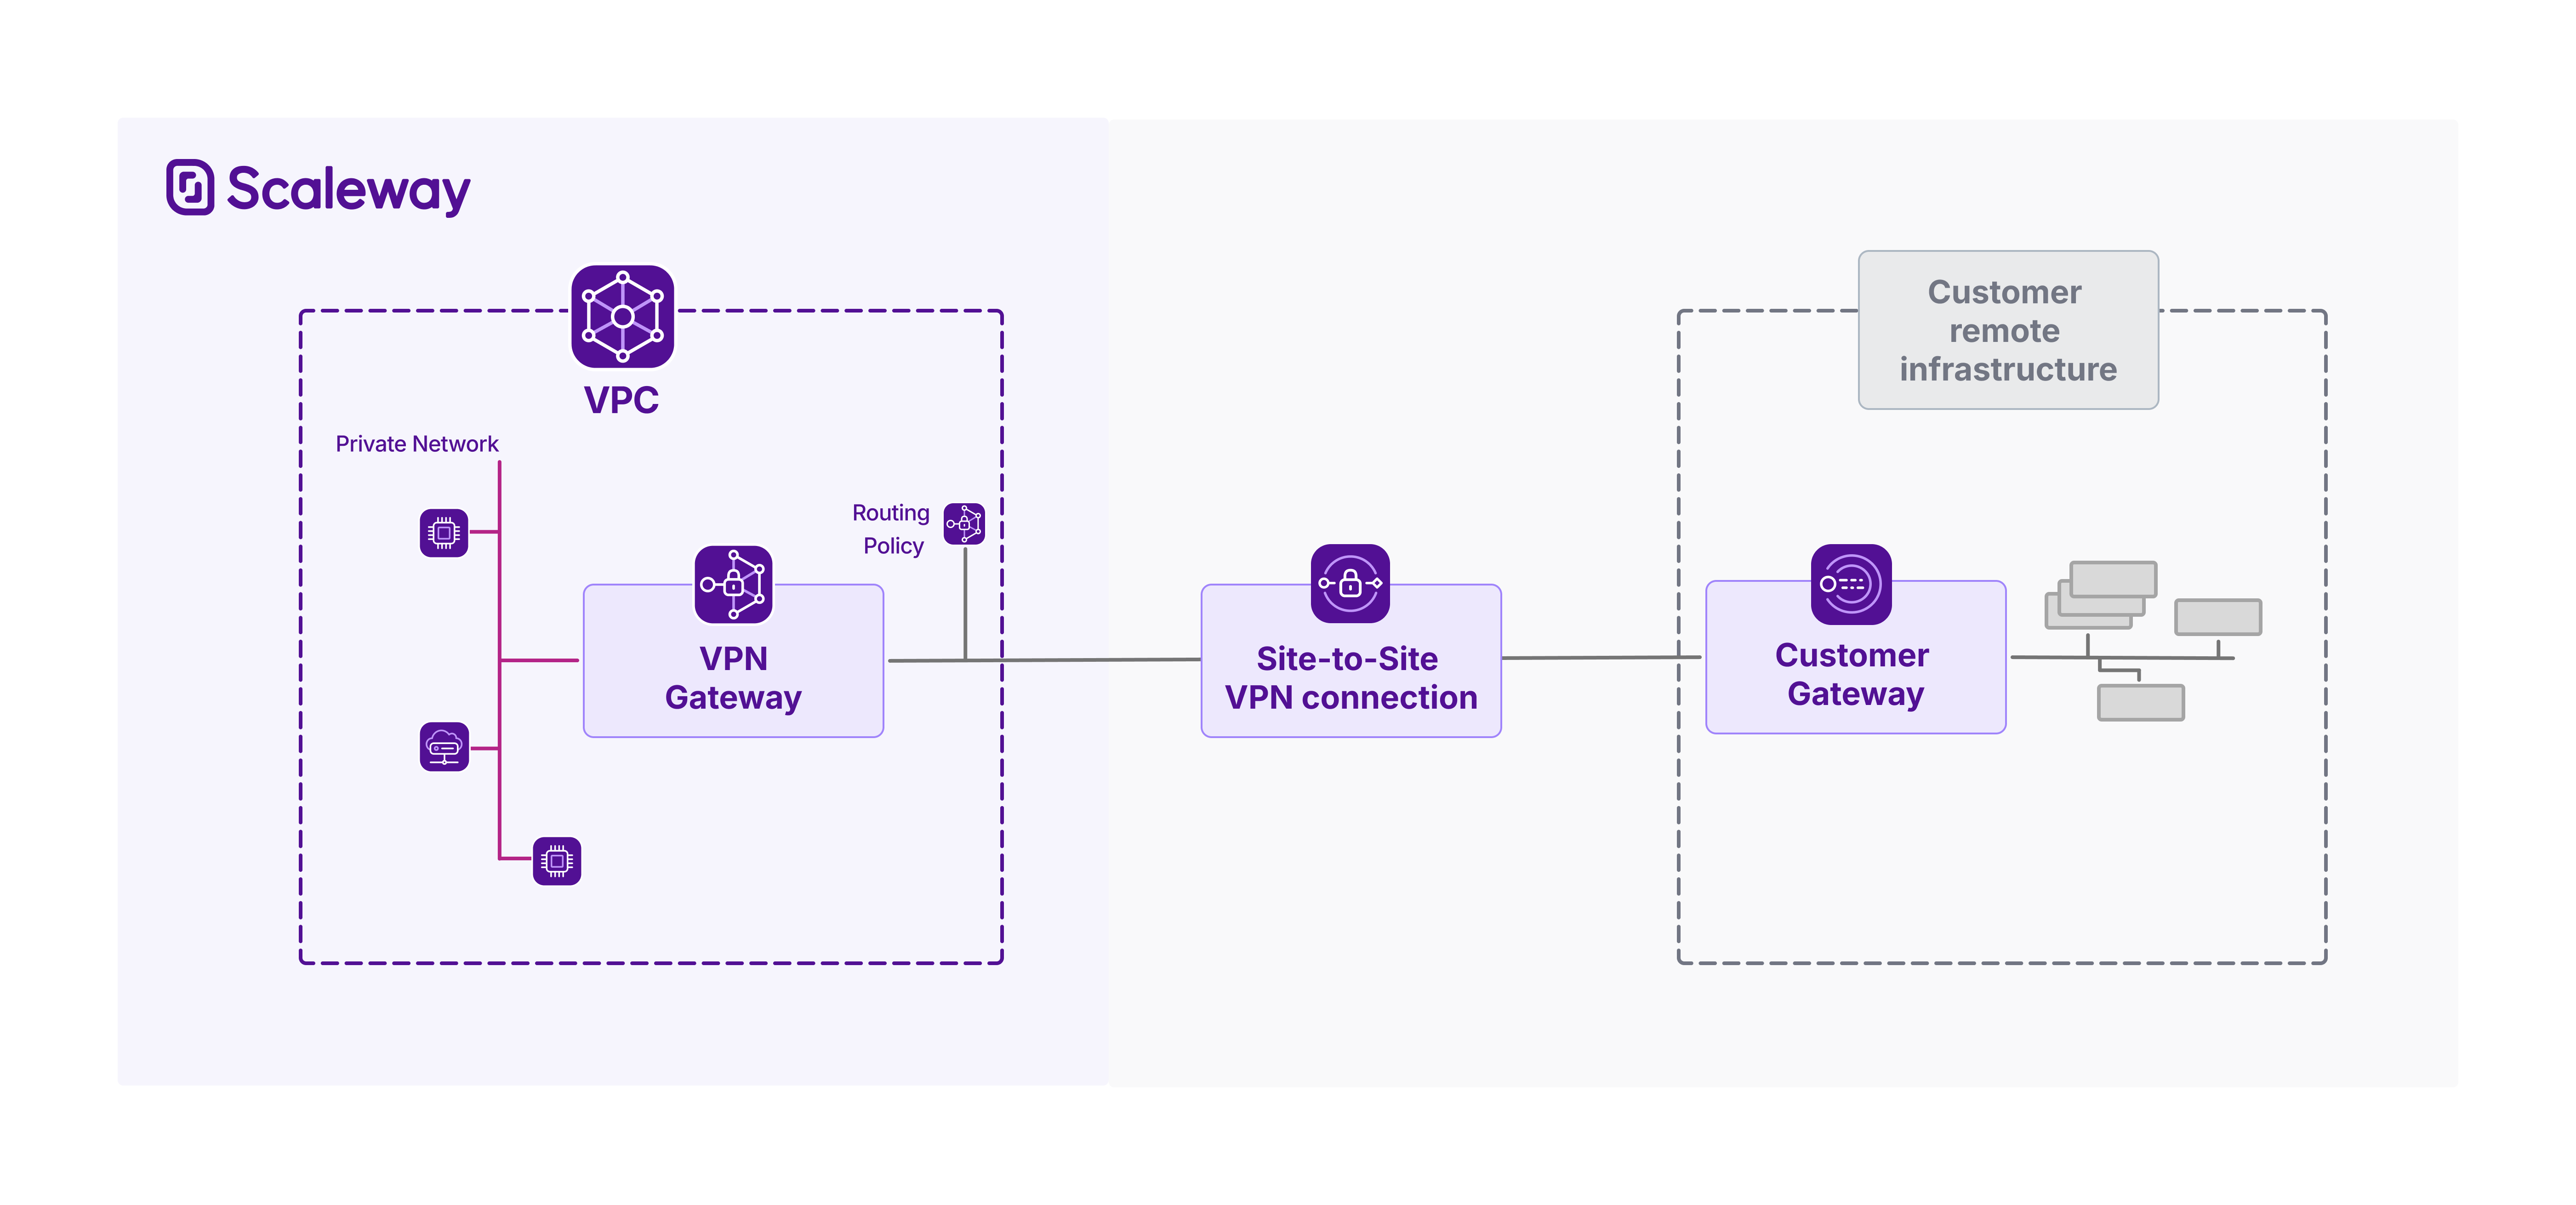
This document explains how to create and manage a VPN gateway with the Scaleway console. Creating a VPN gateway is the first step to creating a working Site-to-Site VPN. It represents the VPN tunnel's endpoint on the Scaleway side of your infrastructure.
For a working VPN, in addition to creating a VPN gateway, you must also create:
- A customer gateway, your remote endpoint.
- A routing policy, to control traffic flow.
- A VPN connection, to join the other elements together and configure the VPN tunnel.
Before you start
To complete the actions presented below, you must have:
- A Scaleway account logged into the console
- Owner status or IAM permissions allowing you to perform actions in the intended Organization
How to create a VPN gateway
-
Click Site-to-Site VPN in the Network section of the Scaleway console side menu.
-
Click the VPN gateways tab, then Create VPN gateway. The creation wizard displays.
-
Choose a region in which to create your VPN gateway. The resource will be created in this geographical location. VPN gateways must be in the same region as the resources (customer gateways, connections etc.) that you link them with to create a Site-to-Site VPN tunnel.
-
Choose a zone (optional) if you want to pinpoint exactly where in the region your gateway should be created.
-
Choose a gateway type, based on bandwidth and how many connections the gateway should be able to support.
-
Configure network connectivity for the VPN gateway.
- Attach to Private Network: You must select a Private Network which the VPN gateway will connect to. This is not currently modifiable after gateway creation.
You can choose either to auto-allocate the gateway's private IPv4 and IPv6 addresses on the Private Network, or select specific private IPs. You must have already reserved these IPs via IPAM. - Set up public connectivity: Assign a public IPv4 or IPv6 address to your gateway. This will be used to establish the VPN tunnel. If you want to be able to create two connections between this gateway and a single customer gateway (for dual tunnels), you must also assign a second IP address, of the IP type not used for the first address.
- Attach to Private Network: You must select a Private Network which the VPN gateway will connect to. This is not currently modifiable after gateway creation.
-
Enter a name and (optionally) tags for the VPN gateway.
-
Click Create VPN gateway to finish.
Your gateway is created, and you are directed to its Overview page.
To continue setting up a Site-to-Site VPN, next create a customer gateway.
How to view a VPN gateway's details
-
Click Site-to-Site VPN in the Network section of the Scaleway console side menu. A listing of your VPN connections displays.
-
Click the VPN gateways tab.
-
Use the region selector at the top of the page to filter for the region of the VPN gateway you want to configure, then click the gateway in the listing. The gateway's Overview page displays.
Here you can view the gateway's:
- Status
- Offer type
- Availability Zone
- Bandwidth
- Number of VPN connections, compared to the total number allowed for the gateway offer type
- ID
- Attached Private Network
- Private and public IP addresses
How to edit a VPN gateway
Currently, the only parameters of a VPN gateway that can be edited after creation are its name and tags.
-
Click Site-to-Site VPN in the Network section of the Scaleway console side menu. A listing of your VPN connections displays.
-
Click the VPN gateways tab.
-
Use the region selector at the top of the page to filter for the region of the VPN gateway you want to configure, then click the gateway in the listing. The gateway's Overview page displays.
-
Click the Settings tab.
-
Make your edits as required:
- Click directly on the gateway's name at the top of the page to edit it.
- Type new tags directly in the Tags box, or use the x icon to remove an existing tag.
How to delete a VPN gateway
You must deactivate route propagation on any VPN connections linked to the VPN gateway, before you can delete gateway.
-
Click Site-to-Site VPN in the Network section of the Scaleway console side menu. A listing of your VPN connections displays.
-
Click the VPN gateways tab.
-
Use the region selector at the top of the page to filter for the region of the VPN gateway you want to configure, then click the gateway in the listing. The gateway's Overview page displays.
-
Click the Settings tab.
-
Click Delete VPN gateway.
A pop-up displays, informing you that any VPN connections using this gateway will be auto-deleted, along with any flexible public IP addresses that you created specifically for the gateway.
You must manually delete any other objects associated with the gateway, such as customer gateways or routing policies, if you do not need them any more.
Any reserved private IPs that were used for the VPN gateway on its Private Network will remain reserved, and accessible from your IPAM management interface.
-
Type DELETE to confirm you want to proceed, then click the *Delete button.
The gateway is deleted, and you are returned to the list of your VPN gateways.