Deploying AWStats
AwStats serves as a valuable utility capable of providing a comprehensive overview of your website's activity while aiding in site analysis. This open-source web analytics reporting tool generates advanced statistics for web, streaming, FTP, and mail servers in a visually informative manner.
This software stands as a robust, enterprise-level server and log monitoring solution, offering two operational modes: CGI (Common Gateway Interface) and command line. It efficiently presents log data through concise and graphical web pages, with regular and swift updates.
AwStats leverages log file analysis to parse data from a wide range of web servers, including Apache, IIS, and numerous others.
Before you start
To complete the actions presented below, you must have:
- A Scaleway account logged into the console
- Owner status or IAM permissions allowing you to perform actions in the intended Organization
- An SSH key
- An Instance
sudoprivileges or access to the root user
Installing Apache
-
Connect to your Instance:
ssh root@<your_Instance_public_IP> -
Make sure the Apache2 HTTP server is installed, then install the AwStats server packages:
apt update
apt install apache2
Installing and configuring AwStats
By default, AwStats package is available in the Ubuntu repository.
-
Install the AwStats package.
apt install awstats -
Enable the CGI module in Apache.
a2enmod cgi -
Restart Apache.
systemctl restart apache2.service -
Duplicate the AwStats default configuration file to one with your domain name.
cp /etc/awstats/awstats.conf /etc/awstats/domain-example.conf -
Edit your AwStats domain name configuration file.
nano /etc/awstats/domain-example.conf -
Update the settings shown below.
# Change to Apache log file, by default it's /var/log/apache2/access.log LogFile="/var/log/apache2/access.log" # Change to the website domain name SiteDomain="domain-example.com" HostAliases="www.domain-example localhost 127.0.0.1" # When this parameter is set to 1, AwStats adds a button on report page to allow to "update" statistics from a web browser AllowToUpdateStatsFromBrowser=1 -
Type
CTRL + OandCTRL + Xto save and exit the file. -
Build your initial statistics which are generated from the current logs on your server.
/usr/lib/cgi-bin/awstats.pl -config=test.com -updatewhich returns
...
Create/Update database for config "/etc/awstats/awstats.conf" by AwStats version 7.6 (build 20161204)
From data in log file "/var/log/apache2/access.log"...
Phase 1 : First bypass old records, searching new record...
Searching new records from beginning of log file...
Phase 2 : Now process new records (Flush history on disk after 20000 hosts)...
Jumped lines in file: 0
Parsed lines in file: 5
Found 0 dropped records,
Found 0 comments,
Found 0 blank records,
Found 0 corrupted records,
Found 0 old records,
Found 5 new qualified records.
Configuring Apache for AwStats
Copy the content of the cgi-bin folder to the default document root directory of your Apache installation. By default, this is in the /usr/lib/cgi-bin folder.
cp -r /usr/lib/cgi-bin /var/www/html/
chown www-data:www-data /var/www/html/cgi-bin/
chmod -R 755 /var/www/html/cgi-bin/
Testing AwStats
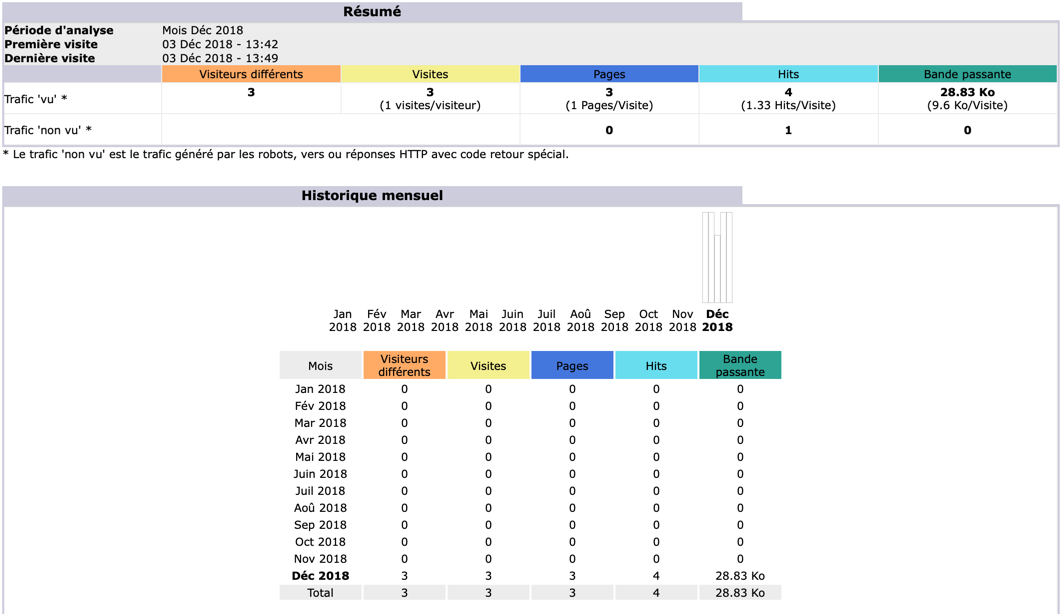
Now you can access your AwStats by visiting the following URL: http://your-server-ip/cgi-bin/awstats.pl?config=test.com, which displays:
Setting up a cron job to update logs
It is recommended to schedule a cron job to regularly update the AwStats database using newly created log entries, so the stats get updated regularly.
- Edit the
/etc/crontabfile.nano /etc/crontab - Add the following line to tell AwStats to update every ten minutes:
*/10 * * * * root /usr/lib/cgi-bin/awstats.pl -config=test.com -update - Type
CTRL + OandCTRL + Xto save and exit.
Visit our Help Center and find the answers to your most frequent questions.
Visit Help Center