Deploying Umami web analytics on Scaleway Serverless Containers
Umami is a simple, easy-to-use, self-hosted web analytics solution. It provides an easy-to-use, open-source, and privacy-focused alternative to paid solutions such as Google Analytics. The tool collects only the metrics relevant to you and displays everything on a single page.
Before you start
To complete the actions presented below, you must have:
- A Scaleway account logged into the console
- Owner status or IAM permissions allowing you to perform actions in the intended Organization
- An SSH key
- A valid API key
- A Container Registry
- A Database for PostgreSQL
- Installed Docker on your local computer
Preparating the database
- Create a database user and grant permissions to the PostgreSQL database you want to use for Umami.
- Clone the Umami project locally and enter the project's directory:
git clone https://github.com/mikecao/umami.git cd umami - Install the required tables from the script shipped with Umami:
psql -h <postgresql-ip>:<port> -U username -d databasename -f sql/schema.postgresql.sql
Preparing the Container Registry
-
Sign in to your namespace in your terminal:
docker login rg.fr-par.scw.cloud/<umami-namespace> -u nologin -p $SCW_SECRET_TOKEN -
Download the Umami Docker container on your local machine:
docker pull ghcr.io/mikecao/umami:postgresql-latest -
Tag the local container:
docker tag ghcr.io/mikecao/umami:postgresql-latest rg.fr-par.scw.cloud/<umami-namespace>/umami:postgresql-latest -
Push the local container to your Container Registry namespace:
docker push rg.fr-par.scw.cloud/<umami-namespace>/umami:postgresql-latest -
Click the Namespace settings tab in the Container Registry section of the Scaleway console and make sure your namespace privacy policy is set to Public.

Deploying the Serverless Container
-
Select the namespace you want to use to deploy the application in the Serverless Containers section of the Scaleway console. If you do not have a Serverless Containers namespace yet, click + Create a namespace to create a new one.

-
Click + Deploy a Container. The container deployment wizard displays.
-
Choose the namespace you pushed the image to and select the
umami:postgresql-latestimage. Set the value for the port to3000. -
Enter a name for your container. Optionally, you can enter a container description.
-
Select the resources you want to allocate to the container. The resources to allocate depend on the intended load of your application. In this tutorial we use 128 MB - 70 mvCPU.
-
Configure the minimum and maximum values to autoscale the number of available instances for your container.
-
Set the Secrets. Secrets are an extra-secure type of environment variables that are injected into your container and stored securely:
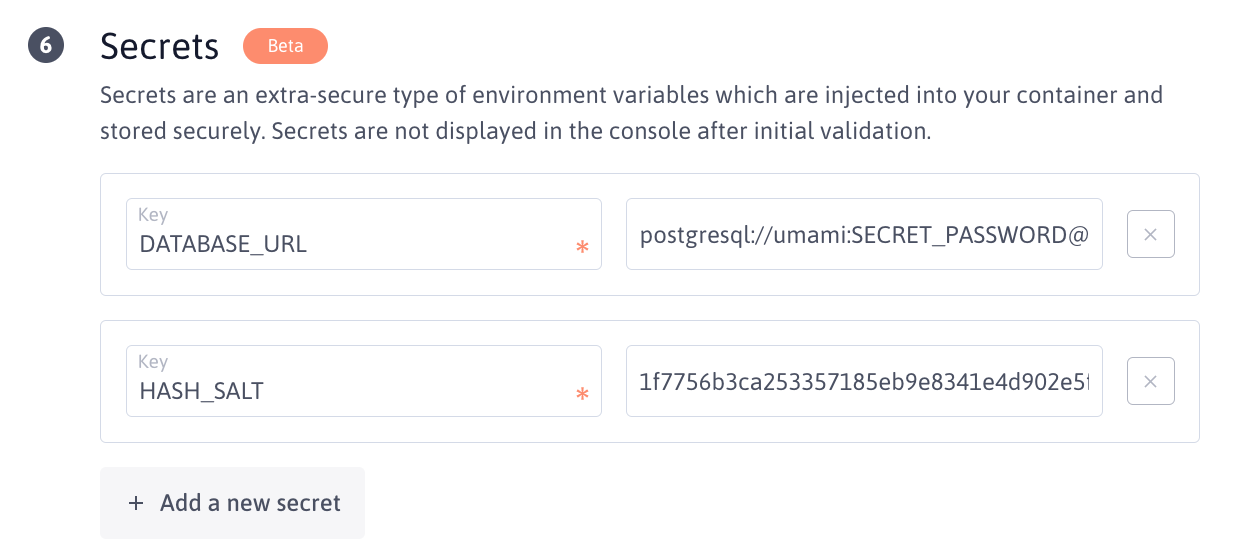
Click + Add a new secret to add a secret. Configure the following two secrets:
-
DATABASE_URL: The URL of your PostgreSQL database in the format:postgres://<db-user>:<db-password>@<postgresql-ip>:<port>/<db-name>?sslmode=require -
HASH_SALT: A random hash. To generate it, runopenssl rand -hex 32in your terminal and post the output in the form.
-
-
Verify that the container privacy policy is set to Public.
-
Click Deploy a Container.
Accessing the Umami dashboard
-
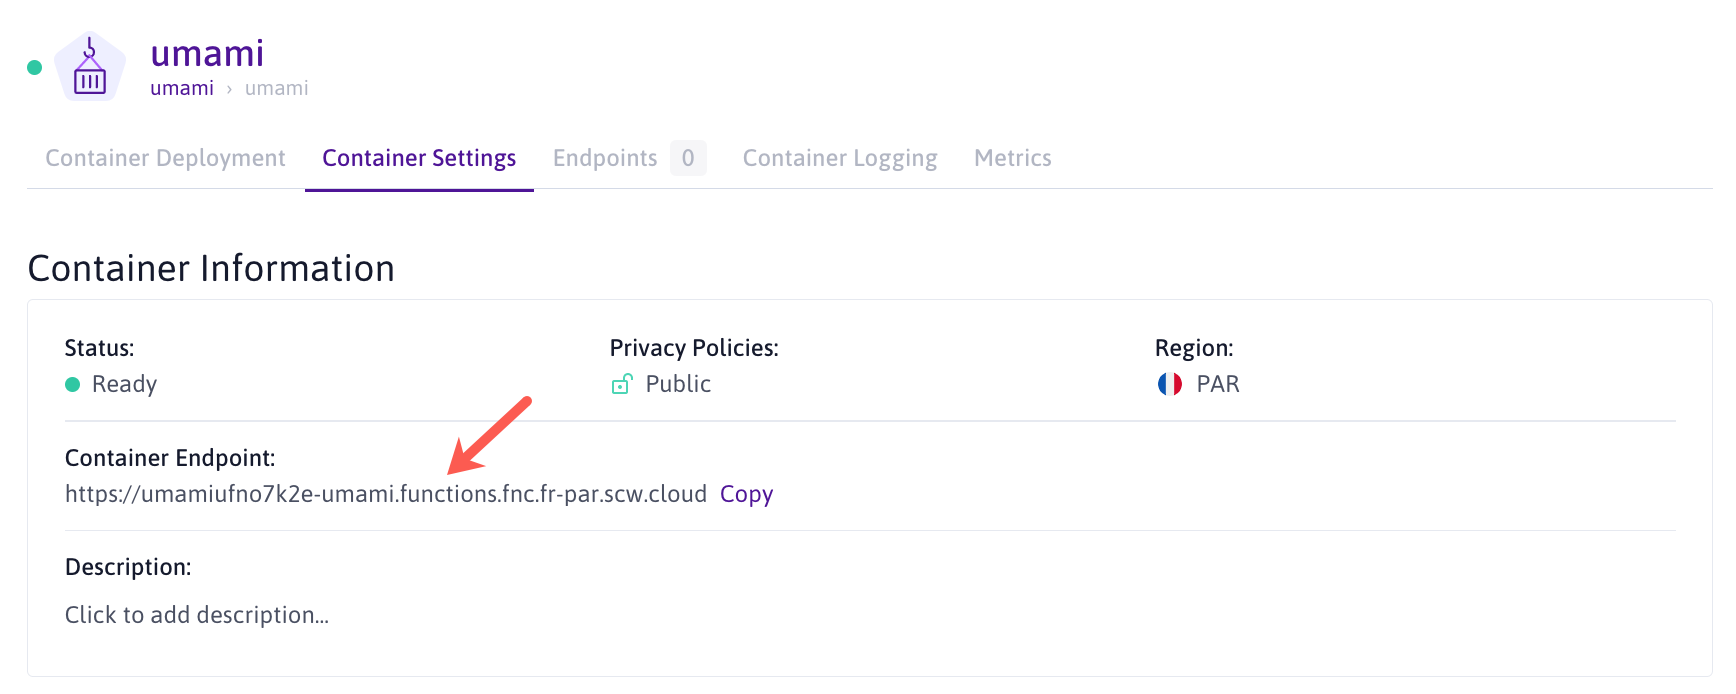
Click the Container Settings tab, to display container information.
-
Copy the URL displayed for Container Endpoint and paste it into a web browser. The Umami login screen displays.
-
Log in to the Umami interface using the following credentials:
- User:
admin - Password:
umami
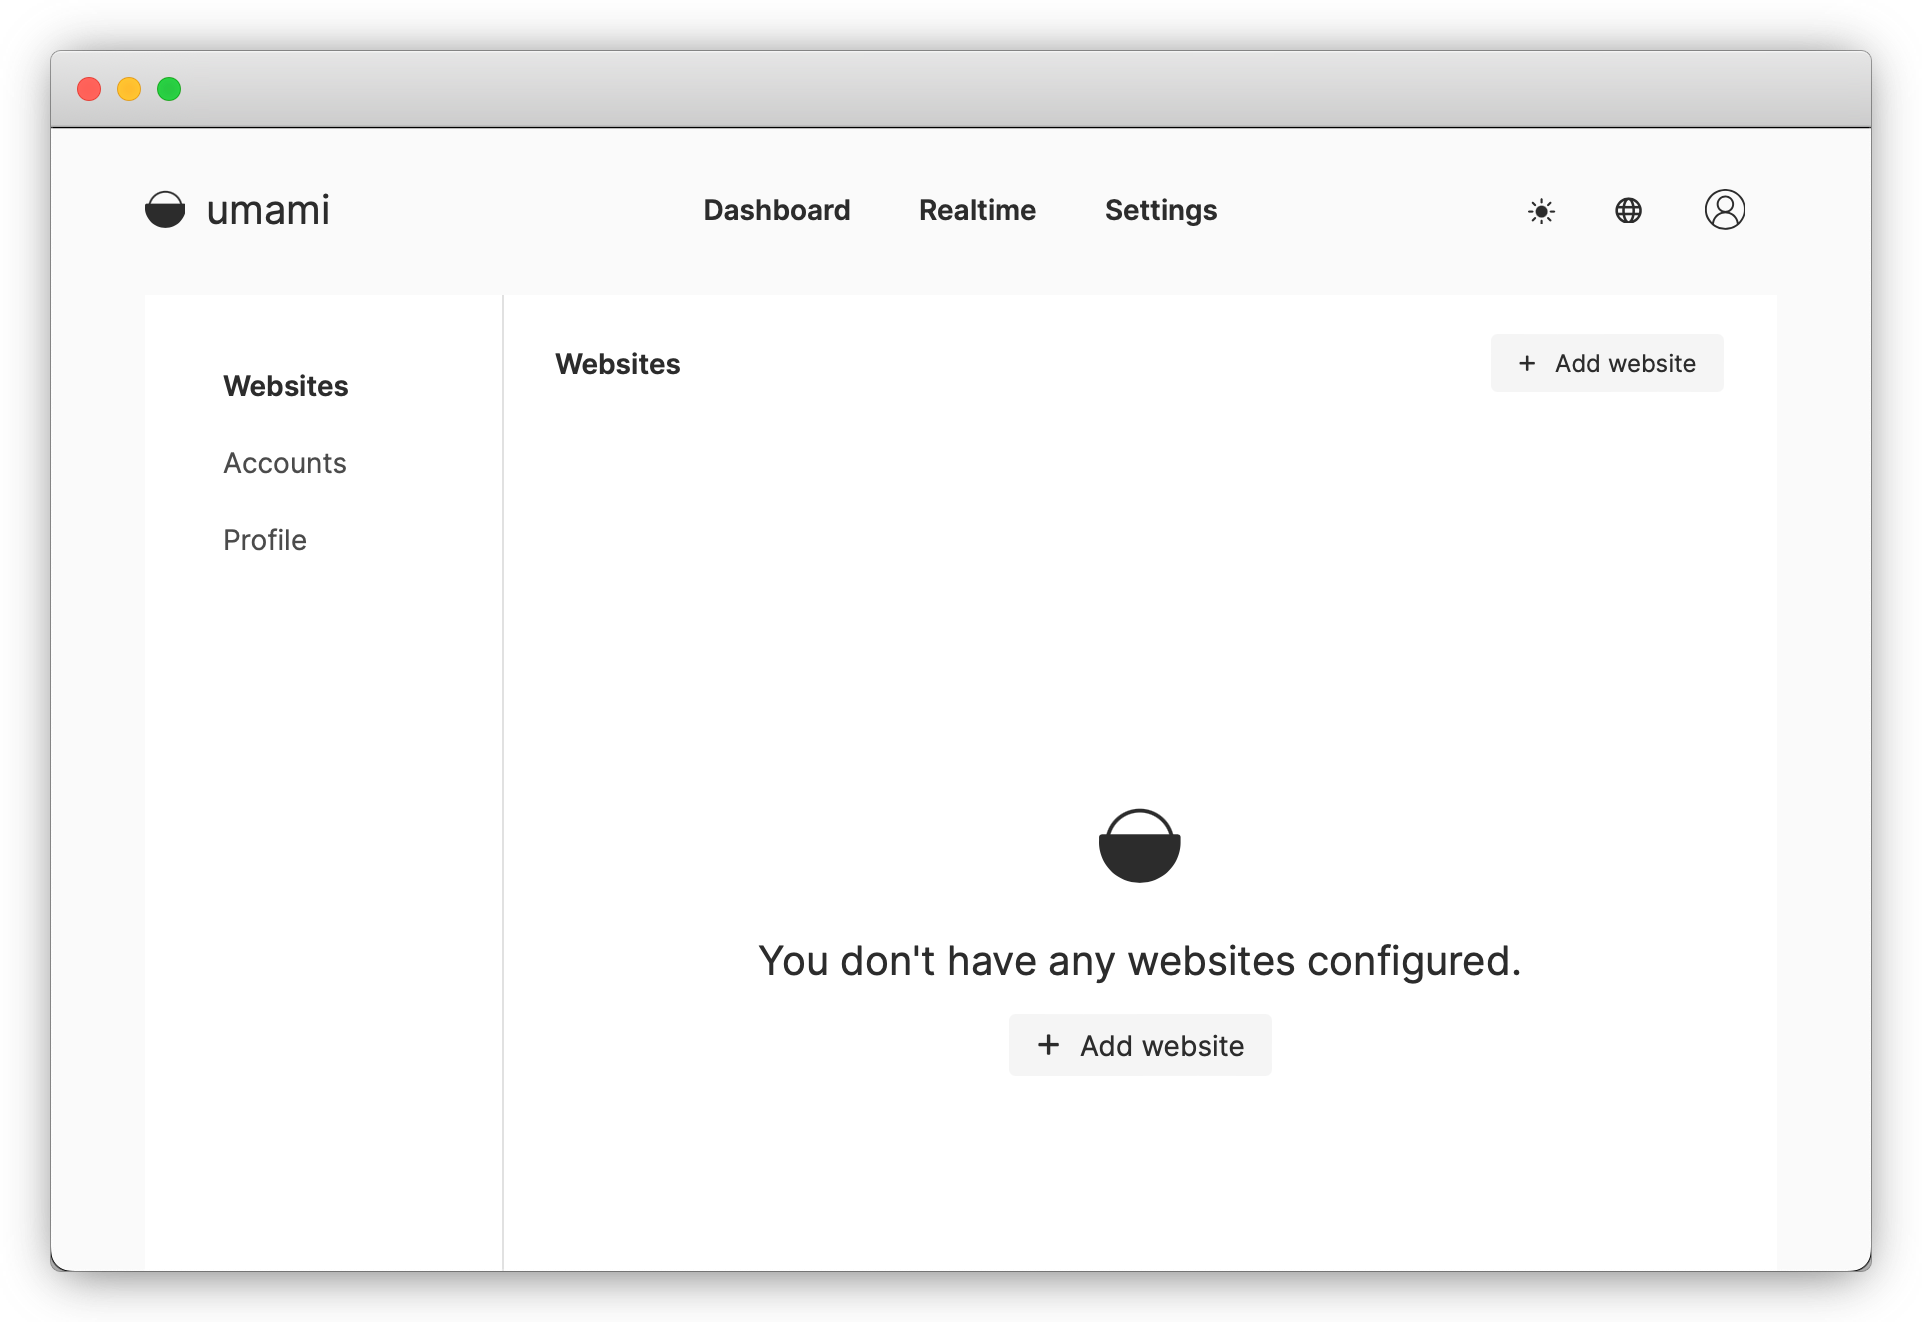
The Umami dashboard displays and you can add websites to monitor. For more information about Umami refer to the official documentation.
- User:
Customizing the endpoint name (optionally)
Your Serverless Functions come with a default endpoint name. You can customize this to a name of your choice using the Endpoints feature.
-
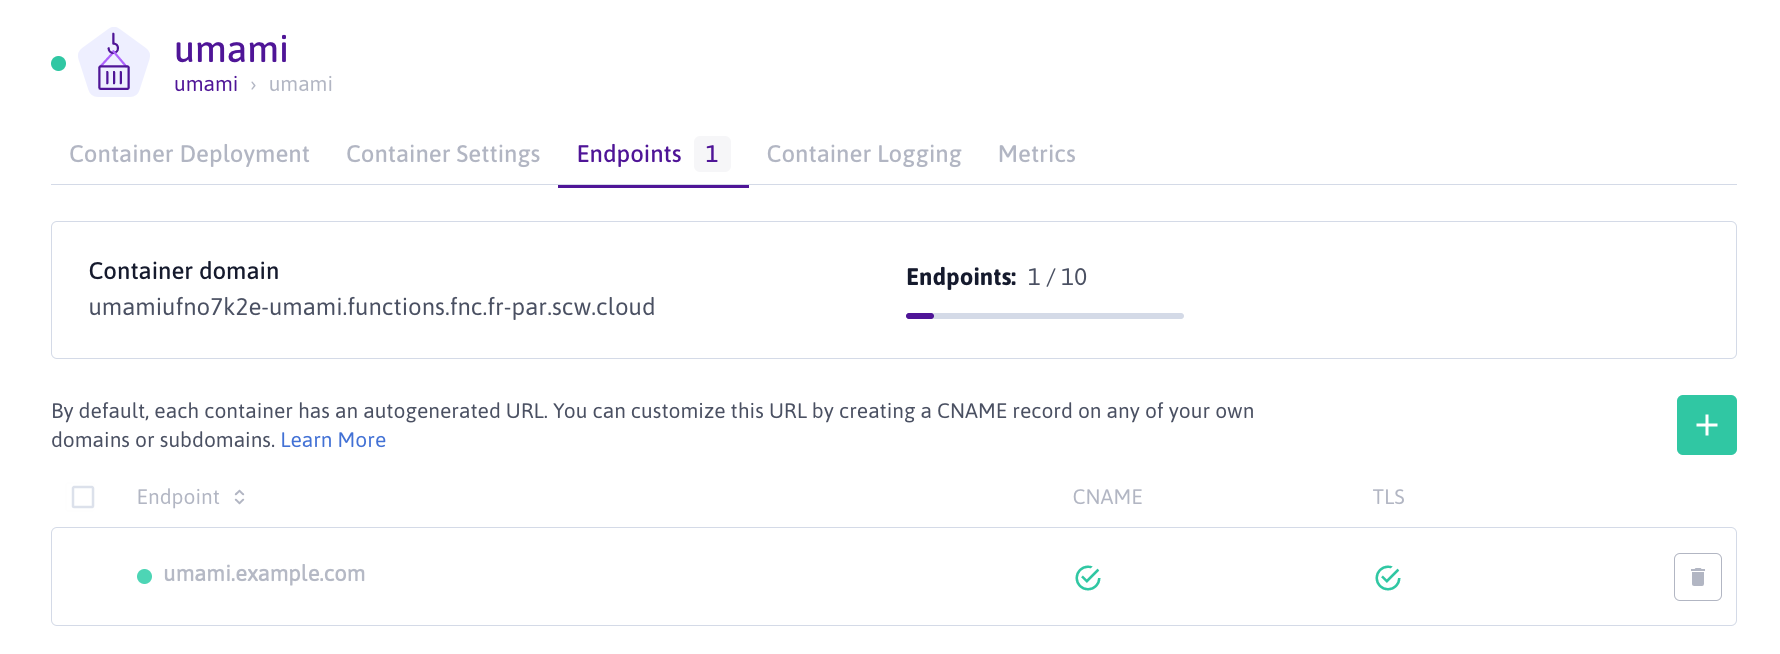
Click the Endpoints tab. The endpoint information displays.
-
Click + Add new Endpoints. A pop-up displays.
-
Enter the name of your endpoint. You can use any domain or subdomain that you own. Click Add Endpoint to validate.

The new endpoint displays in the list of endpoints. You can now access your application using your custom endpoint name.
Visit our Help Center and find the answers to your most frequent questions.
Visit Help Center