Connecting Loriot LoRaWAN© network server to your IoT Hub
LoRaWAN© is a low-power, low-bandwidth, long-range radio protocol used by many devices to send their data over the air. This protocol is specifically designed for battery powered devices with little to no installation cost.
LoRaWAN© devices broadcast their data to reachable LoRaWAN© gateways, which forward the messages on the LoRaWAN© operator network. The operator de-duplicates the messages from multiple gateways and hand over the message to the "LoRaWAN© application". In our scenario, the "LoRaWAN© application" is Scaleway IoT Hub.
Loriot is a LoRaWAN© network server provider on which to connect your LoRaWAN© gateways and build your private LoRaWAN© network.
In this tutorial we are going to:
- Create an IoT Hub to receive/send messages from/to LoRaWAN© devices
- Add a Device to the Hub to prepare the Loriot-to-Scaleway connection
- Set up the Loriot backend to use the Device credentials to establish a connection with IoT Hub
- Add another Device and connect it as a subscriber to receive LoRaWAN© messages
Before you start
To complete the actions presented below, you must have:
- Owner status or IAM permissions allowing you to perform actions in the intended Organization
Create an IoT Hub
First, we need to create a Hub. Its role will be to distribute messages from your LoRaWAN© devices to the intended targets. Follow this procedure to create an IoT Hub if you do not have one already. The hub's name and plan does not matter for this tutorial.
Create an IoT Device
The Loriot platform will connect as a MQTT device to exchange data on IoT Hub. This means that we need to add a Device to the IoT Hub. Follow this procedure to create a device.
Once done, copy the Device ID, you will need them to set up the Loriot backend.
Set up the Loriot backend
Now IoT Hub is ready to exchange messages, let's configure the Loriot side:
- Go to your Loriot Dashboard
- Click
Applicationsand select your application in the list - Click
Outputin the left pane, clickAdd a new outputand chooseMQTT - Fill in the following parameters:
- MQTT Broker URL: your IoT Hub Endpoint, followed by MQTTs port (ex:
iot.fr-par.scw.cloud) - MQTT Path: the MQTT topic to publish messages to, set it to
my-app/{DEVEUI}/uplink. - Username: you can not leave this field empty, so just write
xhere, it will not be used - Password: you can not leave this field empty, so just write
xhere, it will not be used - Client ID: your IoT Hub Device ID
- MQTT Broker URL: your IoT Hub Endpoint, followed by MQTTs port (ex:
- That's it, click
Add Outputbutton
Verify we have done things right
It is time to see messages flowing on IoT Hub:
- Create another IoT Hub Device, but this time choose the
Allow Insecureconnections setting. Secured connections are not supported over Web Sockets, which theMQTT Webclientuses. - On the Device page, click the
MQTT Webclientbutton. The client will open and automatically connect.

- Now subscribe to the LoRaWAN© devices messages:
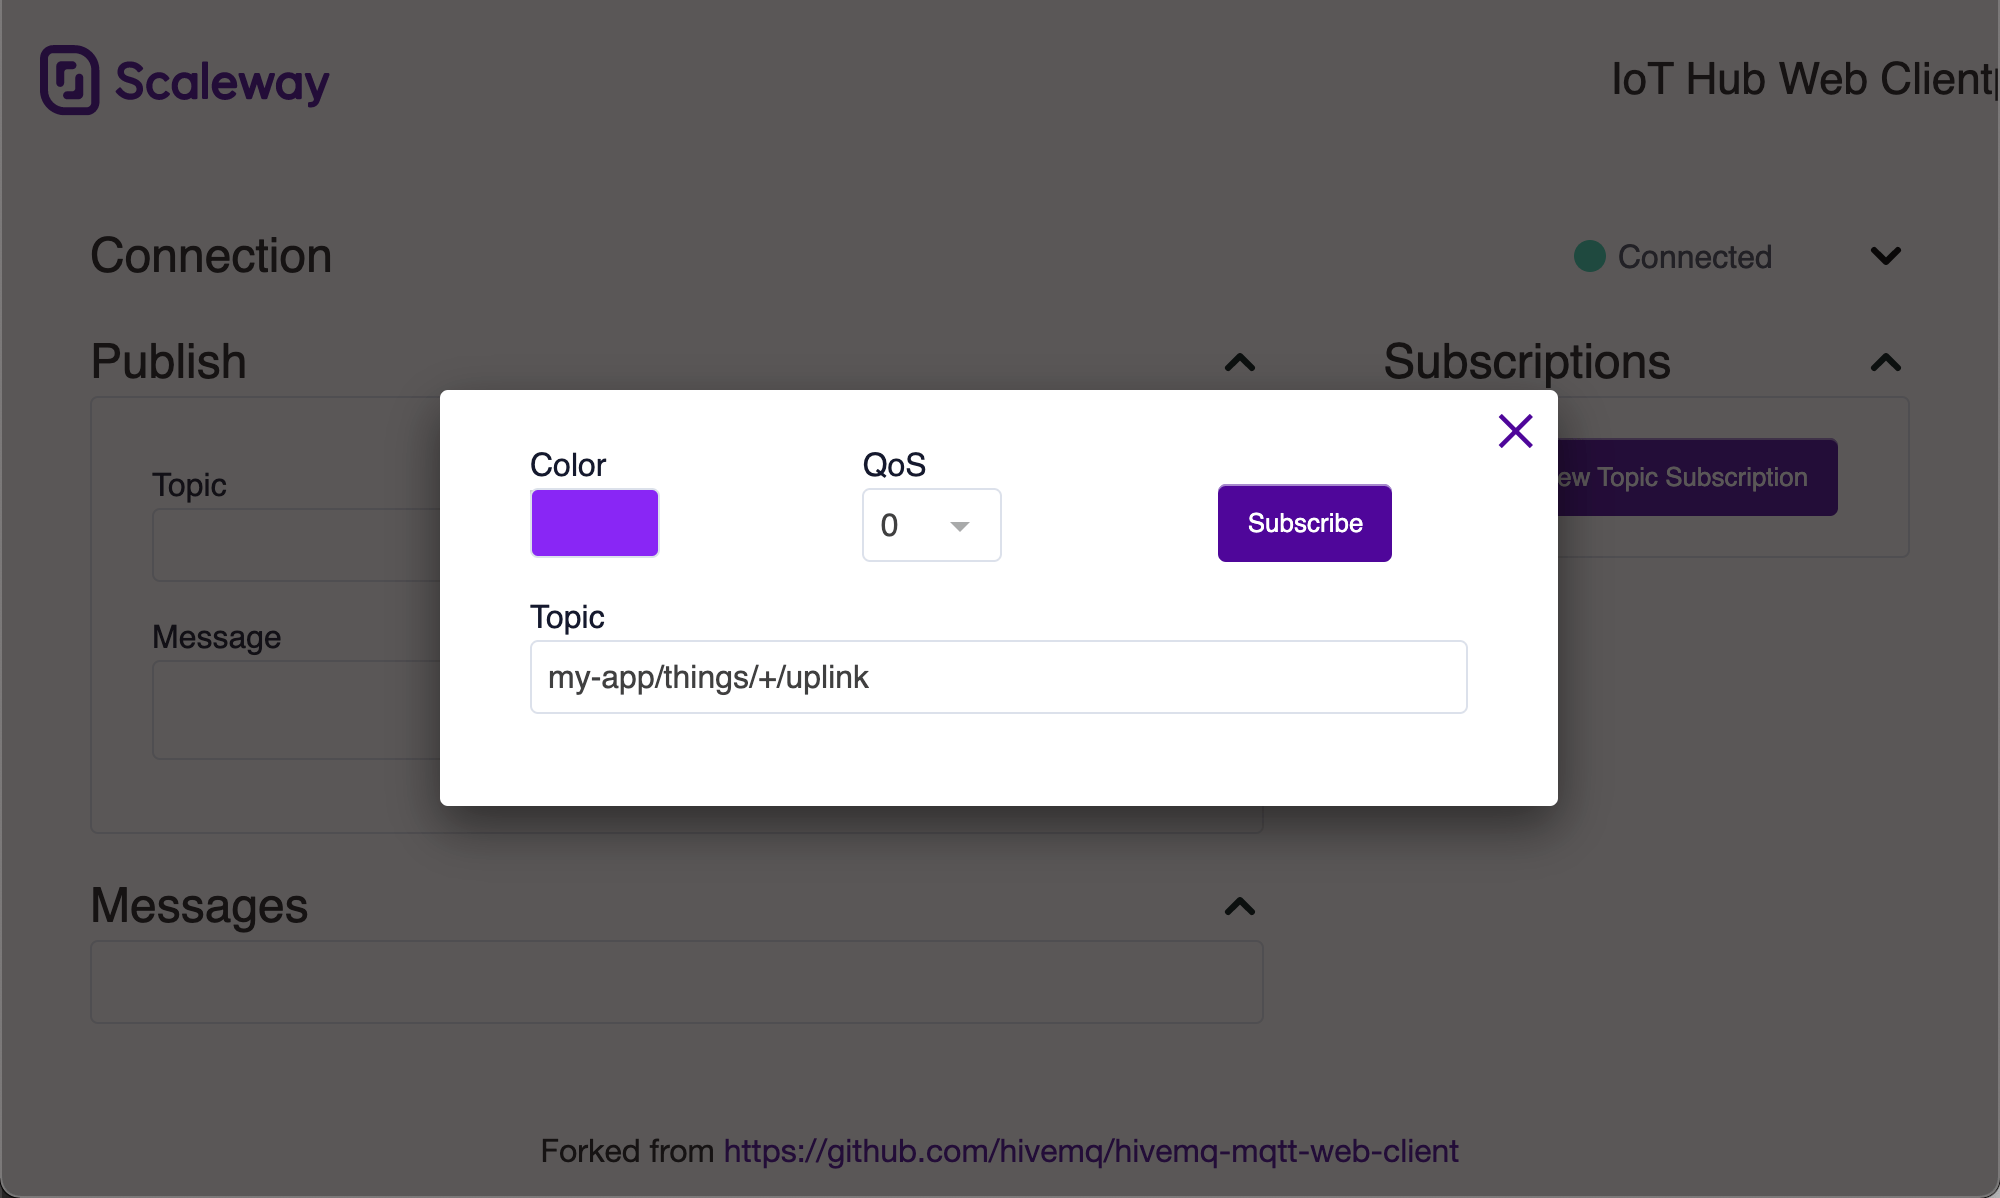
- Click
Add New Topic Subscriptionin theSubscriptionsblock - Pick any color to identify this subscription
- Leave QoS 0
- Use
my-app/+/uplinkas the topic, this will instruct IoT Hub to send you uplink messages from all devices - Click subscribe
- Click
- Your subscription now appears in the
Subscriptionsblock and the messages from your LoRaWAN© devices will start showing in theMessagesblock.
This means that messages are flowing as expected.
Going further
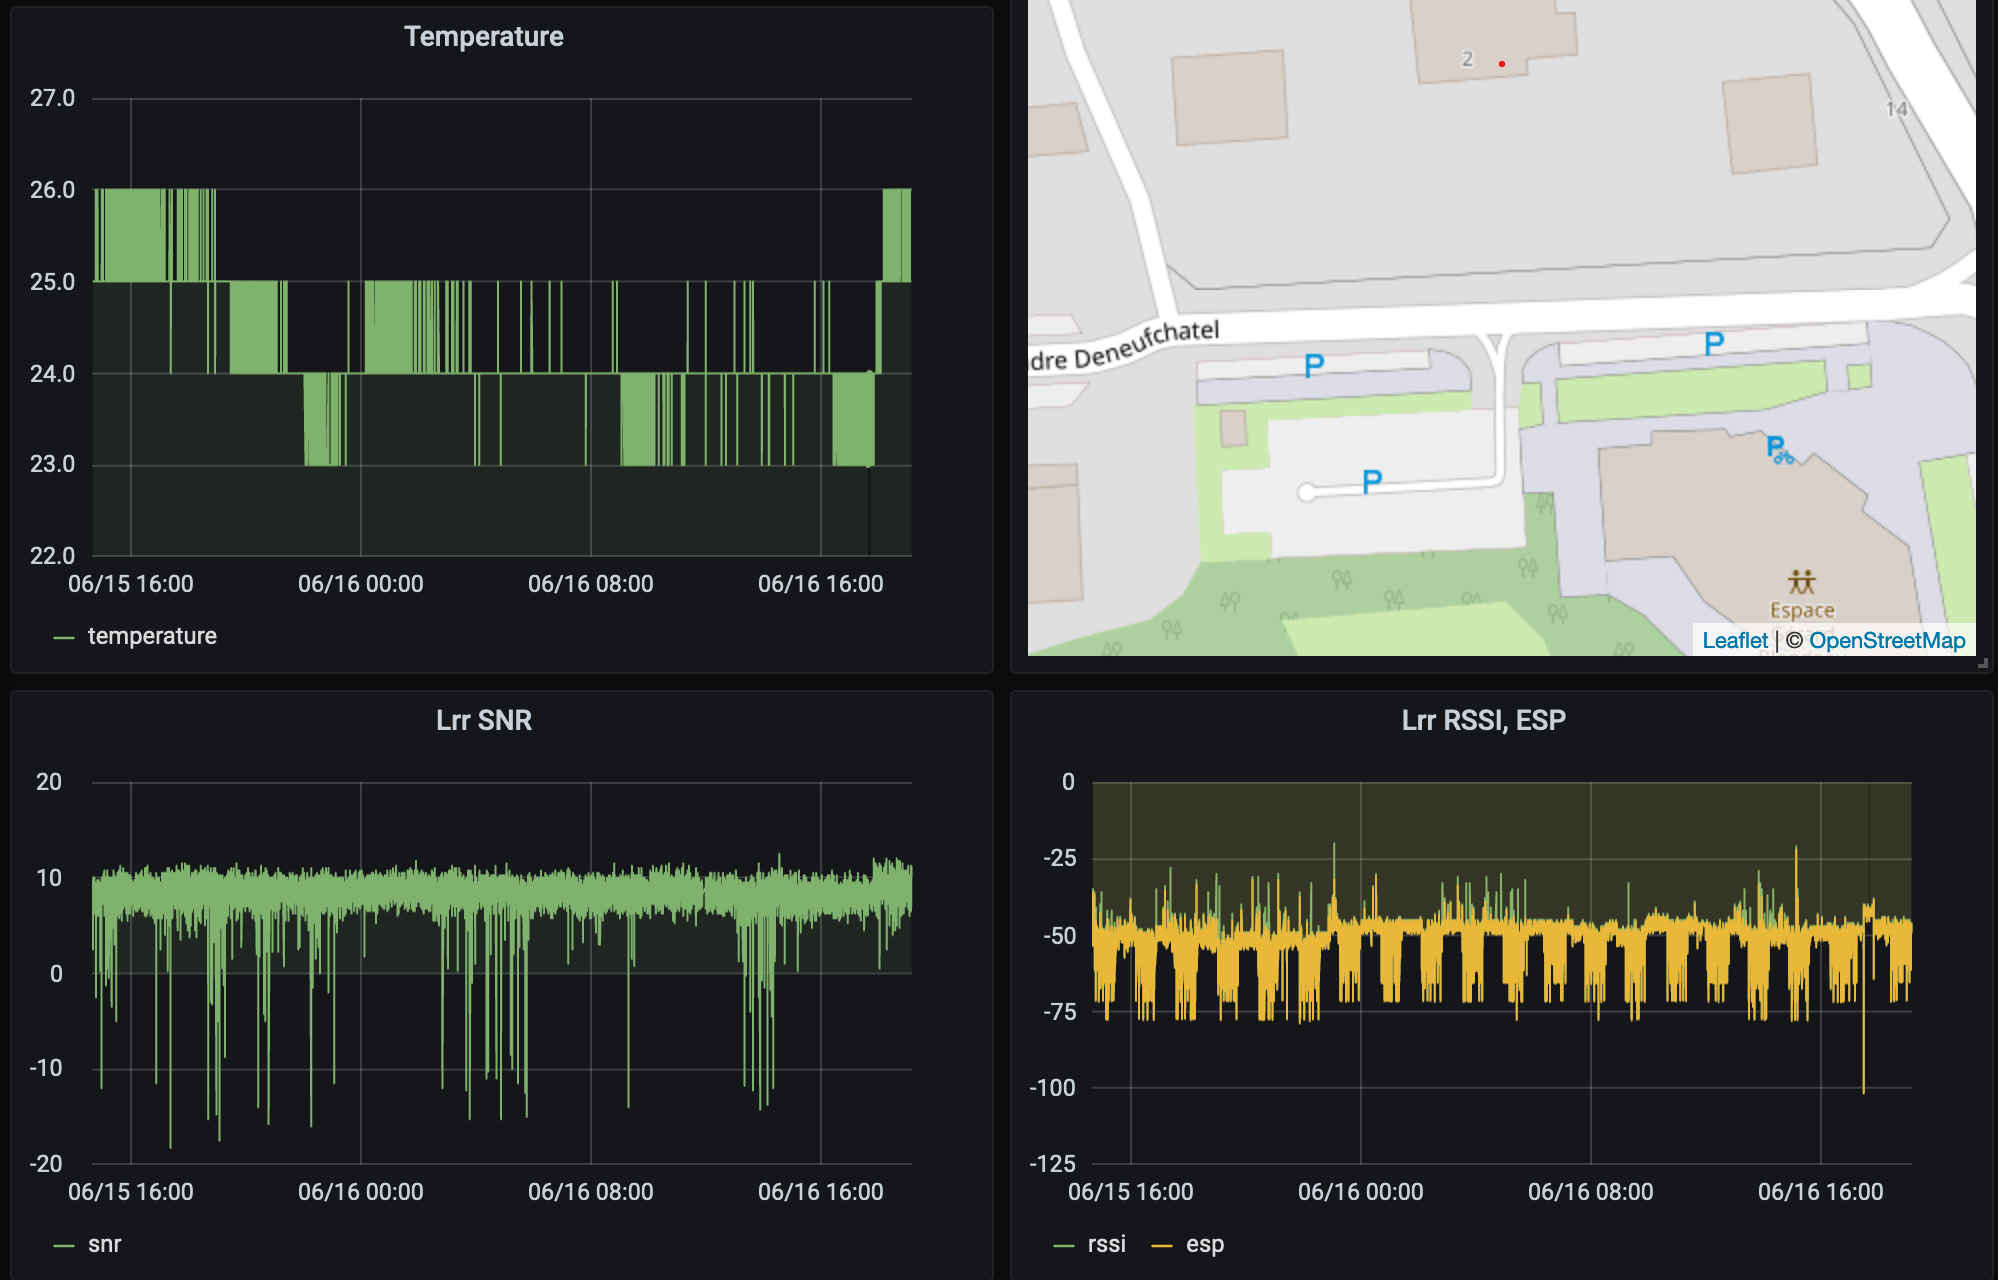
You could leverage the power of IoT Hub to build a dashboard to display your data in a few easy steps:
- Start a PostgreSQL managed DB Instance and create a
loratable with the following fields:time(timestamp type) anddata(jsonbtype) - Configure a Database Route to push data in there, see how to. The topic filter should be
my-app/things/+/uplink. Your query should look likeINSERT INTO lora (time, data) VALUES (NOW(), $PAYLOAD). - Start a new Scaleway Instance and setup Grafana, get inspiration from this tutorial (steps 1 to 14, do not enable the TimescaleDB option).
- Add widgets to your dashboard, for a graph your query could look like
SELECT time, data->'DevEUI_uplink'->'payload'->'batteryLevel' as batteryLevel FROM lora WHERE $__timeFilter(time).
Your LoRaWAN© devices' data is now backed by a production-grade dashboard.
Learn more about Scaleway IoT Hub, discover how to add Devices to the hub or how to check the IoT Hub metrics.
Visit our Help Center and find the answers to your most frequent questions.
Visit Help Center