How to use Postman to manage Scaleway APIs
Postman is an API client that allows you to build, test, and manage APIs through a graphical interface. The platform includes features that make it easy for you to:
- Create, import, and test APIs
- Work collaboratively with other users
- Create different environments with unique variables
- Display responses in several programming languages
- Configure granular request authorization rules, using different authorization types
- Capture and monitor request data (status, time, size)
In this tutorial, you will learn how to import Scaleway APIs into Postman, configure your environment variables and authentication, and share your workspace with other users.
Before you start
To complete the actions presented below, you must have:
- A Scaleway account logged into the console
- Owner status or IAM permissions allowing you to perform actions in the intended Organization
- A valid API key
- An account logged into Postman
Importing Scaleway APIs into Postman
-
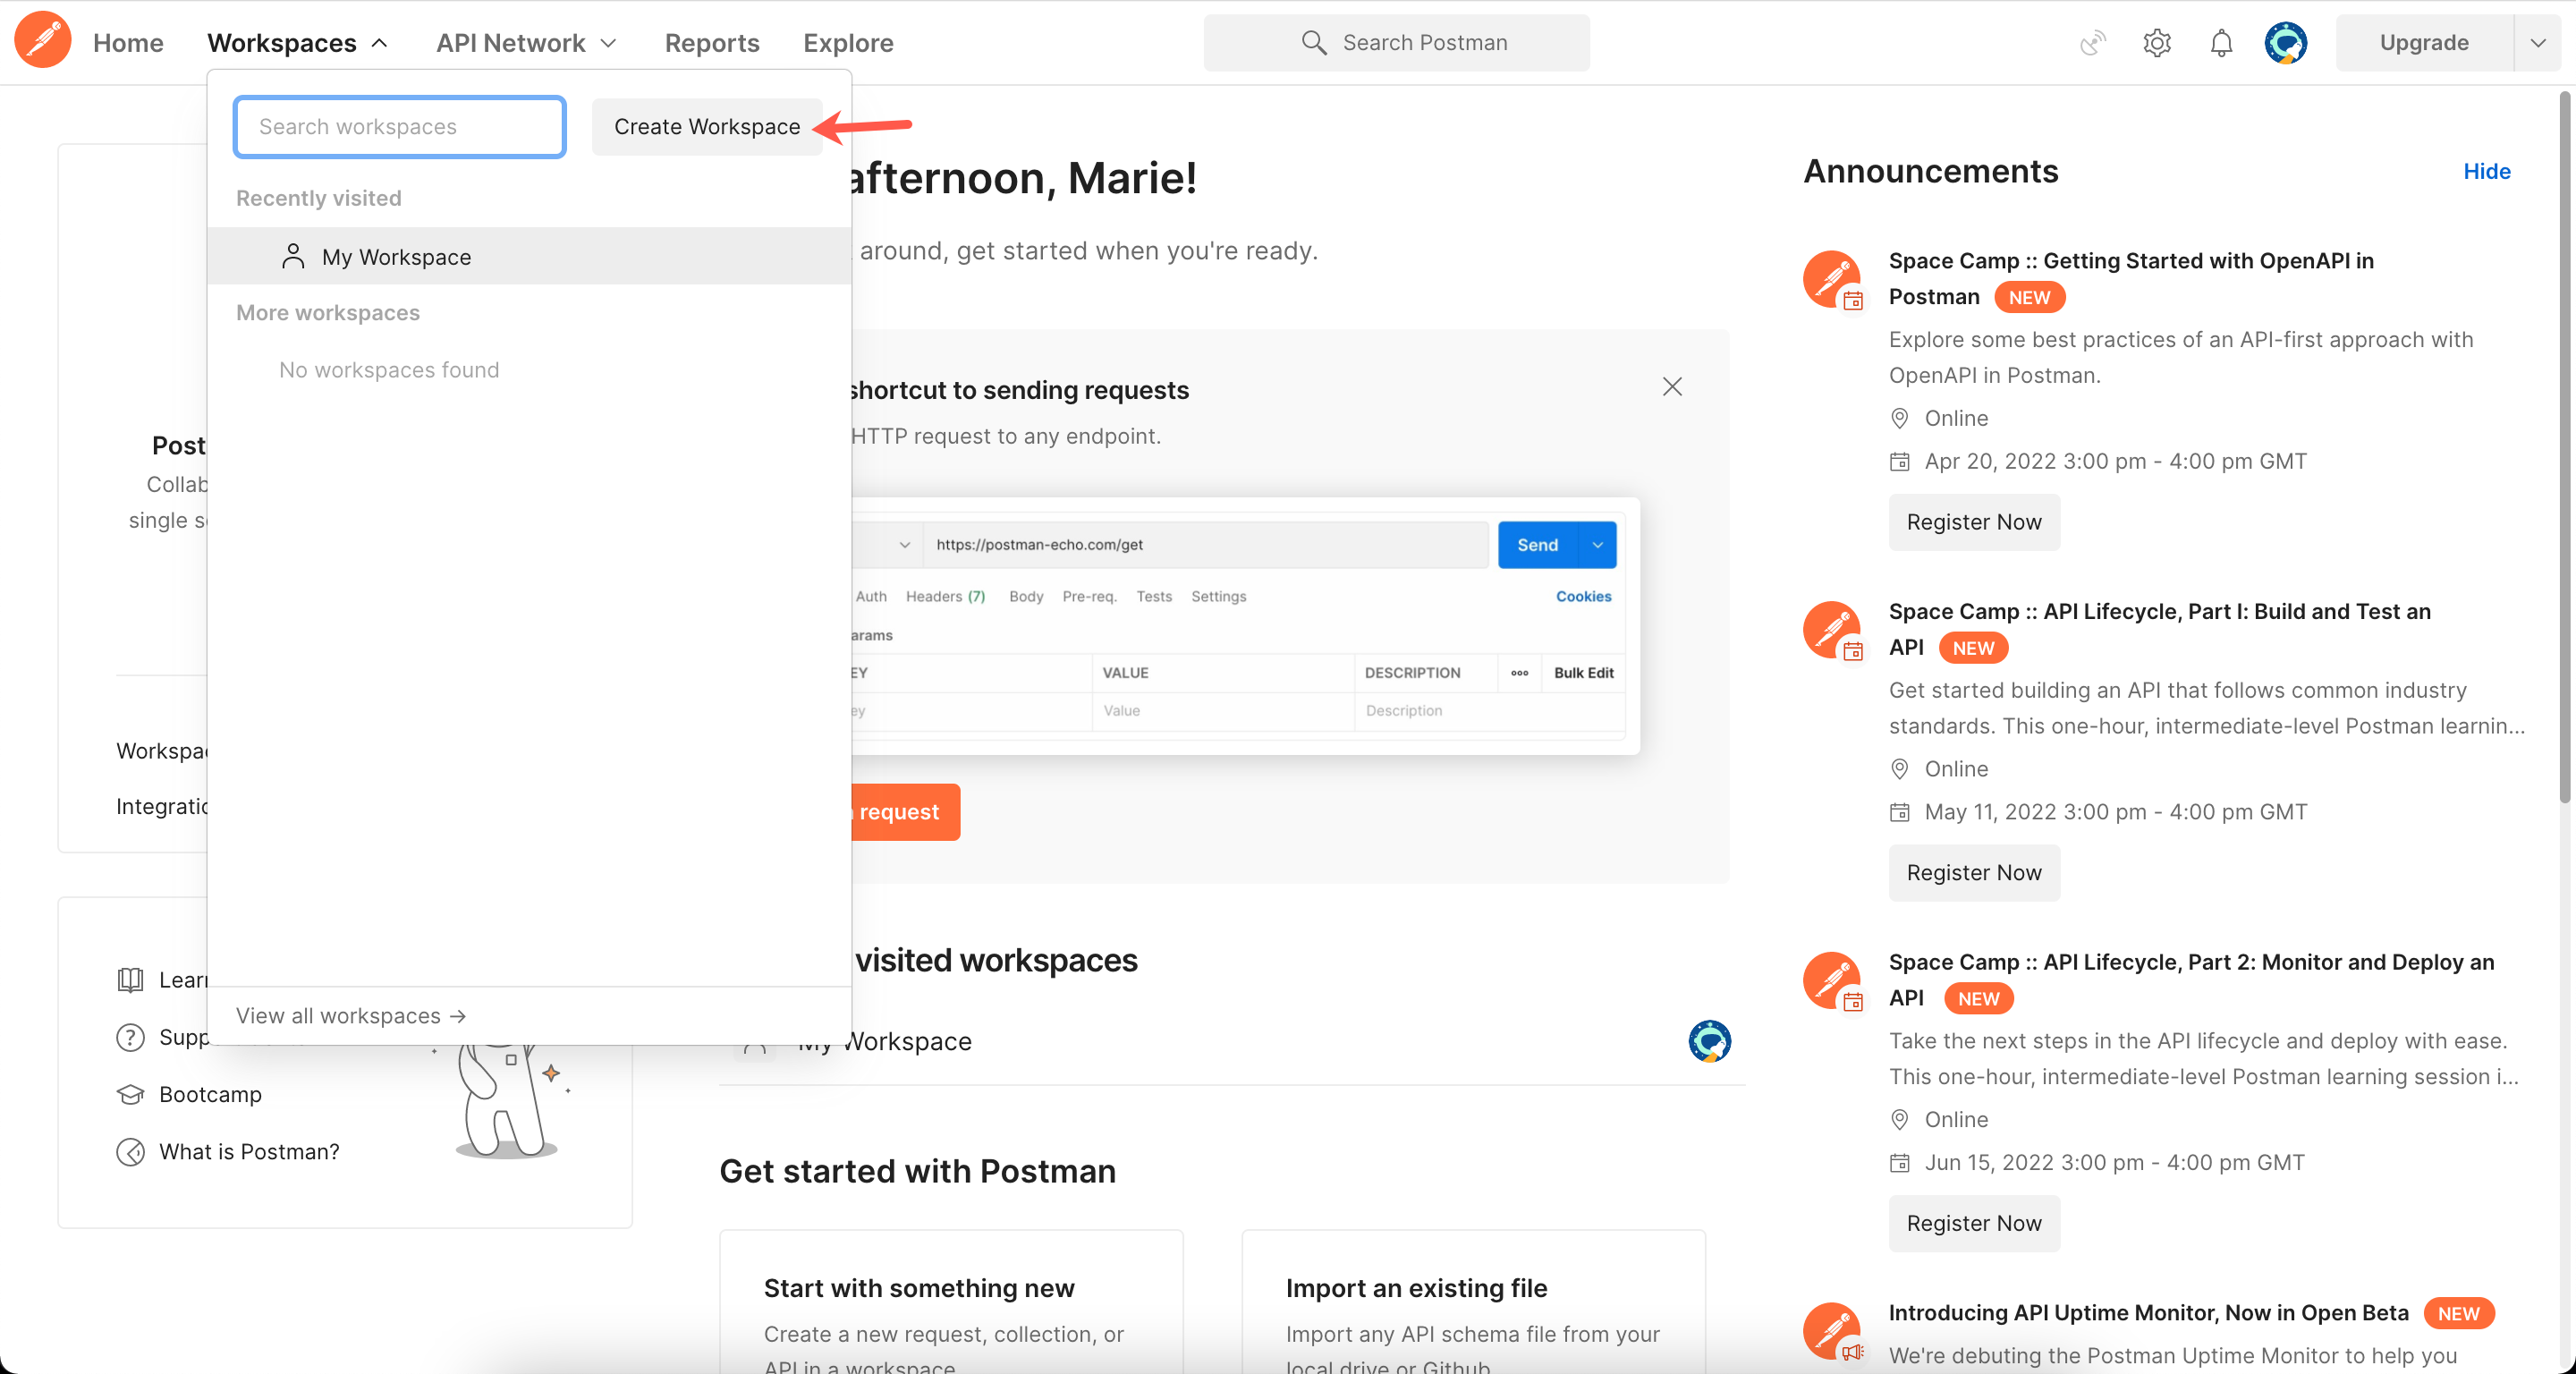
Click Workspaces > Create Workspace in the top menu of the Postman interface.
-
Enter a name and description and select a visibility setting for your workspace. Your workspace displays.
-
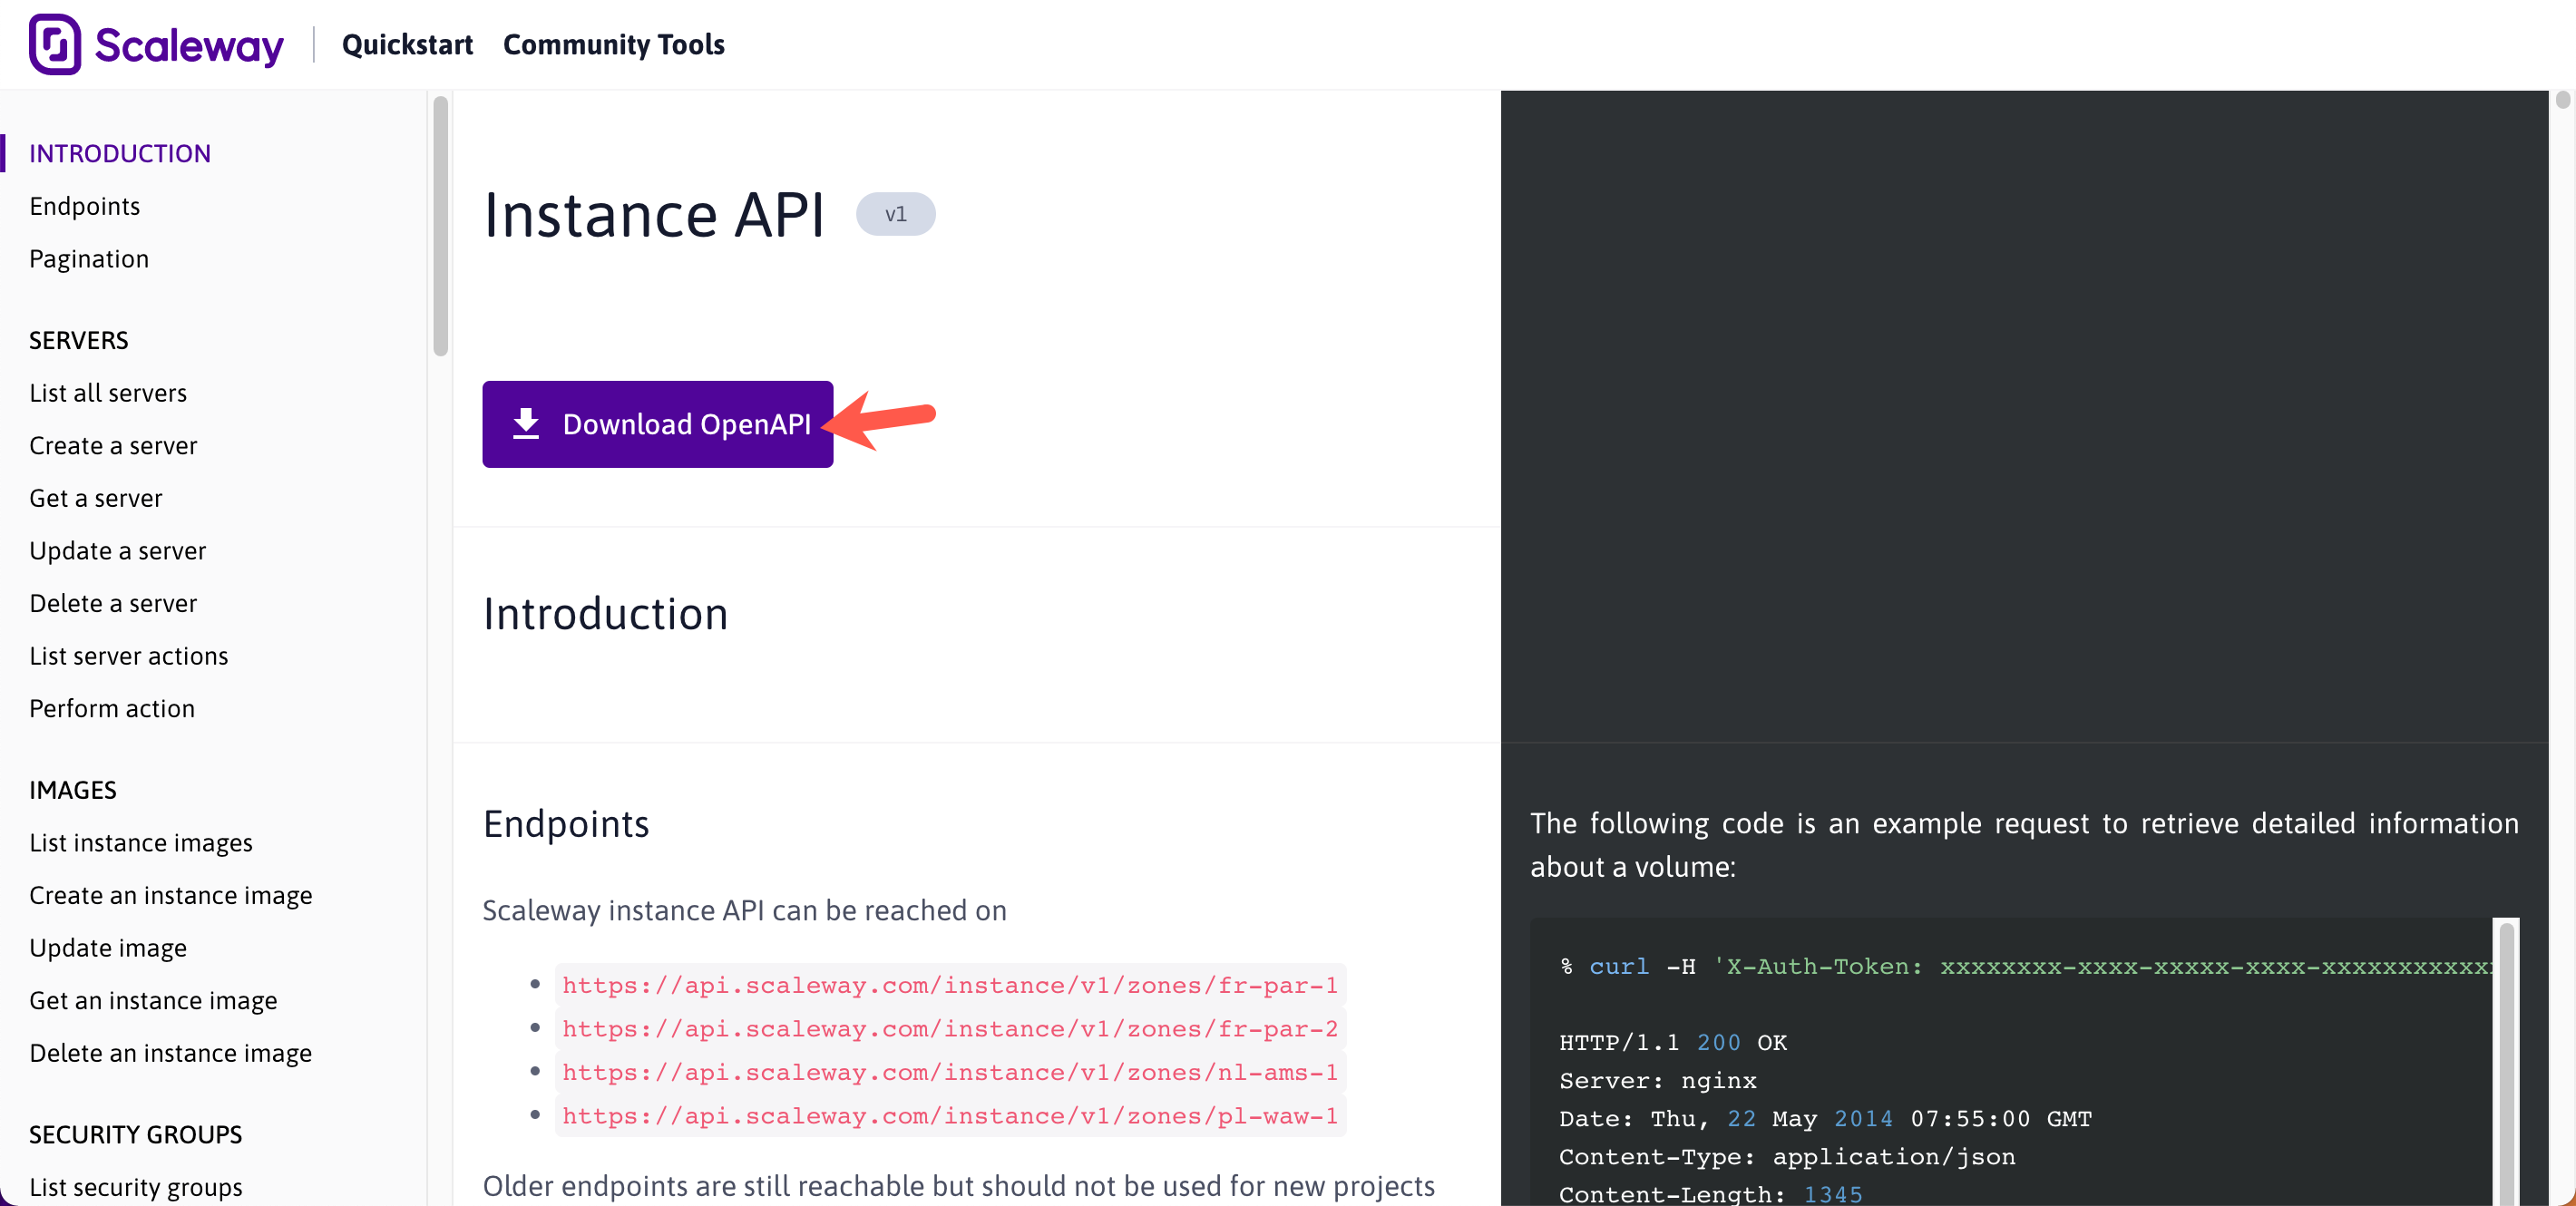
Go to the Scaleway Developers website and select a product API to download.
In this tutorial, we use the Scaleway Instances API.
-
Click Download OpenAPI.
-
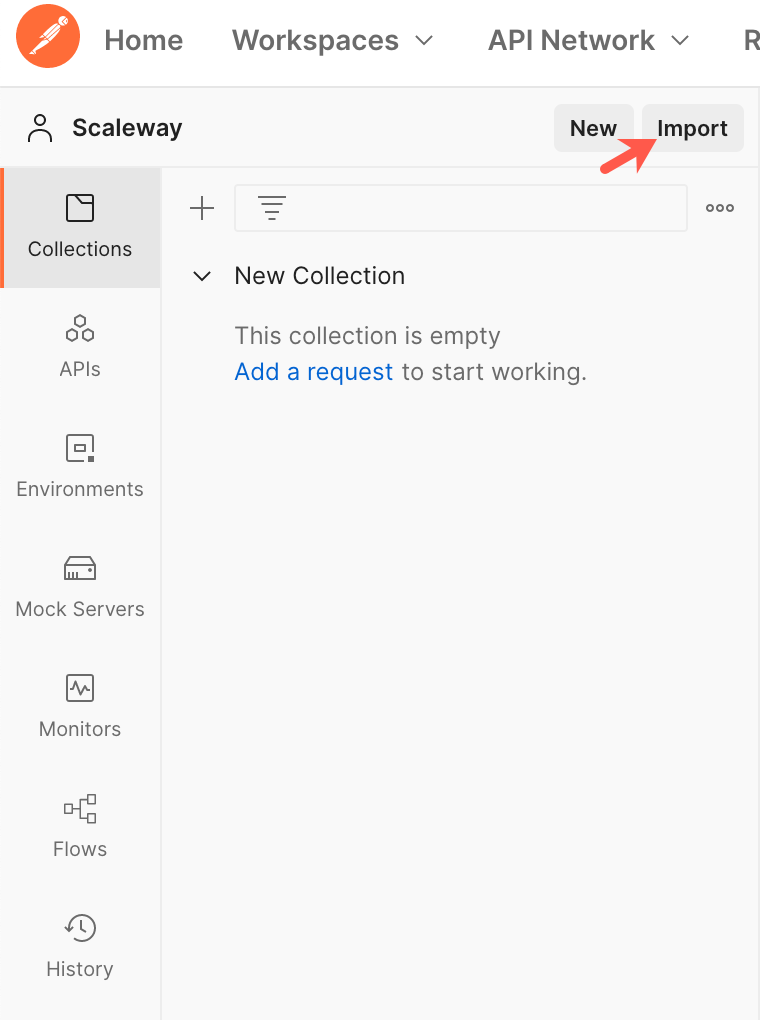
Click Collections > Import in the side menu of the Postman interface.
-
Drag and drop the Instance's Open API
ymlfile into the indicated space to upload. -
Click Import to conclude.
The Instances API displays under the Collections tab in the side menu. The API is organized into files, following the different request categories (including servers, images, placement groups, and IPs).
Setting up an environment
Postman environments are sets of key/value pairs. They are spaces in which you can store your authentication information to use as variables with your collections.
In this section, we show you how to create an environment with environment variables for a Scaleway Project.
-
Click Create Environment.
-
Enter a name for your environment.
-
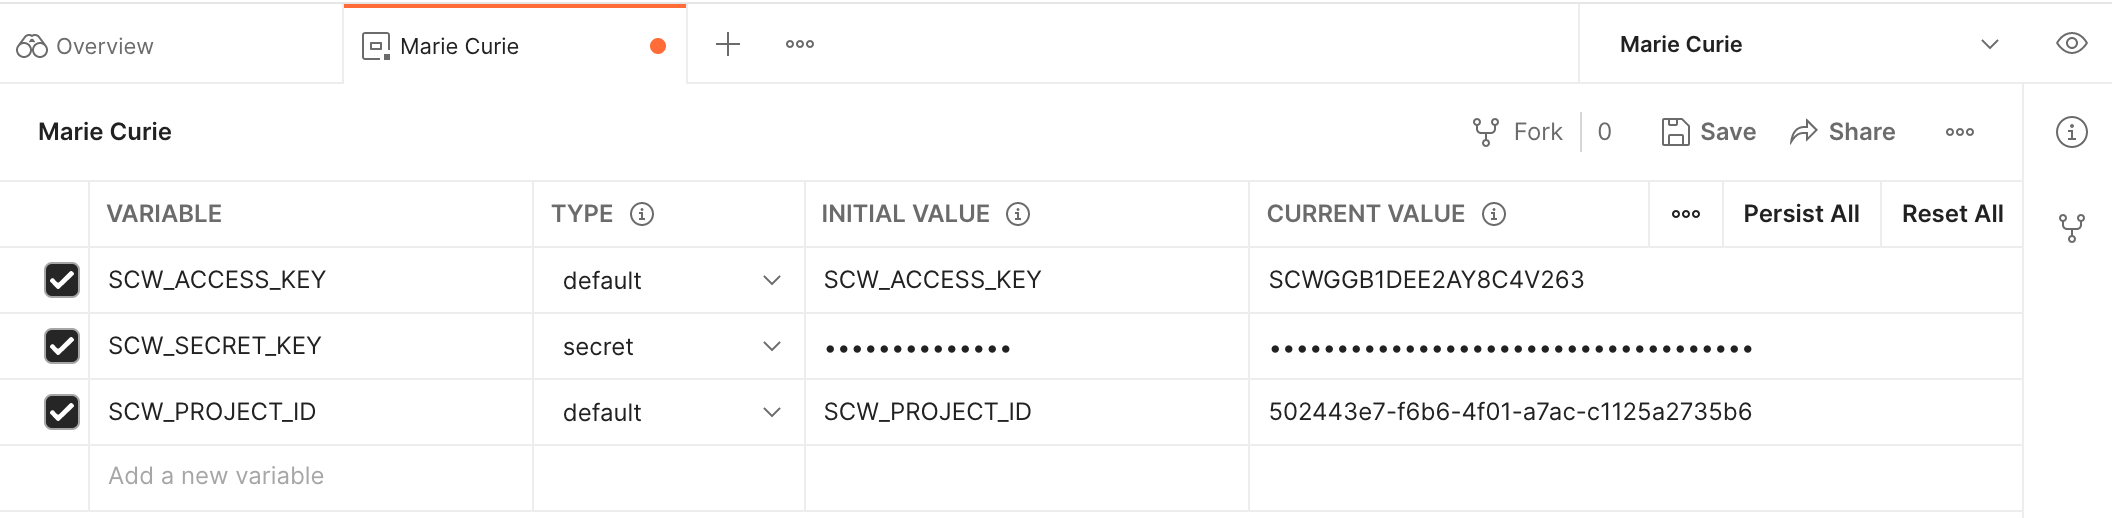
Configure your variables, as follows:
- Variable - enter the key for your variable.
- Type - Select
defaultto make it visible in plaintext orsecretto mask the values on the screen. - Initial value - The value shown to other users when you share the variable in a collection, environment, or globals.
- Current value - The value used when you send a request.
You can add your Project ID, its access key, and secret key. We recommend you set your Project's secret key as secret to increase security.
-
Click Save to do so.
Setting up authorization
You can set up authorization at the collection, request category, and/or request level. In this tutorial, we will set the authorization at the collection level and configure the requests to inherit the setting from the parent.
- Go to the Collections tab.
- Click on the Instance API collection. The Authorization tab displays by default.
- Select your environment from the top-right menu.

- Select API key as the authorization type.
- Enter the following values:
- Key:
X-Auth-Token - Value:
{{SCW_SECRET_KEY}}- this is the variable you set up in your environment. - Add to:
Header
- Key:
- Click Save.
- Go to your request of choice.
- Click the Authorization tab.
- Select Inherit auth from parent as the authorization type.
Running a request
In this tutorial, we will create an Instance through an API request operated with Postman.
-
Go to the Collections tab of the Postman interface.
-
Click the Create a server request under Instance API >
/instance/v1/zones/{zone}/servers/. -
Go to the Body tab of the request.
-
Edit the
{zone}variable in the endpoint. In this tutorial, we will create our Instance infr-par-1.
-
Edit the parameters in the request with your preferences, following the example below. In this tutorial, we will create a GP1-M Instance with the default local volume.
{ "name": "my-new-instance", "commercial_type": "DEV1-S", "image": "881d7a33-4cfa-4046-b5cf-c33cb9c62fb6", "enable_ipv6": false, "boot_type": "local", "project": "697ef834-9bd0-4181-ae29-b0bcd0e574ae" } -
Click Send.
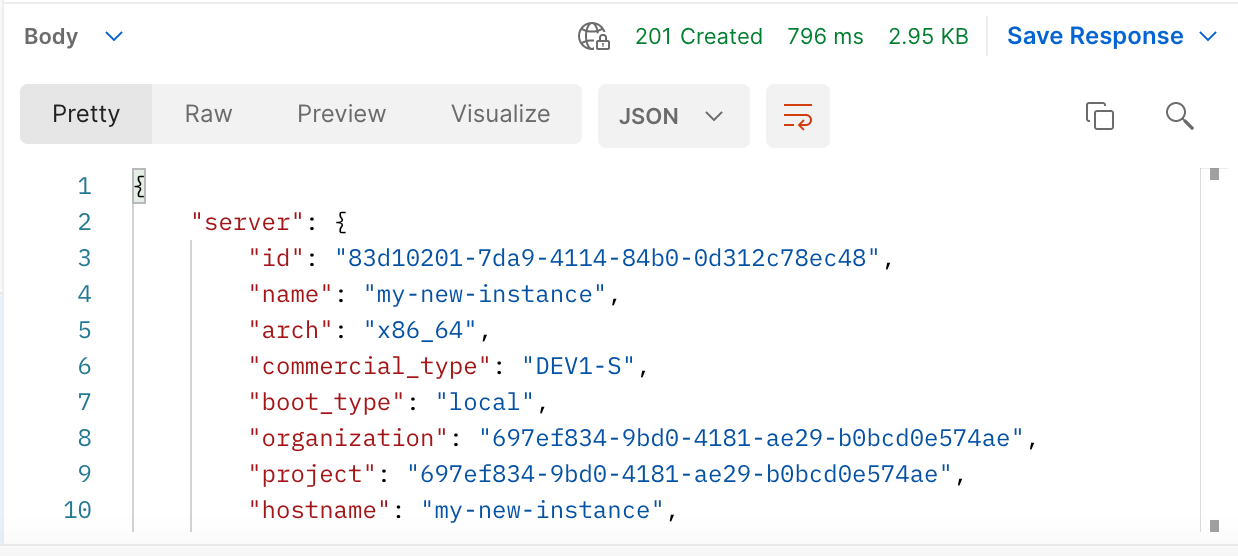
Optionally, click Save to store your configuration for future use.
Going further
Postman also features a Command Line Interface (CLI) called newman, which you can use to run your collections. Find out more about newman.
For more information on Postman usage and features, refer to the Postman Learning Center.
Visit our Help Center and find the answers to your most frequent questions.
Visit Help Center