Setting up a Django Web Framework on a Scaleway General Purpose Instance running Ubuntu 20.04 LTS (Focal Fossa)
Django is a web development framework that allows you to develop dynamic websites and applications. Django allows the use of less code and eases the creation of complex websites. It provides a very good structure and easy methods that help do the heavy lifting when writing web applications.
There are many different ways to install Django on Ubuntu:
-
Django installation with pip in a virtual environment: By installing pip, any user on the system can install and use Django. The pip should always contain the latest stable Django. By using this method, you can install Django without affecting the entire system. This is typically the most practical and recommended approach to working with Django.
-
Django installation from packages: Ubuntu repositories contain Django packages (using the
aptpackage manager). The main disadvantage is the version contained in the repositories may lag behind the official versions available from the project. -
Django installation from its GitHub repository: if you wish to install the latest development version instead of the stable release.
In this tutorial, we install Django using pip in a virtual environment, as it is the most practical and most flexible way to install without affecting the larger system, along with other per-project customizations and packages.
Before you start
To complete the actions presented below, you must have:
- A Scaleway account logged into the console
- Owner status or IAM permissions allowing you to perform actions in the intended Organization
- An SSH key
- An Instance running on Ubuntu 20.04 LTS (Focal Fossa) or later
sudoprivileges or access to the root user
Installing Django on Ubuntu with pip in a virtual environment
-
Update your local package index with
apt:apt update -
Check which version of Python you have installed. The version currently shipped with Ubuntu 20.04 is Python 3.8.2:
root@Django:~# python3 -V Python 3.8.10 -
Install pip from the Ubuntu repositories:
apt install python3-pip python3-django -
Install the
venvpackage withpip:apt install python3-venv -
Once that is done, you can now start a new project in Django. Remember that whenever you start a new project, start by creating and moving into a new project directory.
mkdir ~/newhostA cd ~/newhostA -
Create a virtual environment within the project directory using the Python command that is compatible with your version of Python. We will call our virtual environment
my_env.python3 -m venv my_envThis will install standalone versions of Python and pip into an isolated directory structure within your project directory. A directory will be created with the name you select, which will hold the file hierarchy where your packages will be installed.
-
To install packages into the isolated environment, you must activate it by typing:
source my_env/bin/activateYour prompt should change to reflect that you are now in your virtual environment. It will look something like:
(my_env) root@Django:~/newhostA# -
In your environment, install Django with pip:
pip install django -
Verify the version you have installed.
django-admin --versionwhich returns
(my_env) root@Django:~/newhostA# django-admin --version
4.1.7
To leave your virtual environment, you need to issue the deactivate command from anywhere on the system:
deactivateYour prompt should revert to the normal display.
Creating a sample project
With Django installed, we can now start to create our project and test it on your development server using a virtual environment.
-
Create a directory for your project:
mkdir ~/my-django cd ~/my-django -
Create your virtual environment:
python3 -m venv my_env -
Activate the environment:
source my_env/bin/activate -
Install
djangoin the environment:pip install django -
To create your project, use
django-admin <command> [options]which is Django's command-line utility for administrative tasks. In each Django project, amanage.pyis automatically created.The
startprojectcommand enables you to create a new project. The command creates a directory within your current working directory that includes:manage.pywhich you can use to administer various Django-specific tasks.- a directory (with the same name as the project) that includes the actual project code.
-
Create your project(
myDjangoProject). Add a period at the end of the command to place the management script and inner directory in the current directory.django-admin startproject myDjangoProject . -
Migrate the database (this example uses SQLite by default) using the
migratecommand with themanage.pyapplication. Migrations apply any changes you have made to your Django models, to your database schema.python manage.py migratewhich returns
Operations to perform: Apply all migrations: admin, auth, contenttypes, sessions Running migrations: Applying contenttypes.0001_initial... OK Applying auth.0001_initial... OK Applying admin.0001_initial... OK Applying admin.0002_logentry_remove_auto_add... OK Applying admin.0003_logentry_add_action_flag_choices... OK Applying contenttypes.0002_remove_content_type_name... OK Applying auth.0002_alter_permission_name_max_length... OK Applying auth.0003_alter_user_email_max_length... OK Applying auth.0004_alter_user_username_opts... OK Applying auth.0005_alter_user_last_login_null... OK Applying auth.0006_require_contenttypes_0002... OK Applying auth.0007_alter_validators_add_error_messages... OK Applying auth.0008_alter_user_username_max_length... OK Applying auth.0009_alter_user_last_name_max_length... OK Applying sessions.0001_initial... OK -
Create an administrative user so that you can use the Django admin interface using the
createsuperusercommand.python manage.py createsuperuser -
Answer the prompts which will ask for:
- A username
- An email address
- A password (containing at least 8 characters)
(my_env) root@Django:~/my-django# python manage.py createsuperuser
Username (leave blank to use 'root'): scaleway
Email address: usertest@example.com
Password:
Password (again):
Superuser created successfully.
Modifying Django settings
-
Open the settings file:
nano myDjangoProject/settings.pyTo test your application, you will need to modify one of the directives in the Django settings. Locate the
ALLOWED_HOSTSdirective to define the addresses or domain names that may be used to connect to the Django Instance. -
List the IP addresses or domain names that are associated with your Django server.
-
Save the file and exit.
Testing the development server
-
Start the development server:
python manage.py runserver your_server_ip:8000 -
Visit your server's IP address followed by :8000 in your web browser
http://your_internal_server_ip:8000which should display:
-
Add
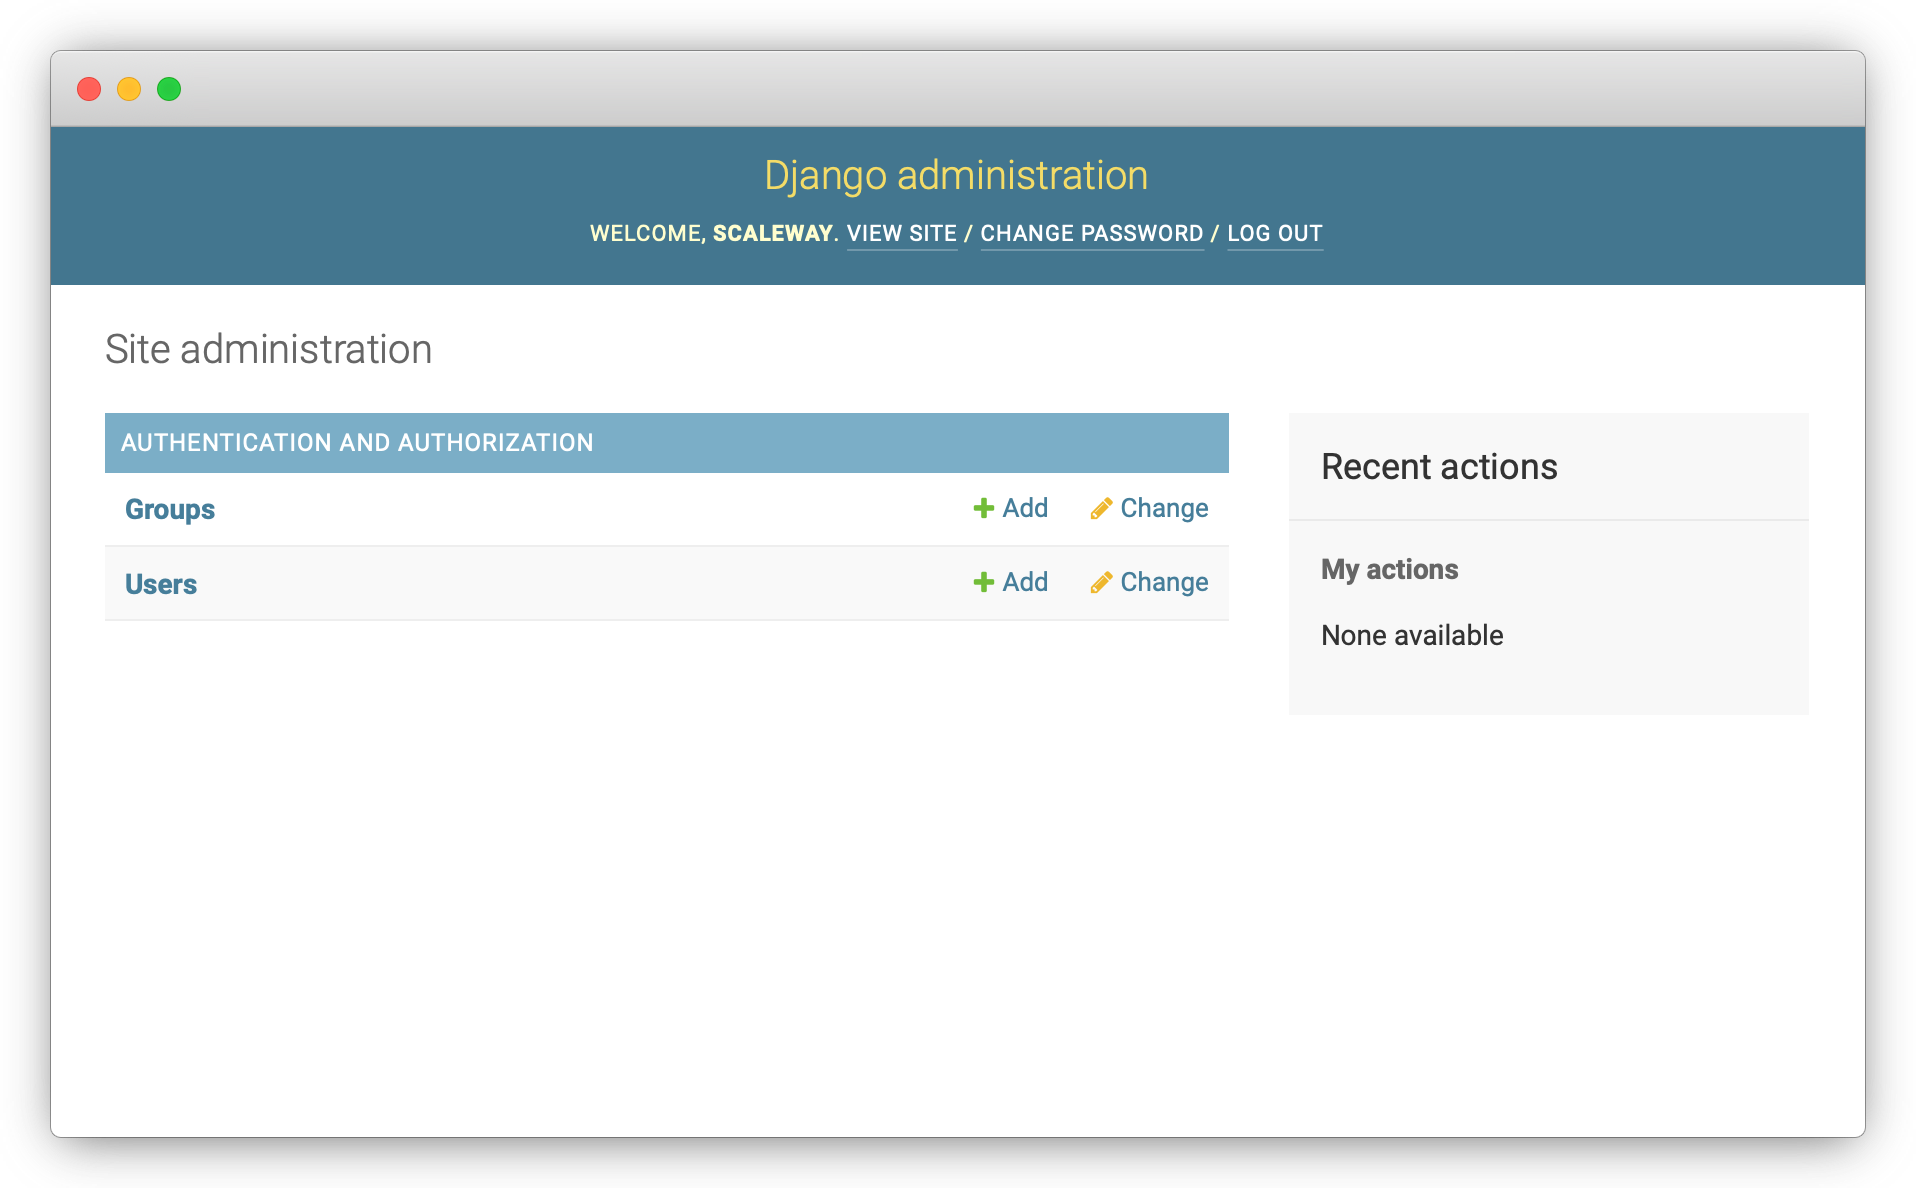
/admin/to the end of your URL. The login page displays. -
Enter your username and password. The admin page displays.
The Django project you have created provides the structural basis for designing a more complete website. Check out the Django documentation for more information about how to build your applications and customize your website.
Going further
To go further with Django, learn how to create models and configure your application with the API and the Admin Console.
Visit our Help Center and find the answers to your most frequent questions.
Visit Help Center