How to order an additional disk and use it in ESXi as datastore
With Dedibox, you have the flexibility to order additional disks to increase the storage capacity of your machine. These disks serve as invaluable resources, particularly when used as an additional Datastore within ESXi setups for storing virtual machines and related data.
Our offers include a diverse selection of SATA, SAS, and SSD disks, catering to various performance and storage needs.
This guide is designed to walk you through the process of ordering an additional disk via the Dedibox console and seamlessly integrating it into your local ESXi environment to function as a Datastore. Follow these steps to make the most of this resource.
Before you start
To complete the actions presented below, you must have:
- A Scaleway account logged into the console
- Owner status or IAM permissions allowing you to perform actions in the intended Organization
- A Dedibox running VMware ESXi
- Subscribed to the Business Service Level for the server
Ordering an additional disk
-
Connect to the Dedibox console.
-
Click Server > Server list to see the list of your Dedibox dedicated servers.
-
Select the Dedibox to configure from the list and click Manage
-
Click Customize in the side menu:
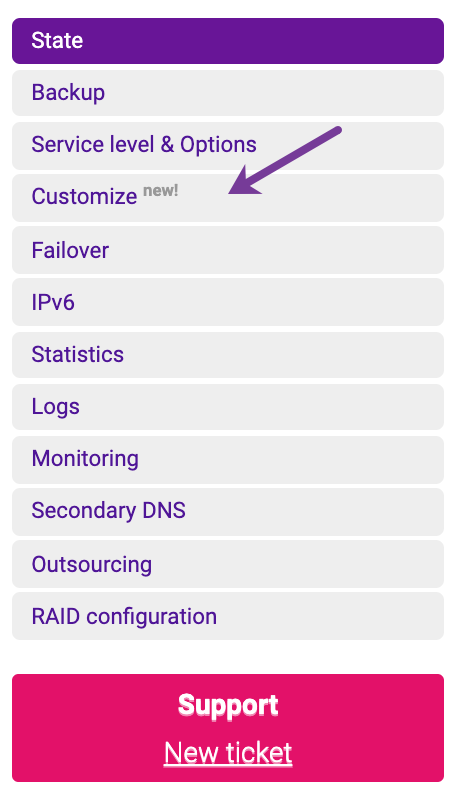
-
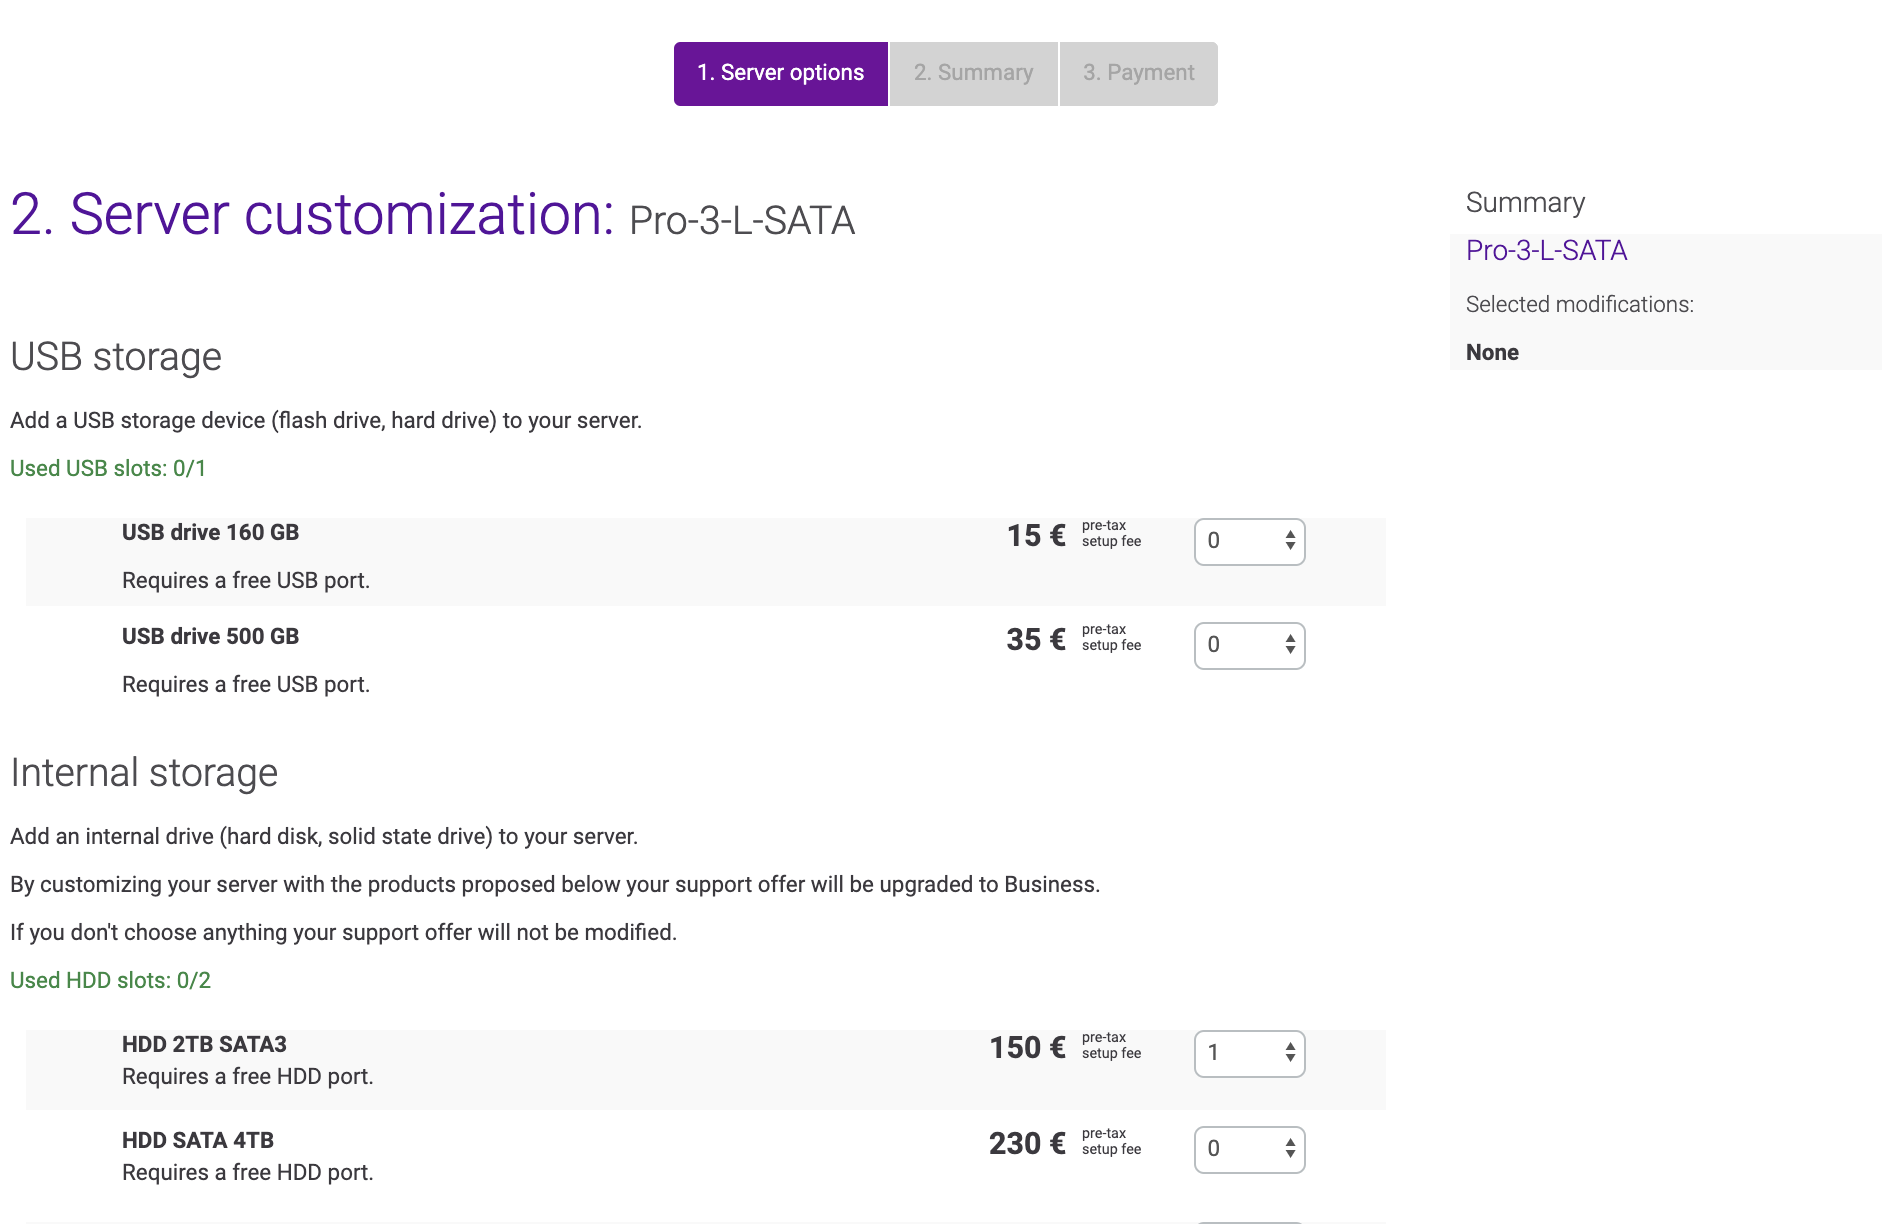
Select either an USB disk or an Internal disk for your server.
-
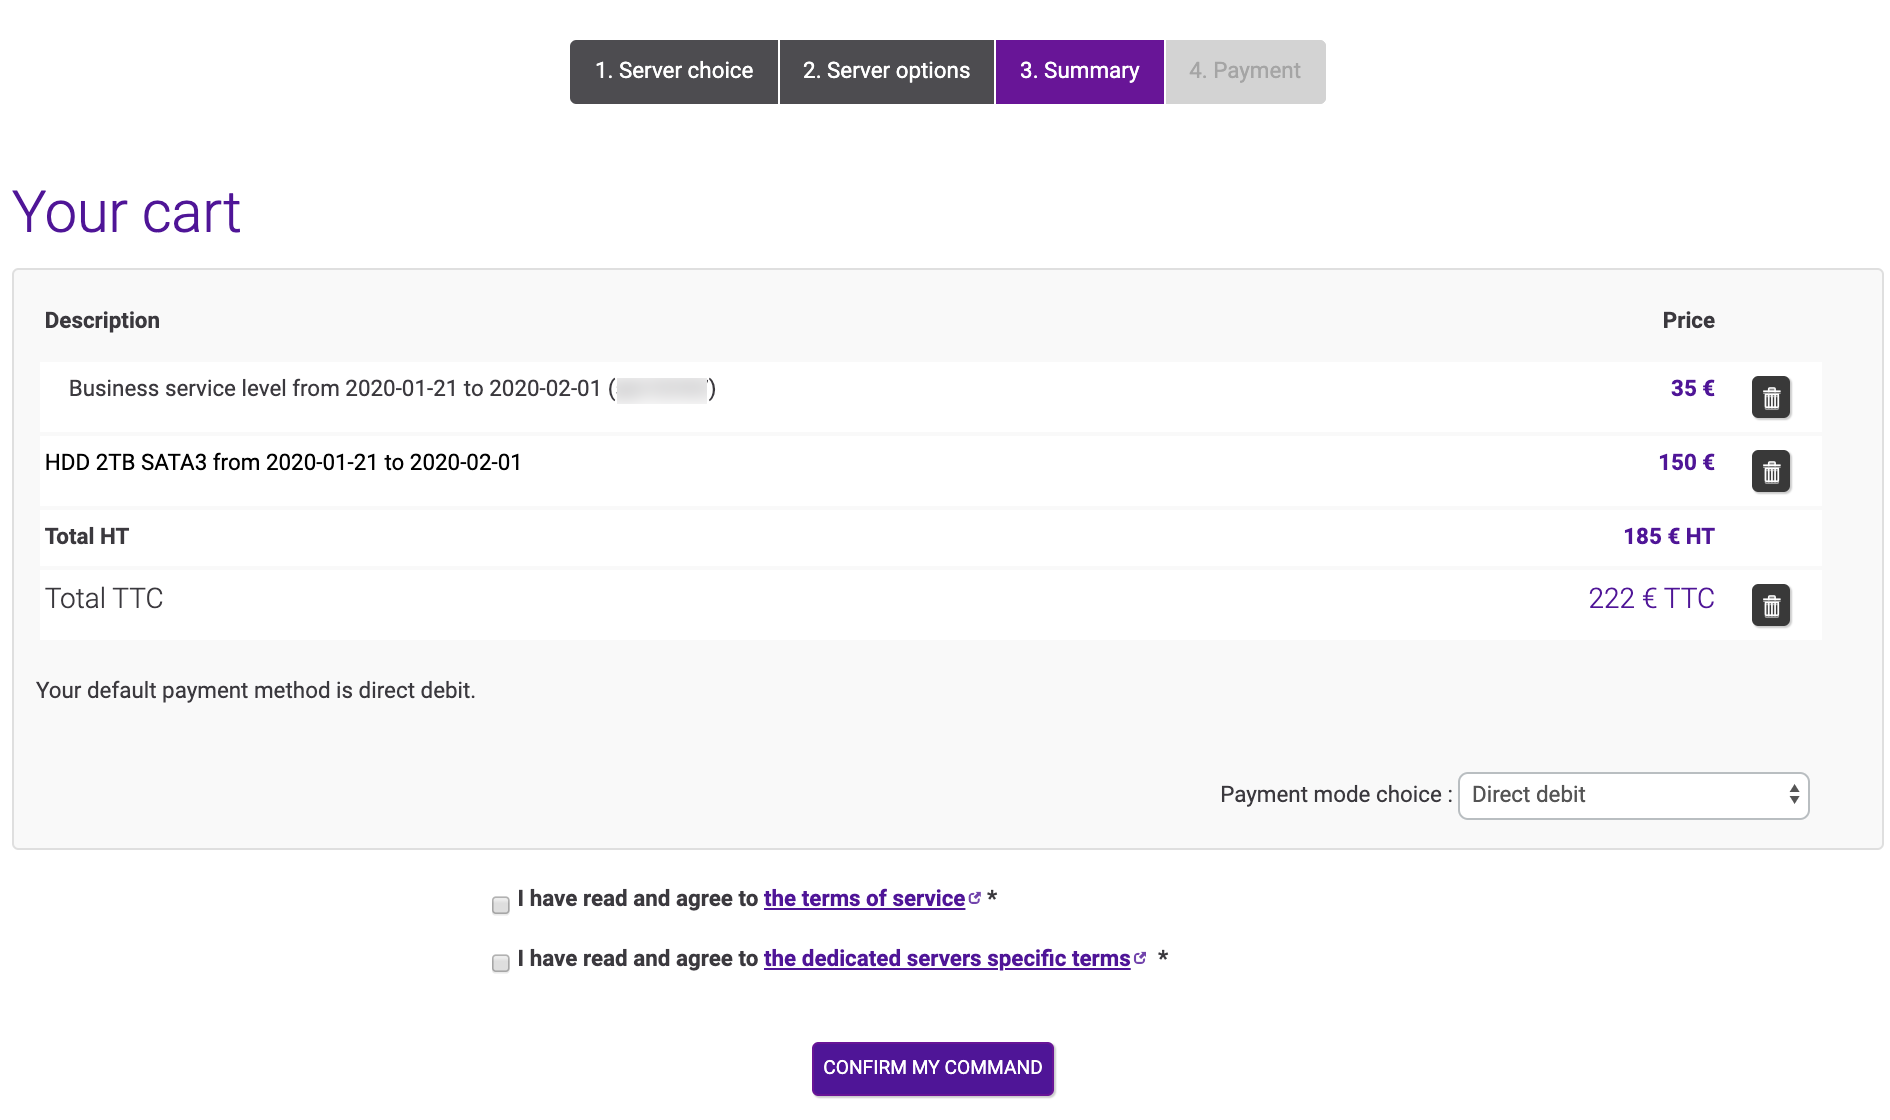
Select the payment method for the installation fees and validate your order.
-
Connect to the ESXi web interface at
https://your_scaleway_dedibox_ip/and log in: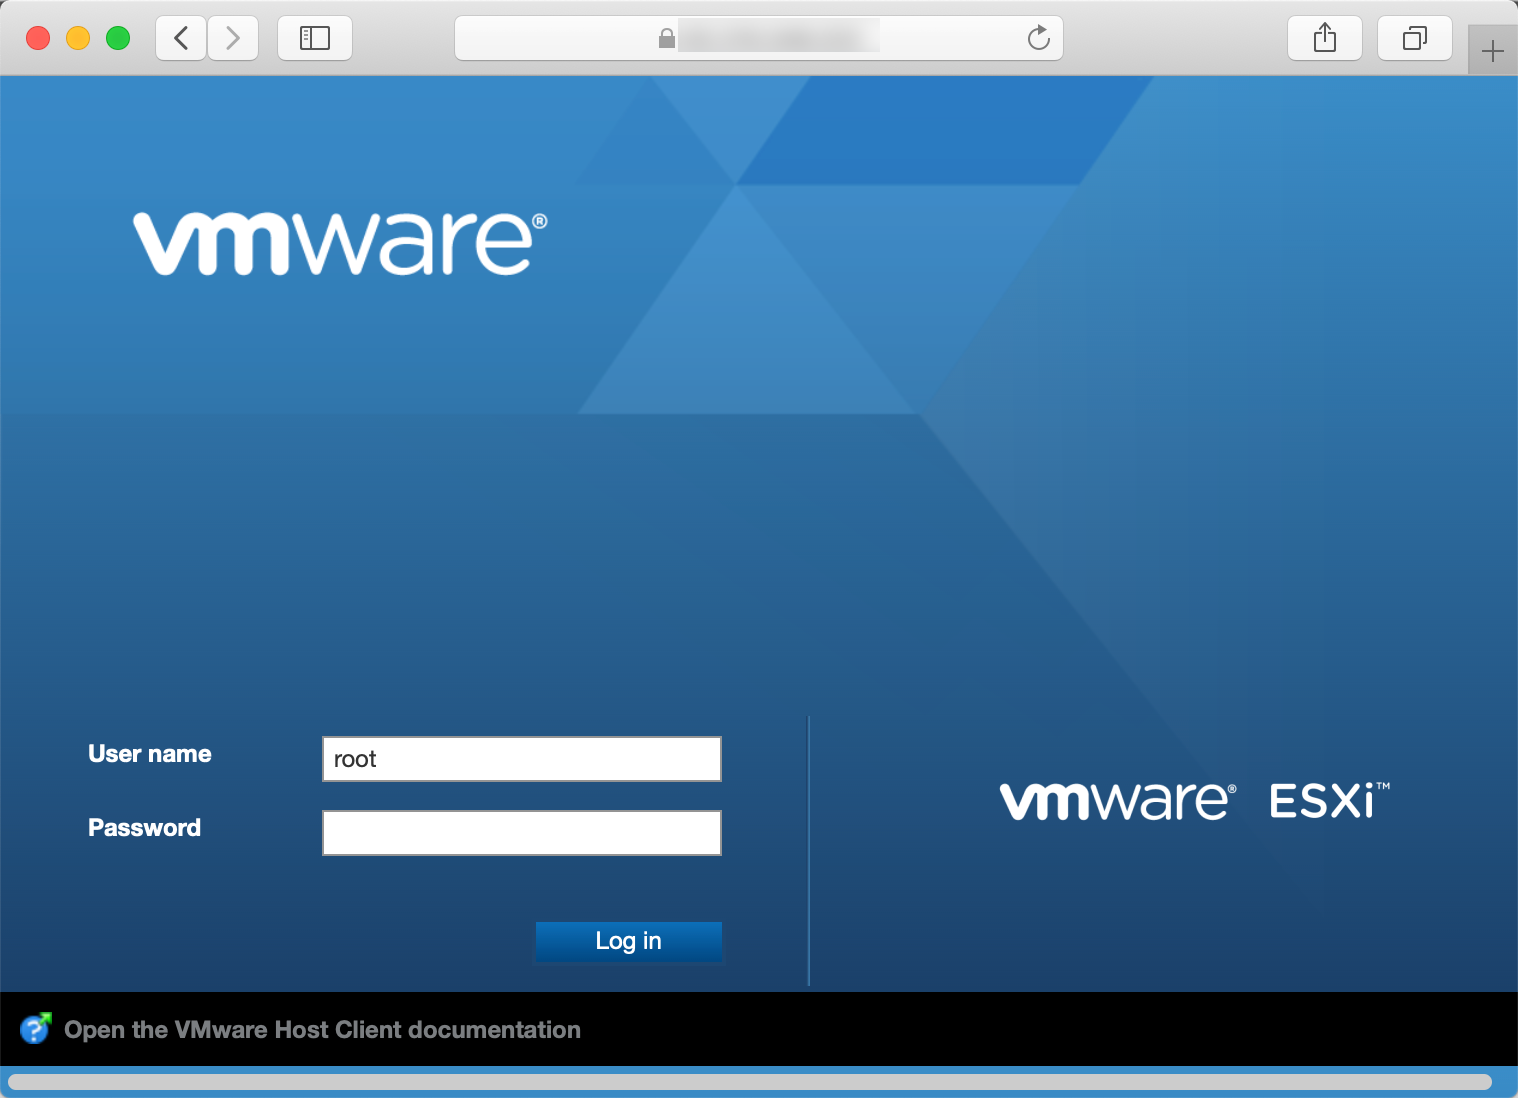
The ESXi Dashboard displays.
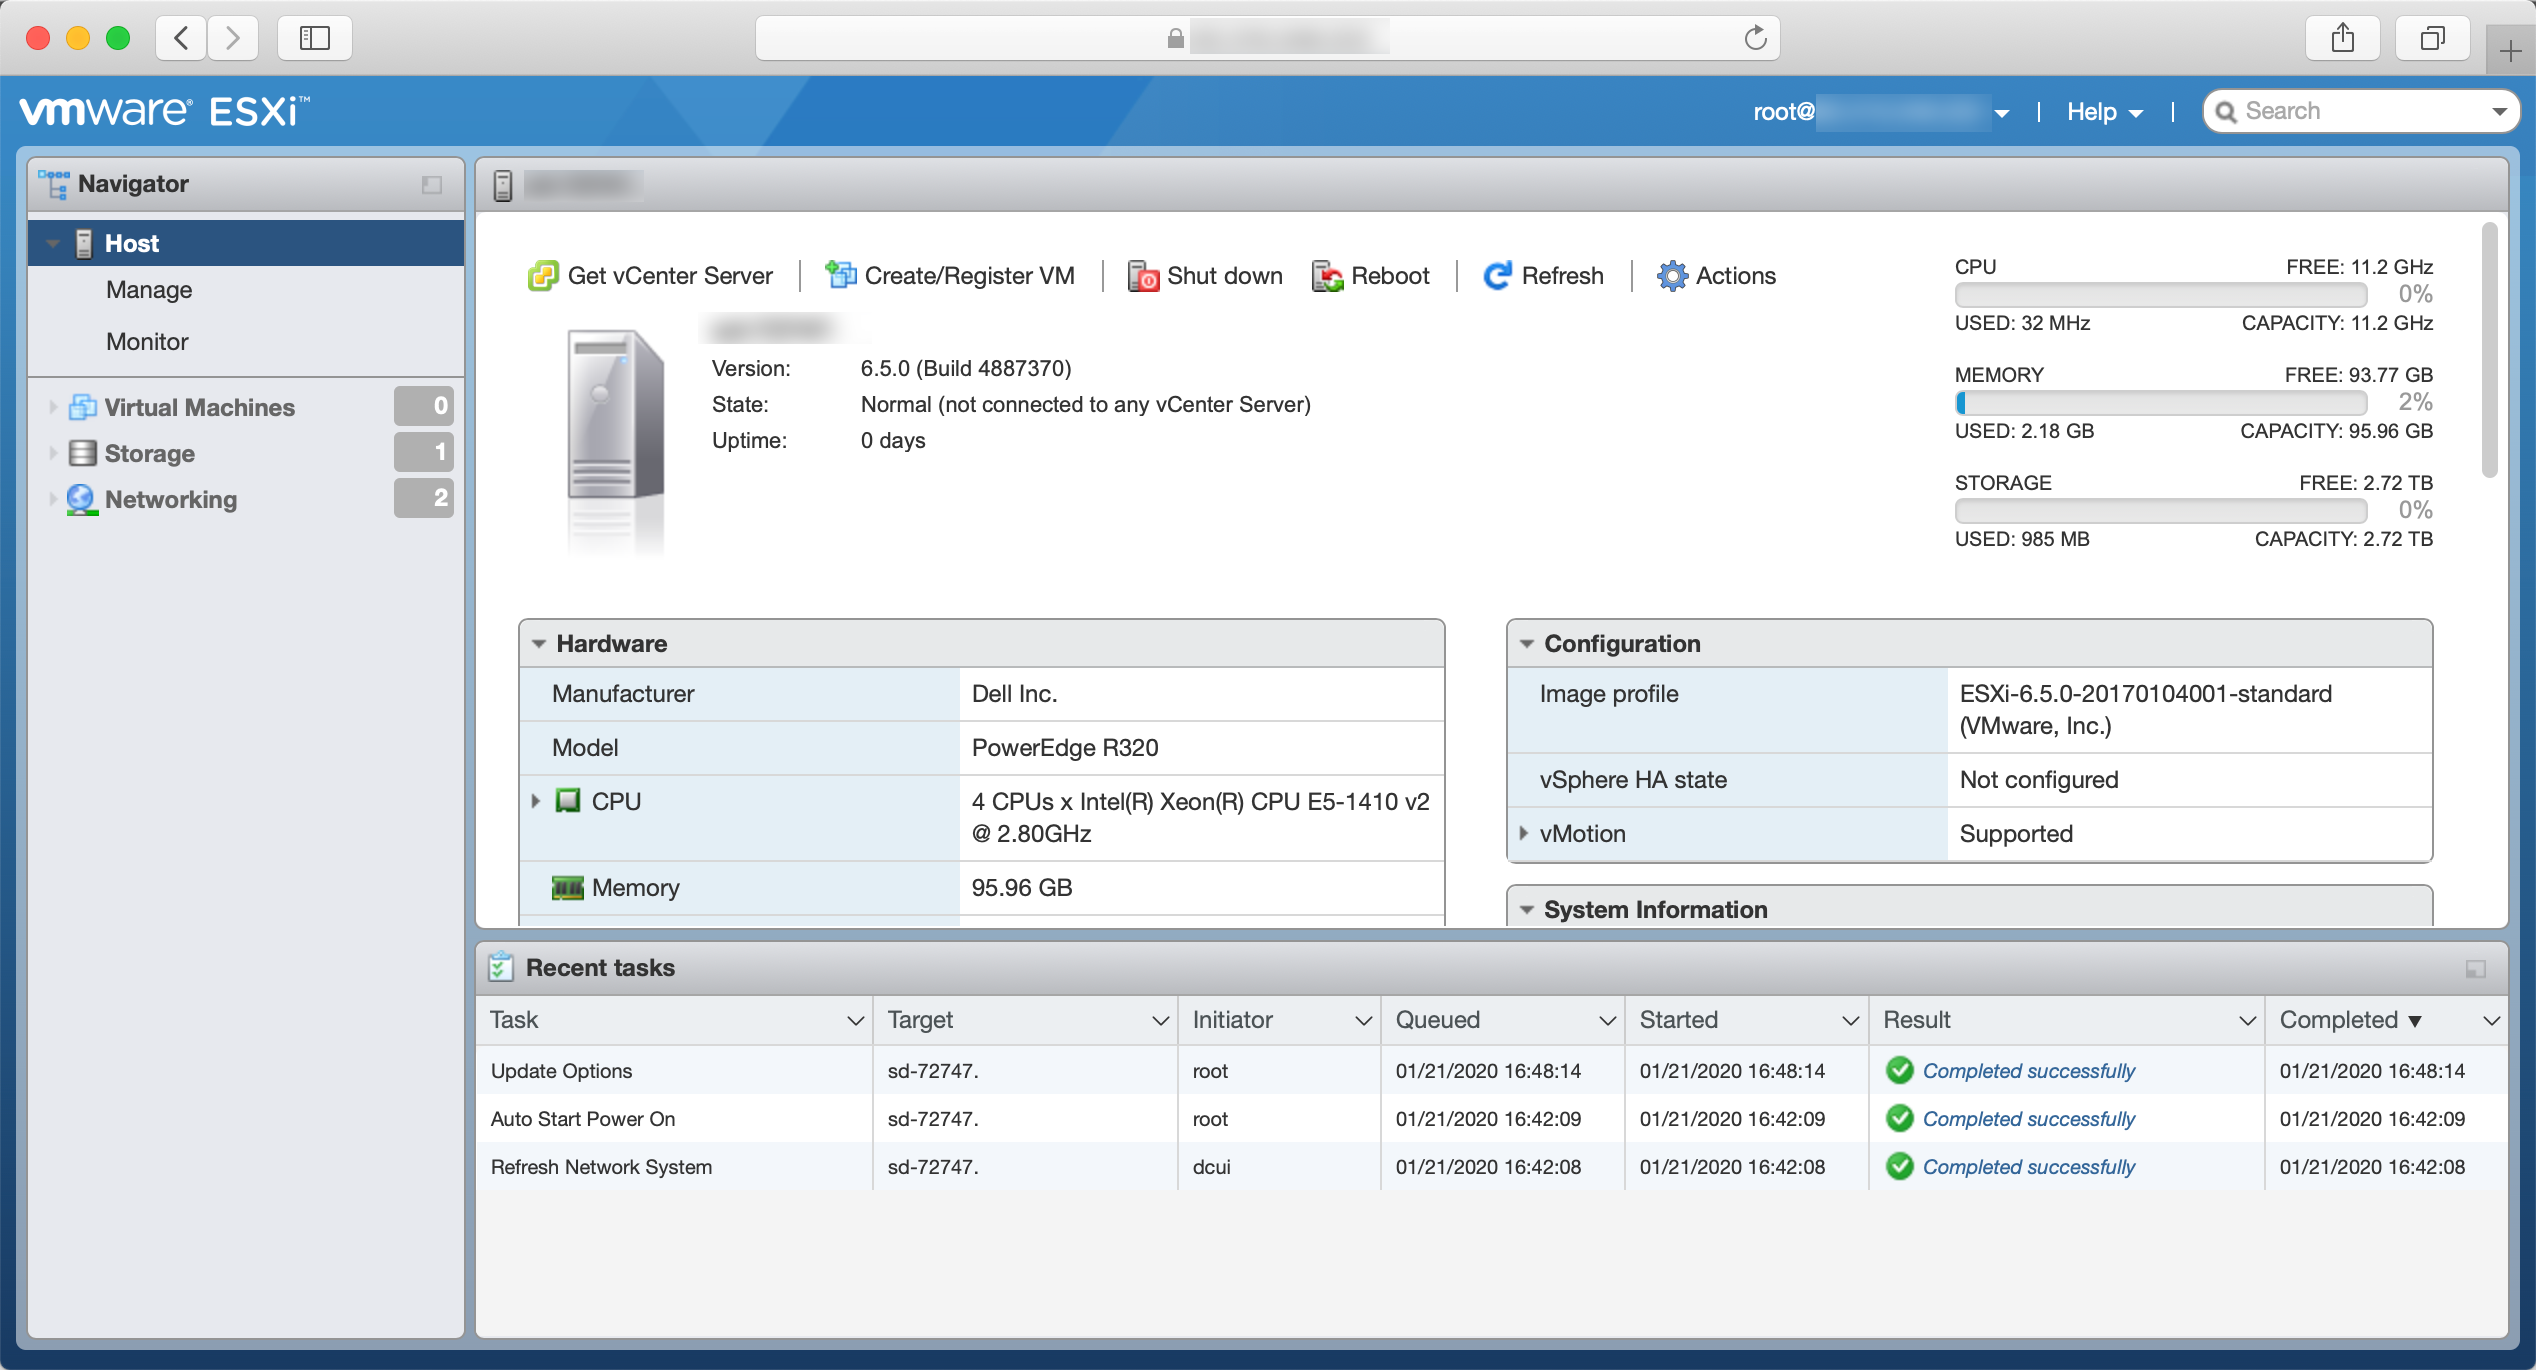
-
Click Storage to enter the storage section.
Creating a virtual disk from the iDRAC interface on a hardware RAID
If your Dedibox uses a software RAID, you will see the disks listed directly. If this is the case, you can skip to the next part of this tutorial.
If you find that the newly installed disk does not appear in your ESXi web interface after installation, it may be the case that your server has a hardware RAID.

Depending on the configuration of your Dedibox, the server may come with a hardware RAID. On this type of server, you cannot configure the datastore directly from ESXi. Instead, you must create a virtual disk from the KVM-over-IP interface of the server before adding the disk to ESXi. To do so, follow these steps:
-
Launch an iDRAC session from the server overview in the Dedibox console:

-
Log into iDRAC using the credentials available from the KVM over IP page of the Dedibox console.
-
Click Physical Disks to verify that the disk is physically available:
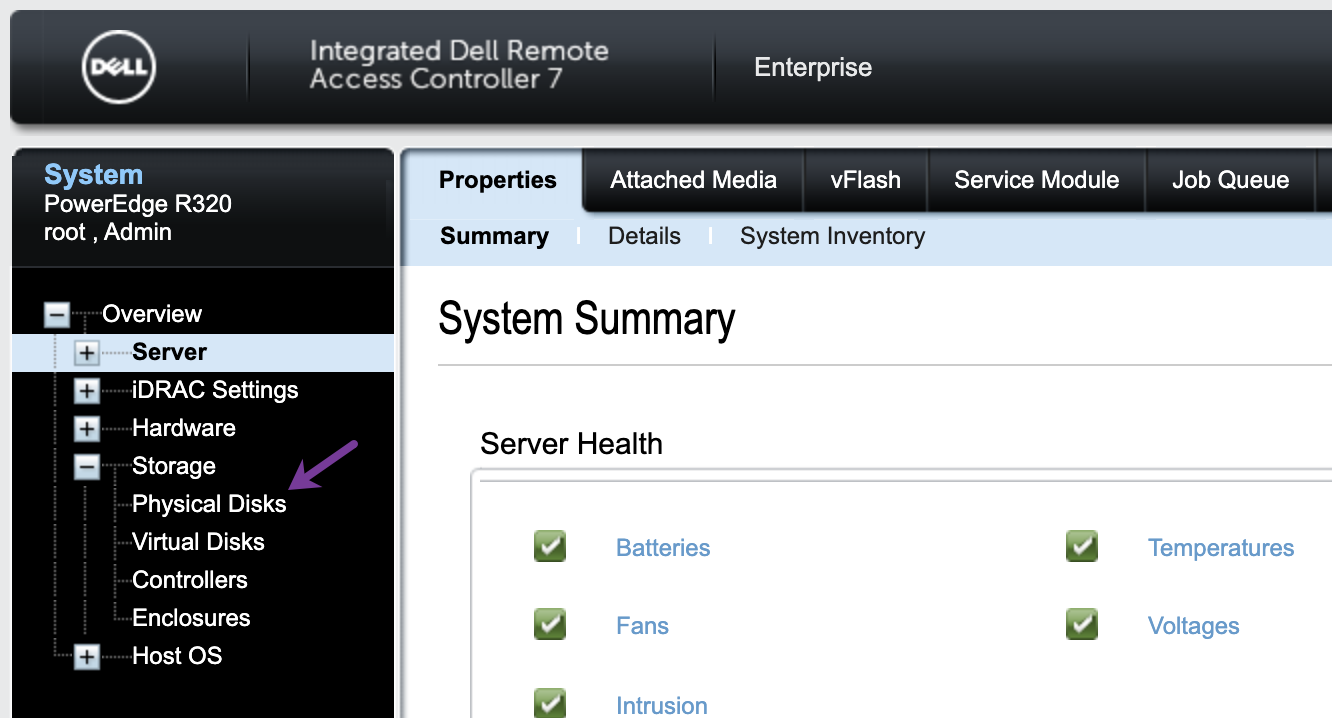
A list of all installed disks and their status displays at the bottom of the page.

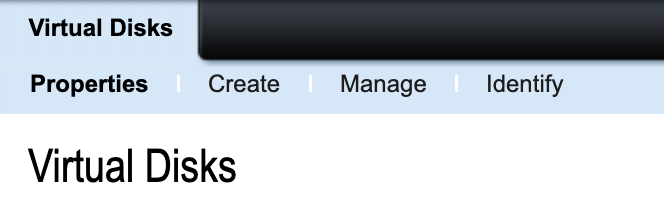
-
Check that all disks are OK, and click Virtual Disks in the side-menu.
The list of all existing virtual disks displays.
-
Click Create in the menu bar to create a new virtual disk.
-
Select the newly installed disk from the list. You can keep the default parameters for a basic configuration, or fine-tune them towards your needs.

-
Click Create Virtual Disk to schedule the creation of a new virtual disk, usable for ESXi during the next reboot.
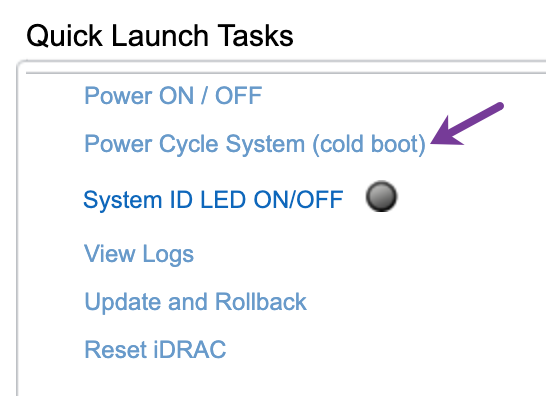
-
Click Overview in the side-menu to go back to the home page of iDRAC, then click Power Cycle System (cold boot) to reboot the machine. The virtual disk will be configured during the boot process.
After rebooting, the new virtual disk shows up in the list of available disks in ESXi:
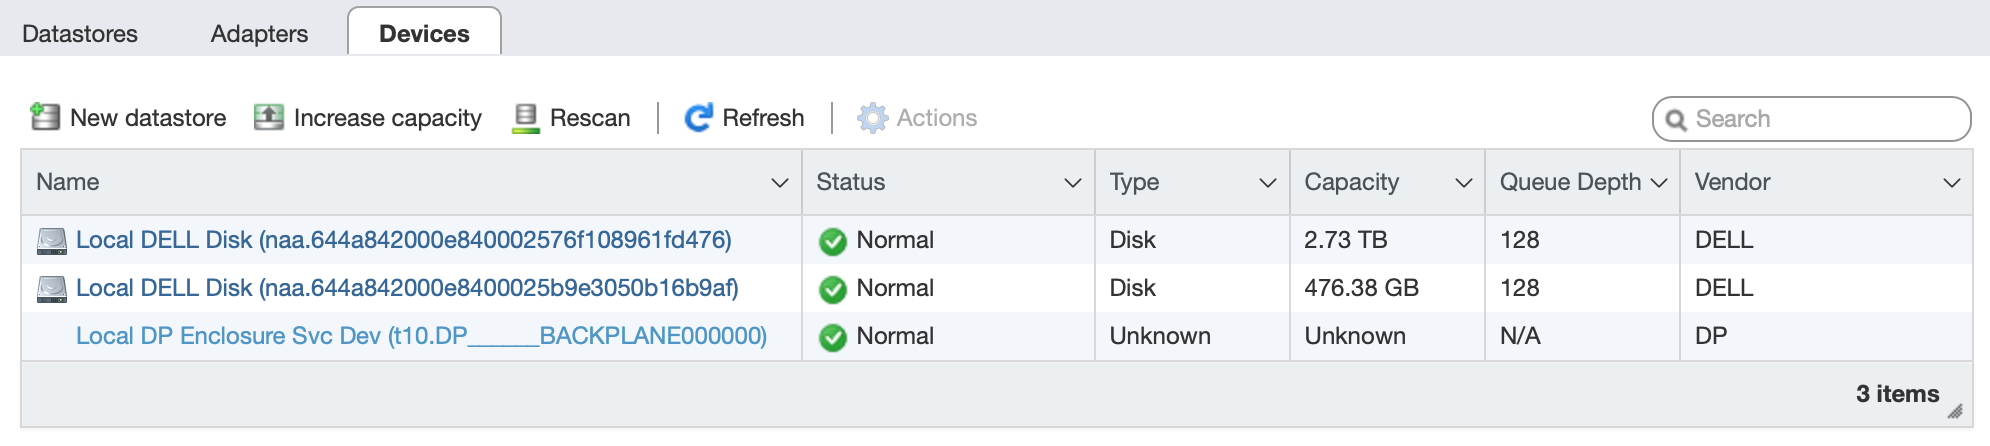
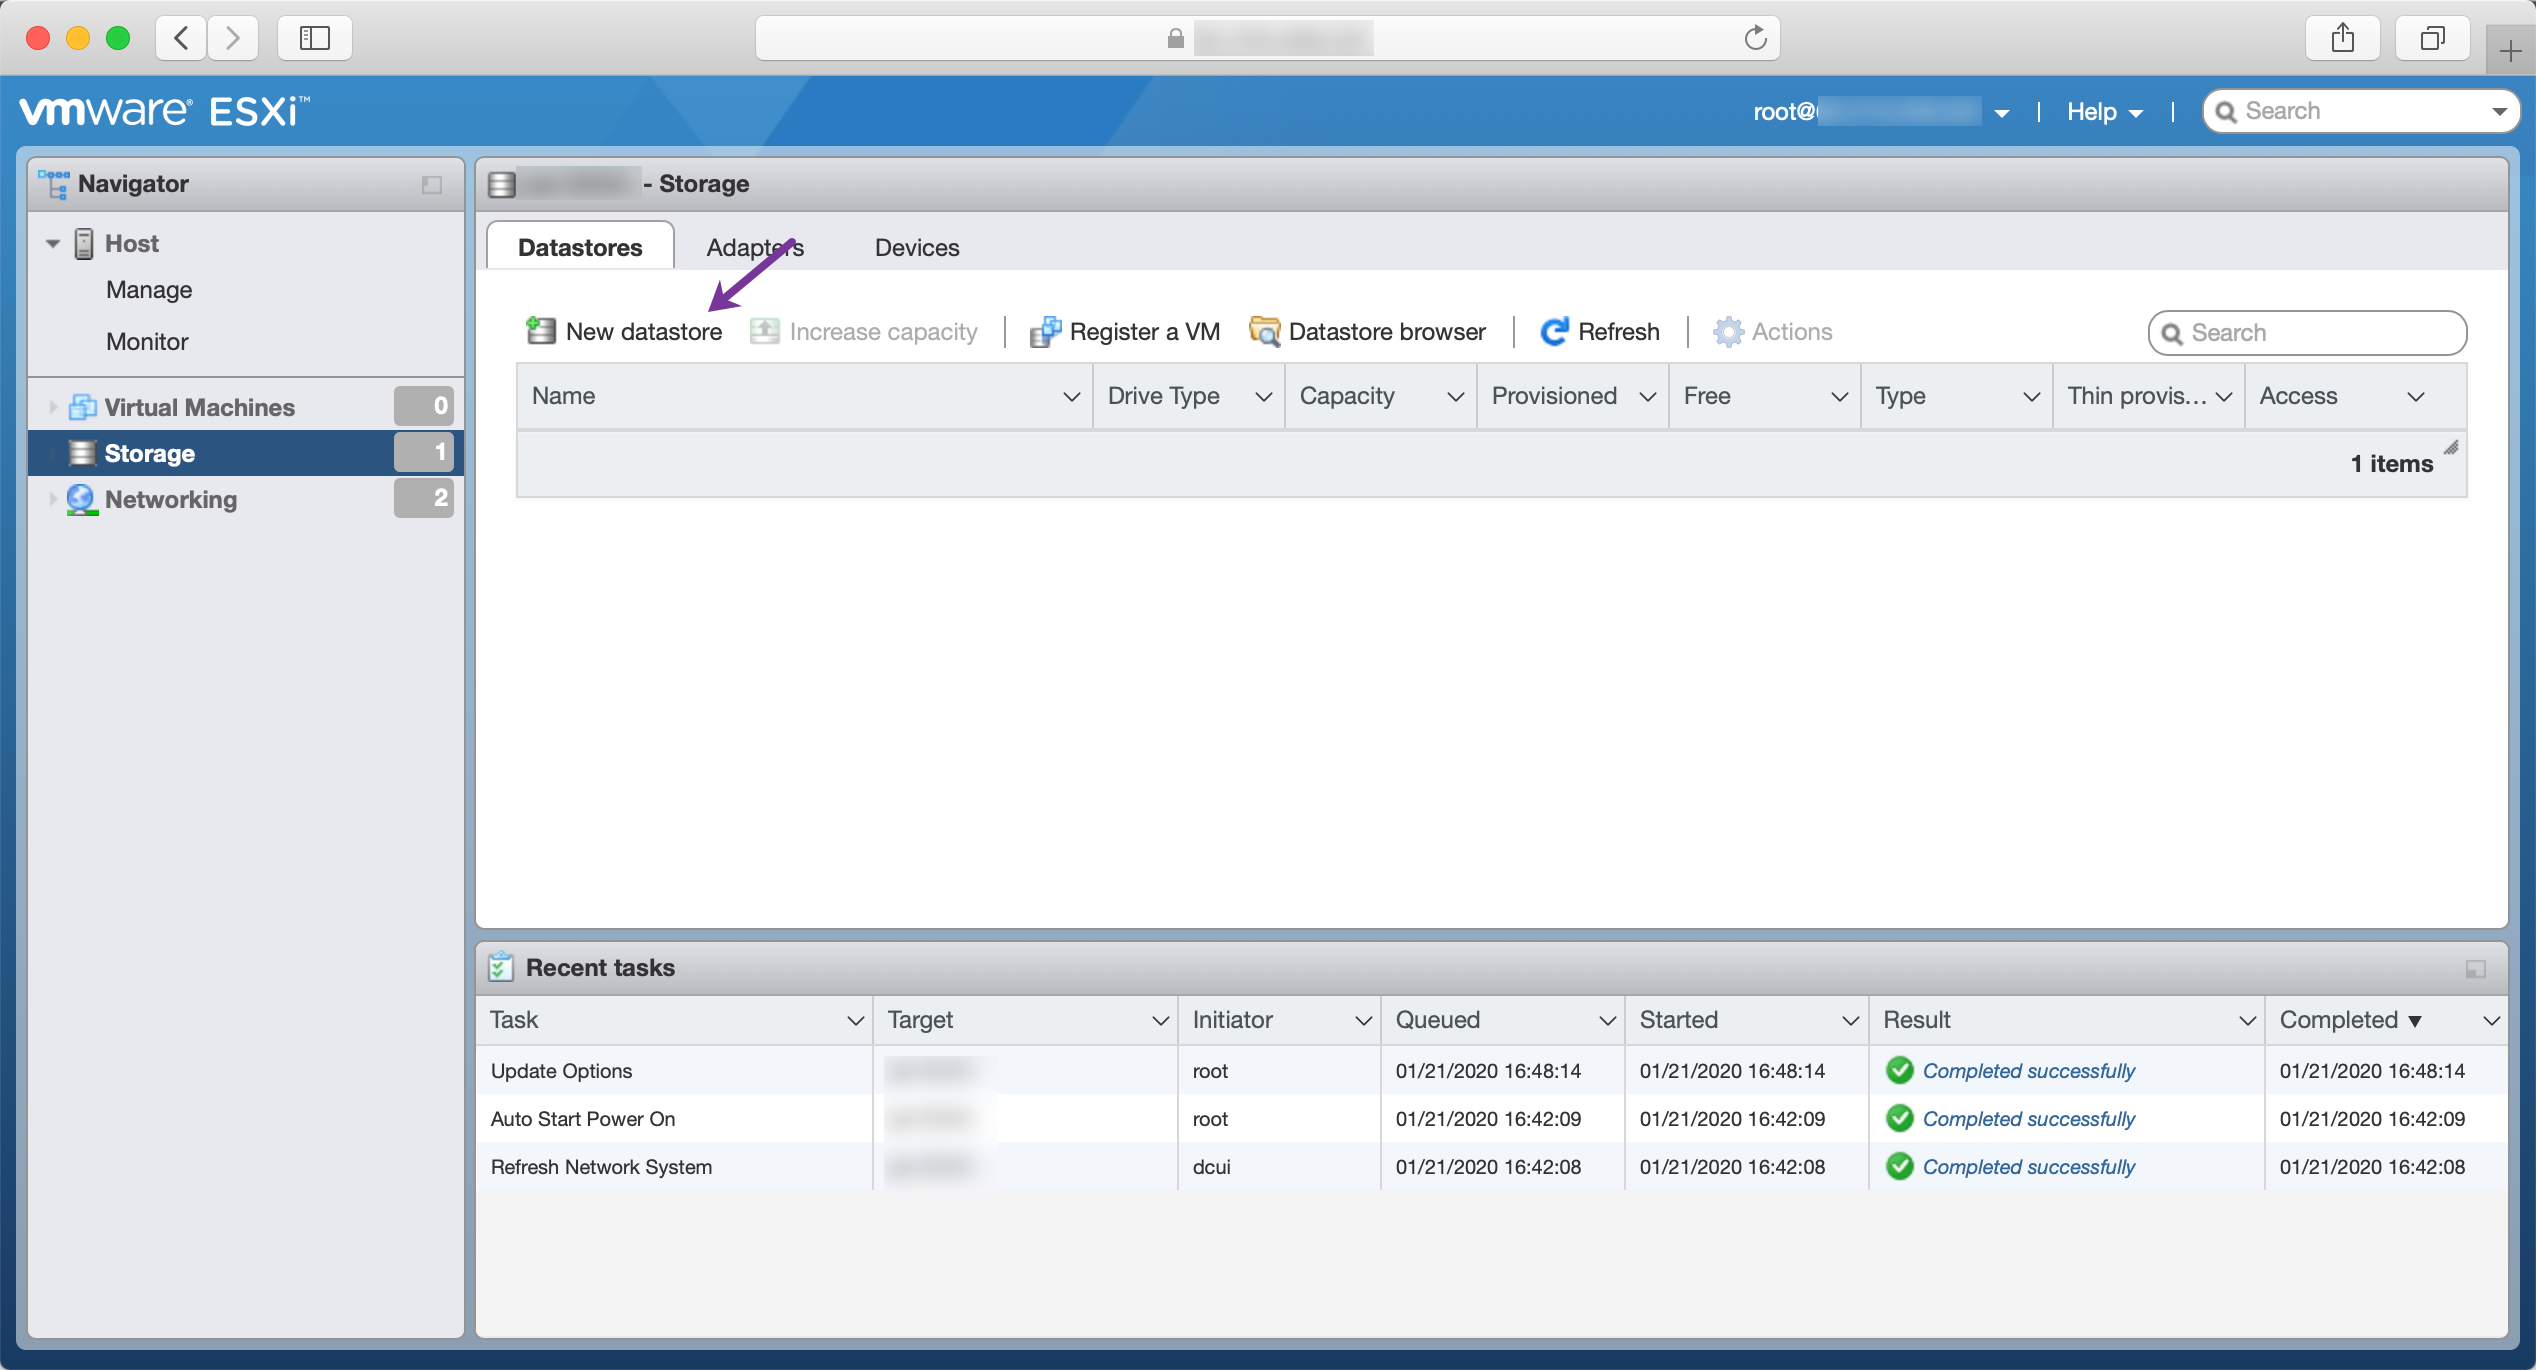
Adding the disk as a datastore to ESXi
When you add a disk as a new datastore, it is formatted and becomes available to store virtual machine images. You can decide on which datastore of the server you want to store the machine images. This can be useful if you have both HDD and SSD storage and you need different specifications for performance or storage.
- Click New Datastore on the storage dashboard of the vSphere web client:
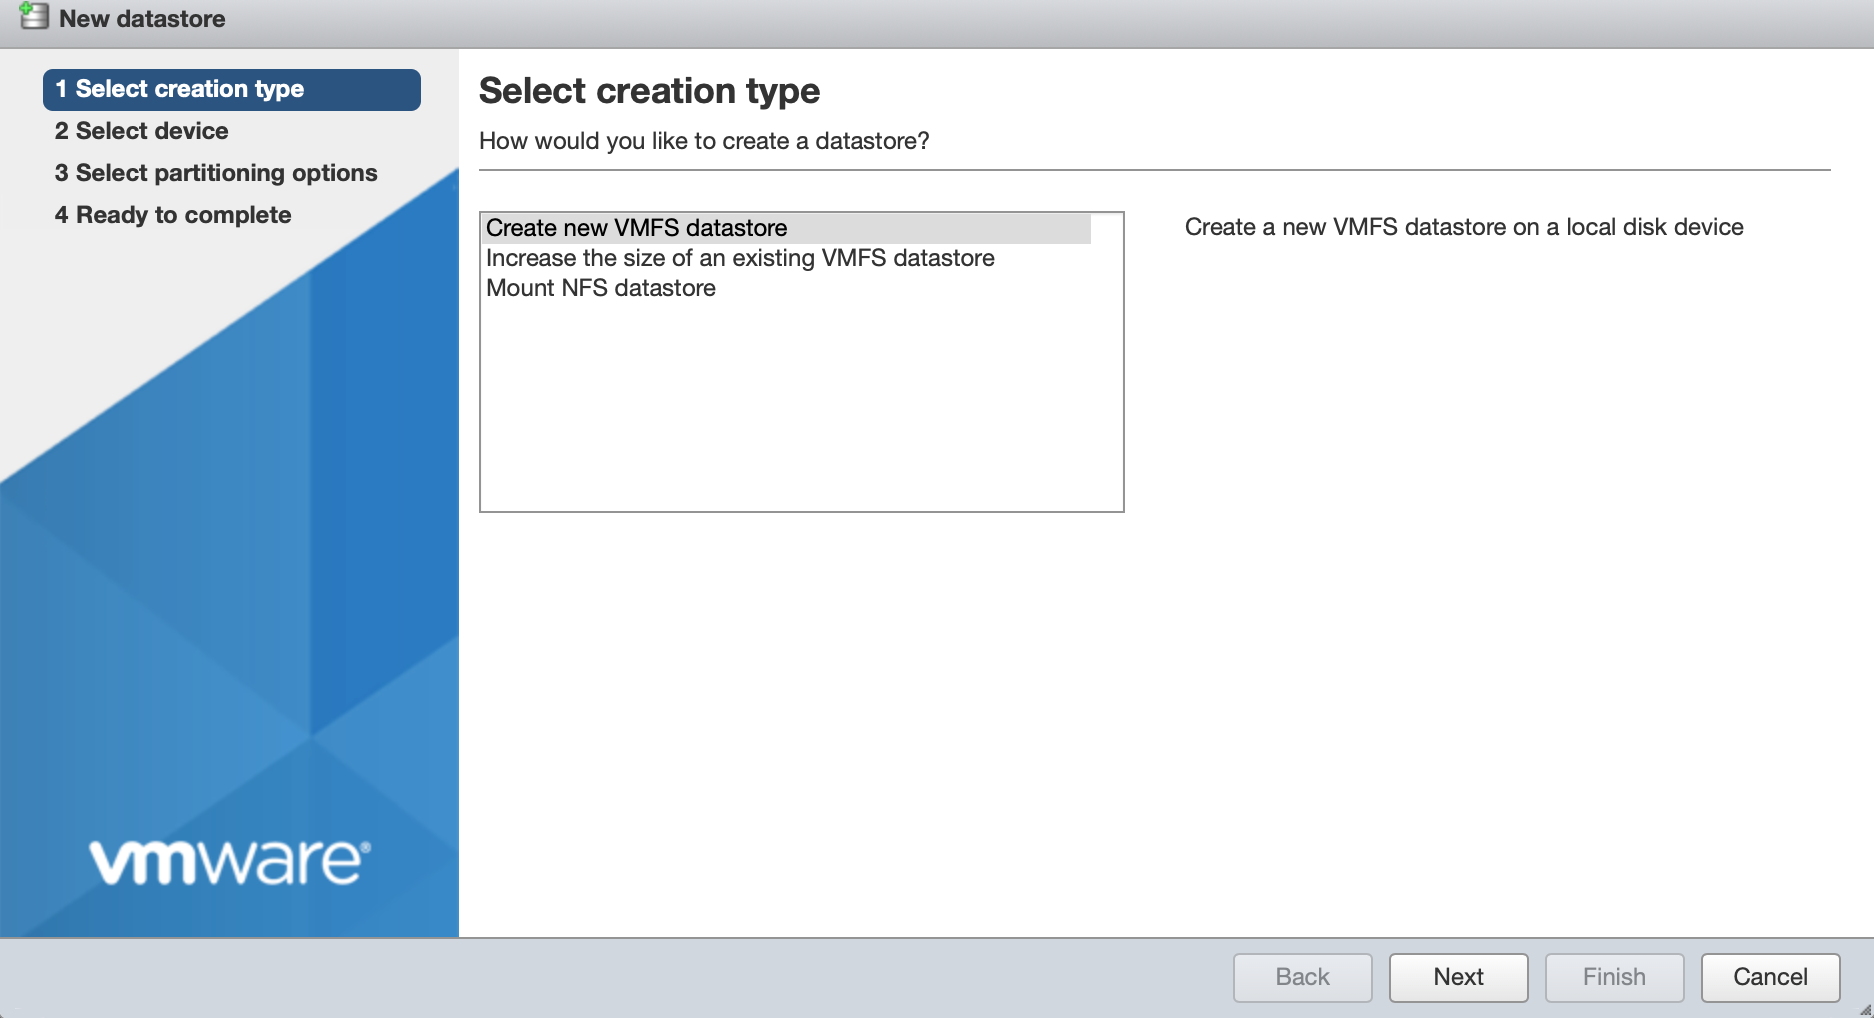
- Select the option Create new VMFS datastore and click Next:
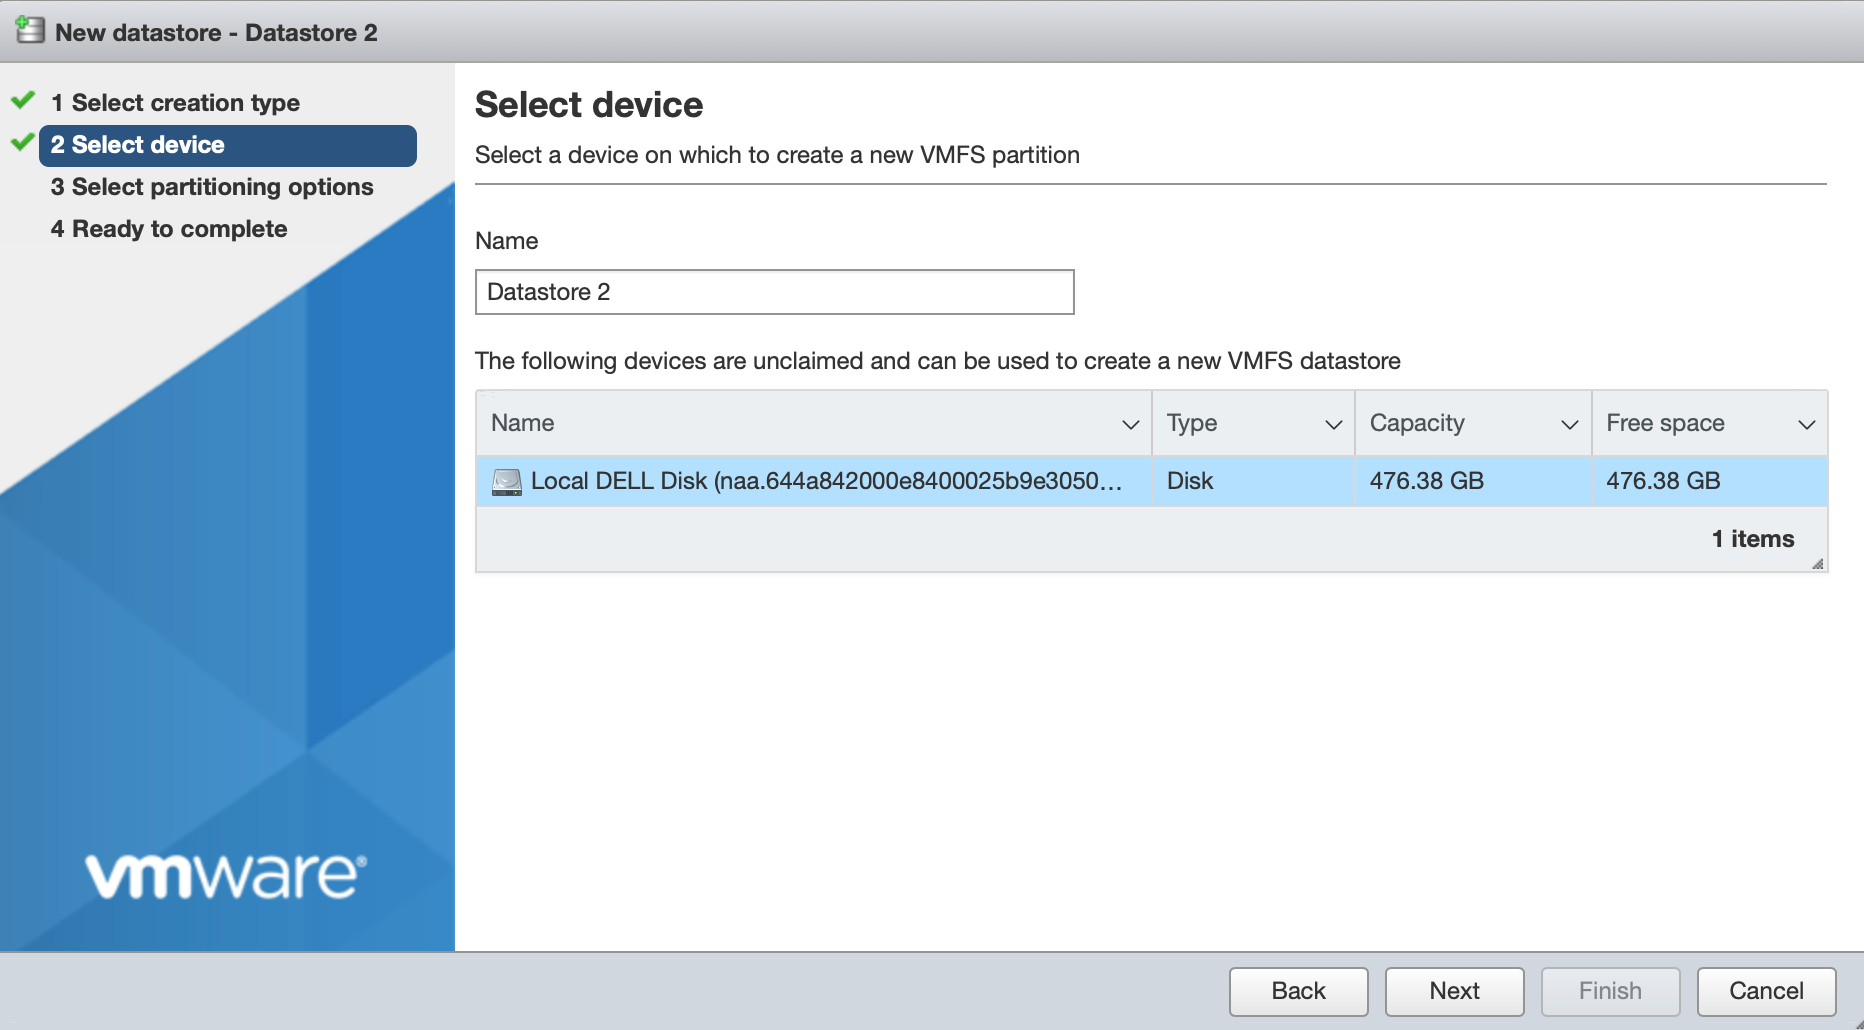
- Select the device from the list of available devices and enter a name for the new datastore. Then click Next:
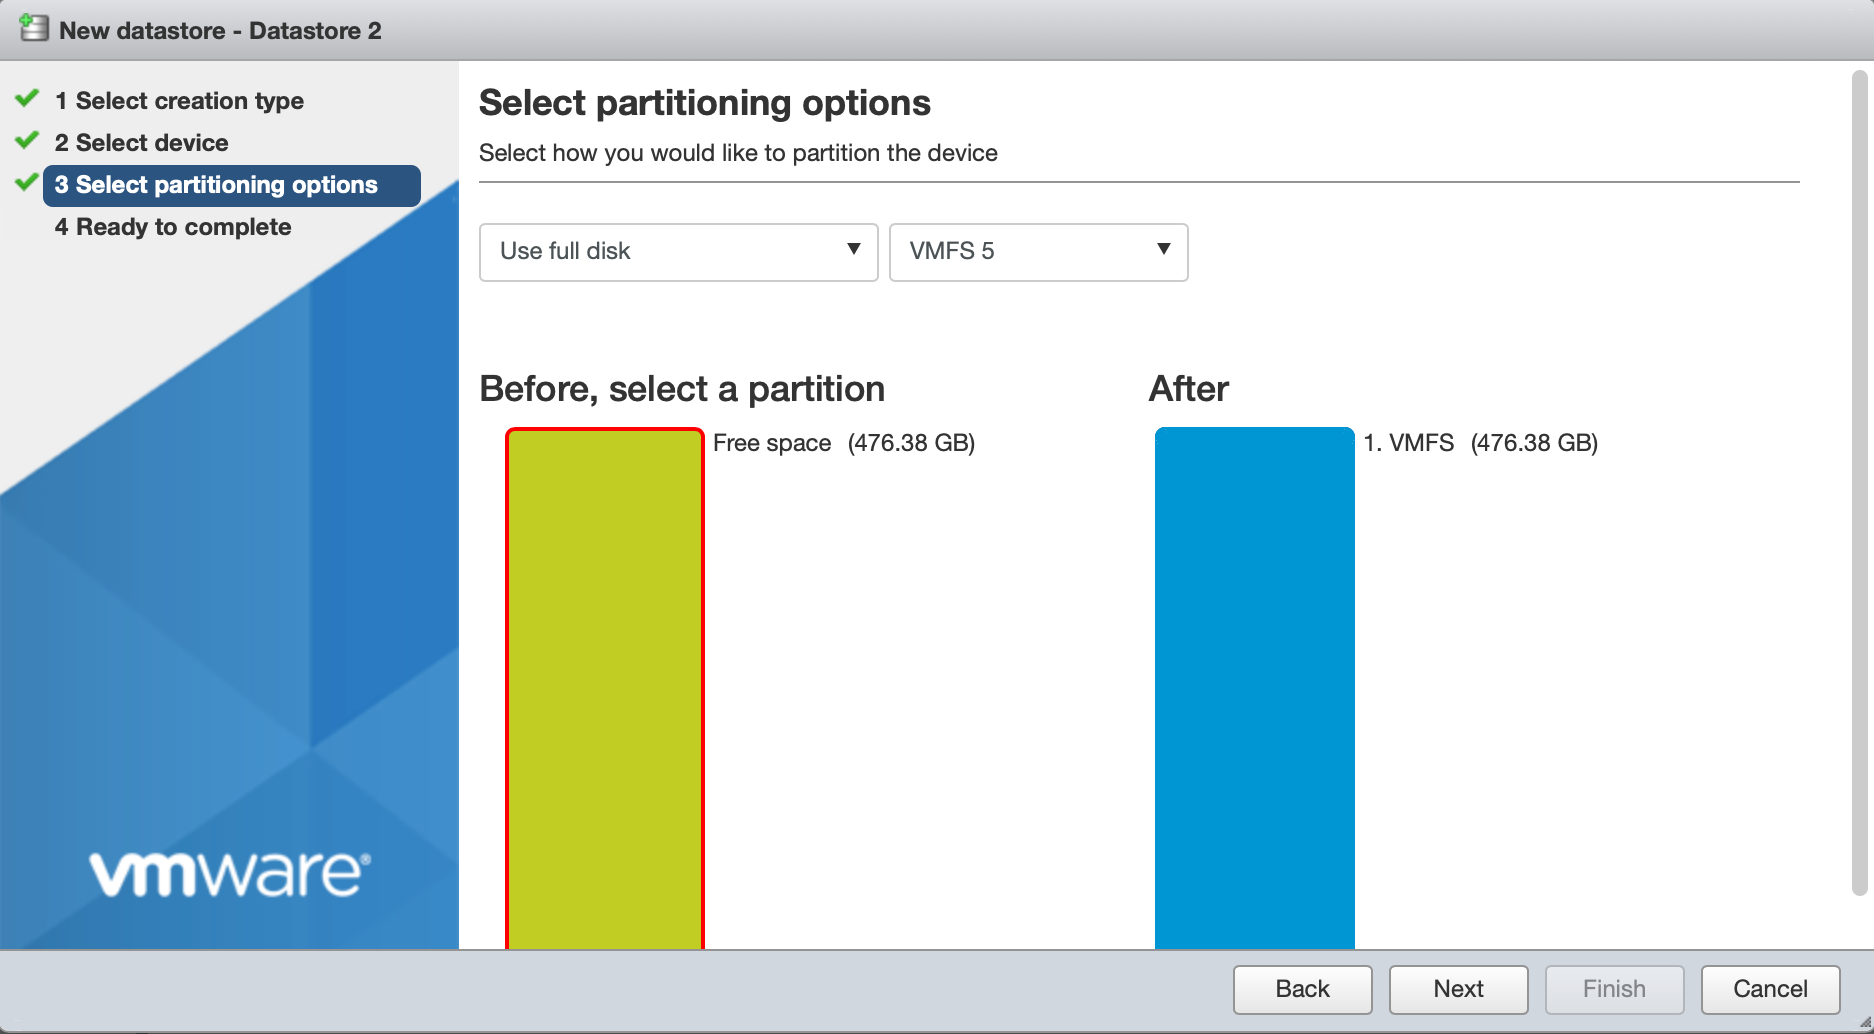
- Select the partitioning options. To use the full disk as datastore, choose Use full disk, then click Next:
- A summary displays. Click Finish to complete the wizard.

Increasing the size of an existing datastore
It is also possible to increase the size of an existing datastore. In this case, the capacity of the newly installed disk will be added to the main datastore of the server which can be useful to extend storage capacity for large virtual machines.
-
Click New Datastore in the storage dashboard of the vSphere web client.
-
Select Increase the size of an existing VMFS datastore and click Next:

-
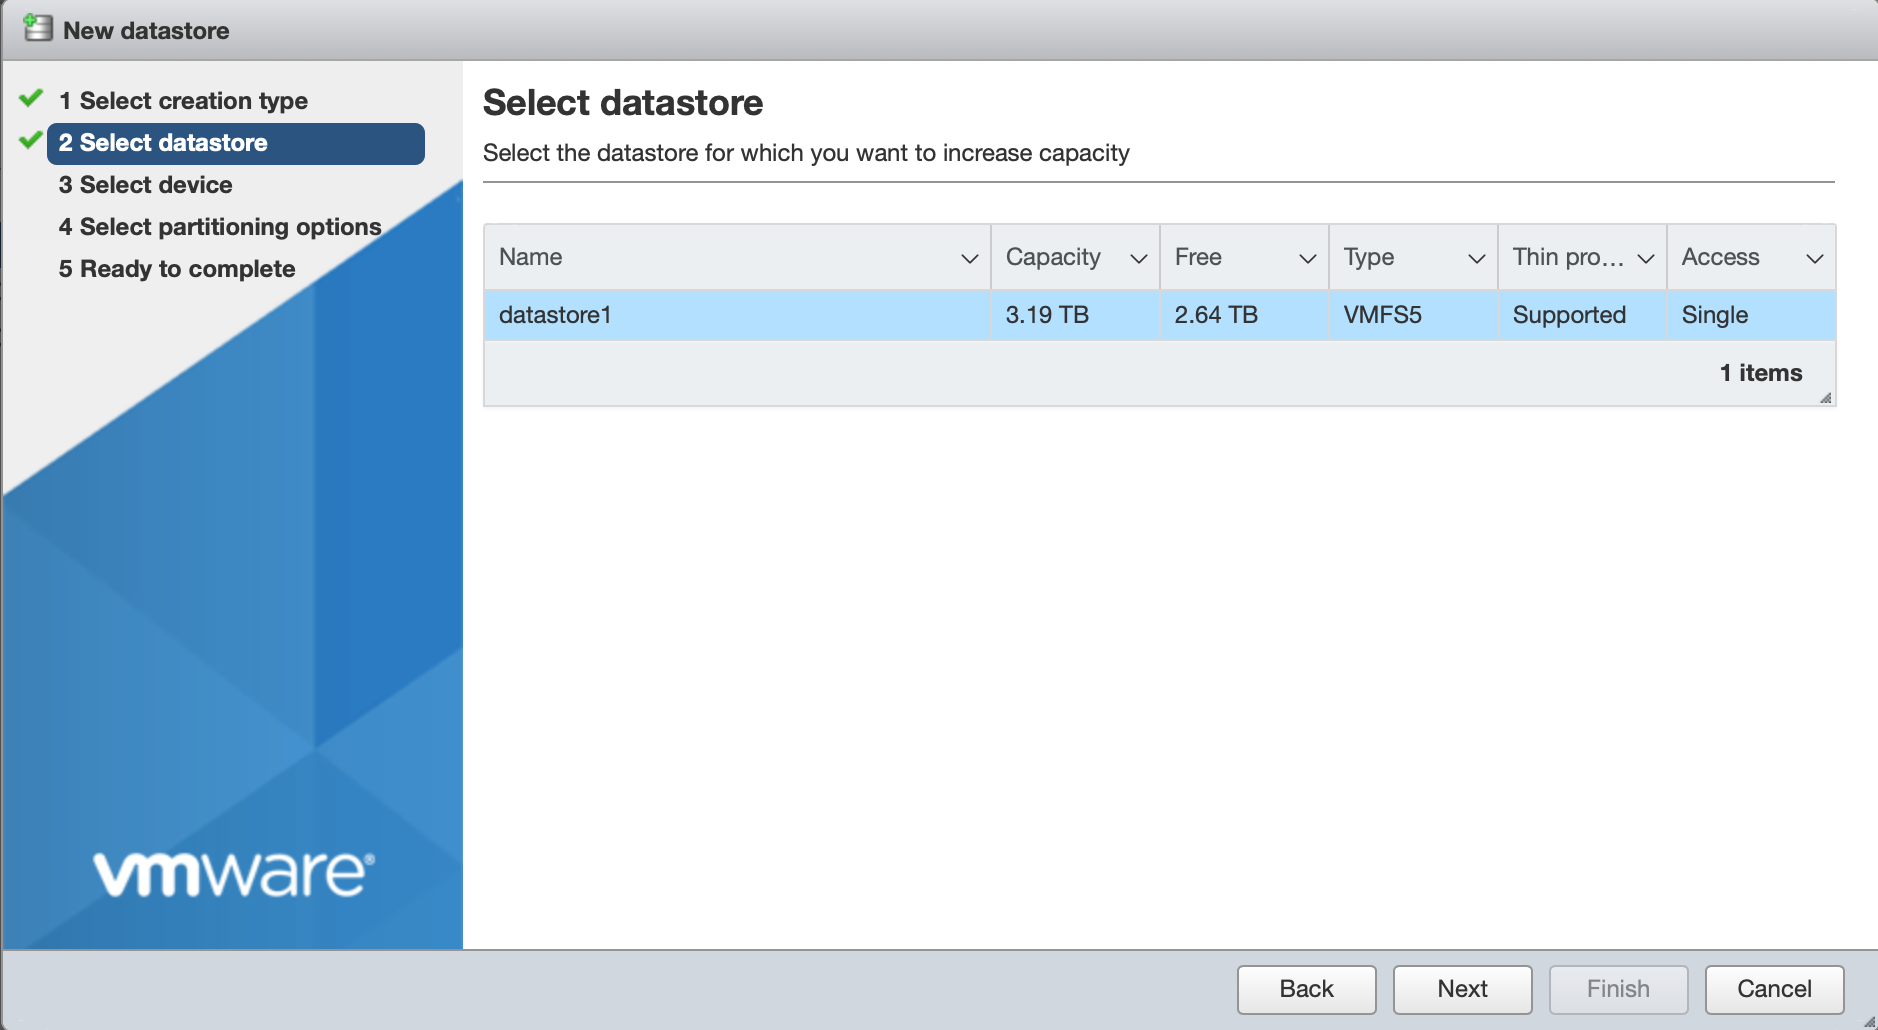
Select the datastore to extend from the list and confirm by clicking on Next:
-
Select the disk to add to the datastore:
-
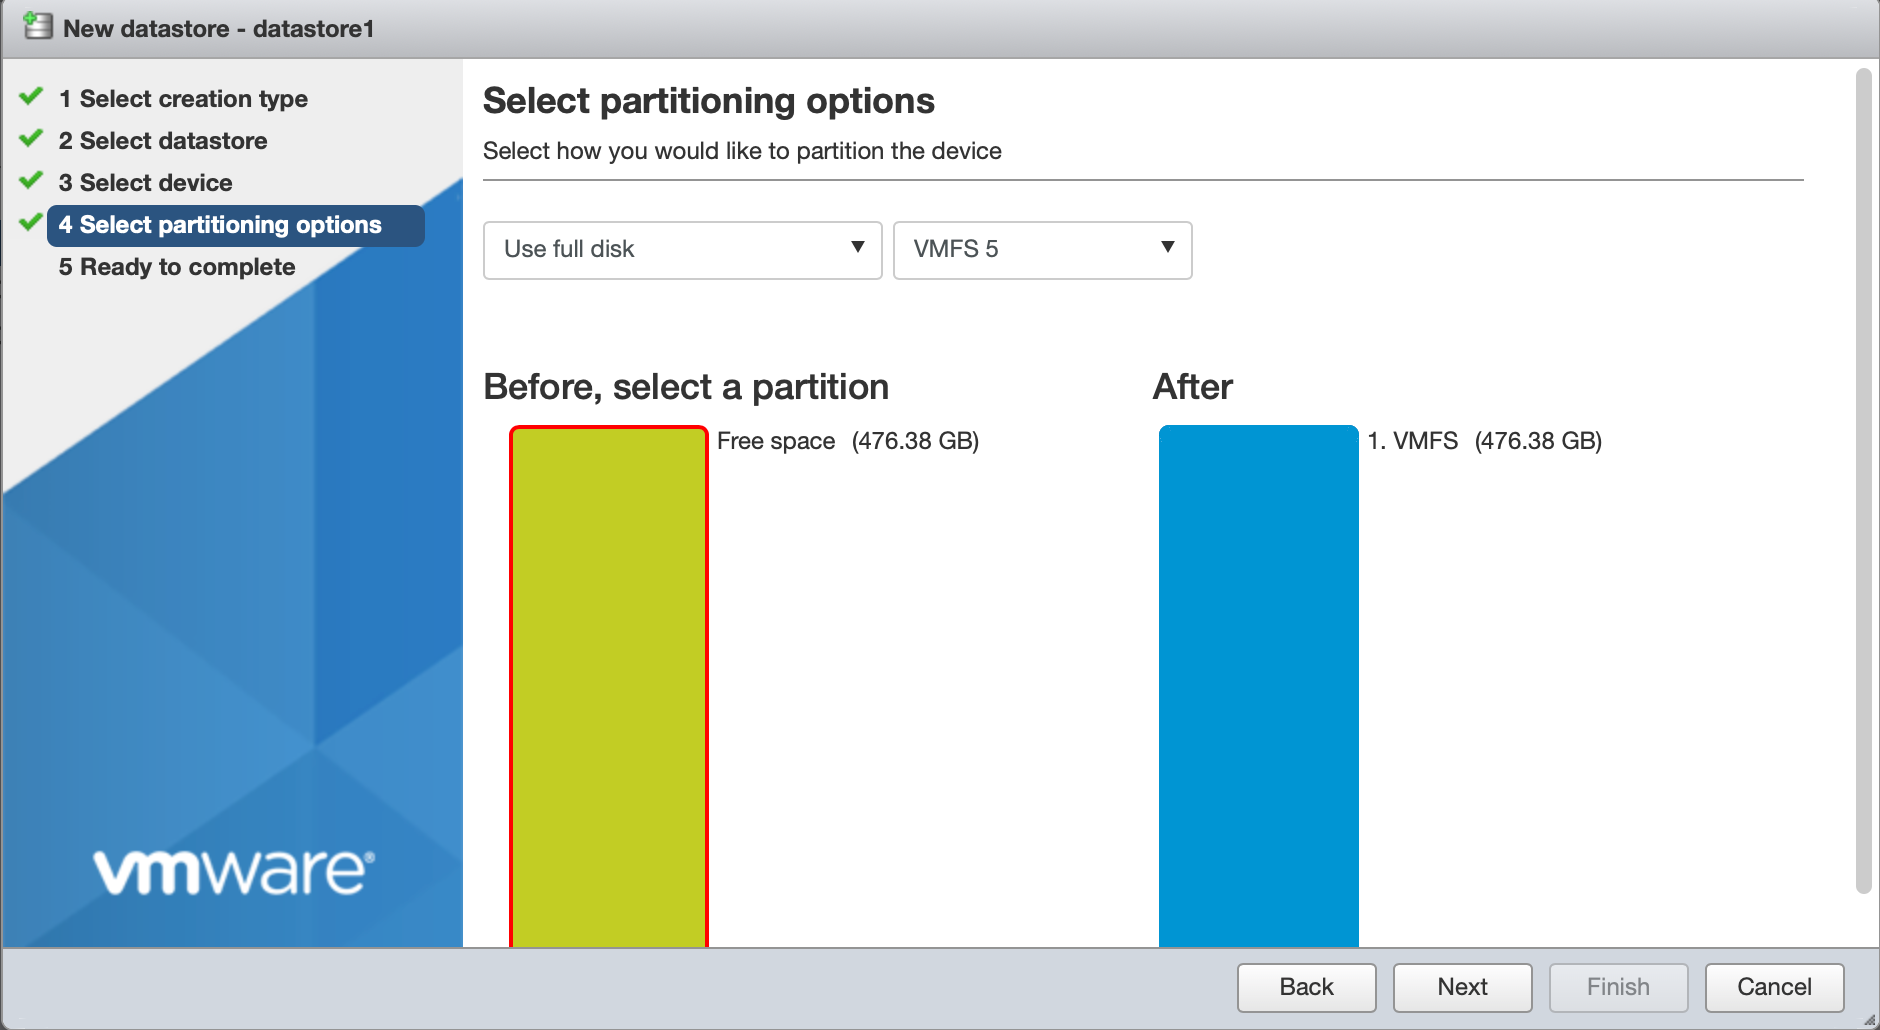
Select a partitioning configuration for the disk. To use all available disk space, go with the default settings and click Next:
The summary displays.
-
Check the summary settings and click Finish:
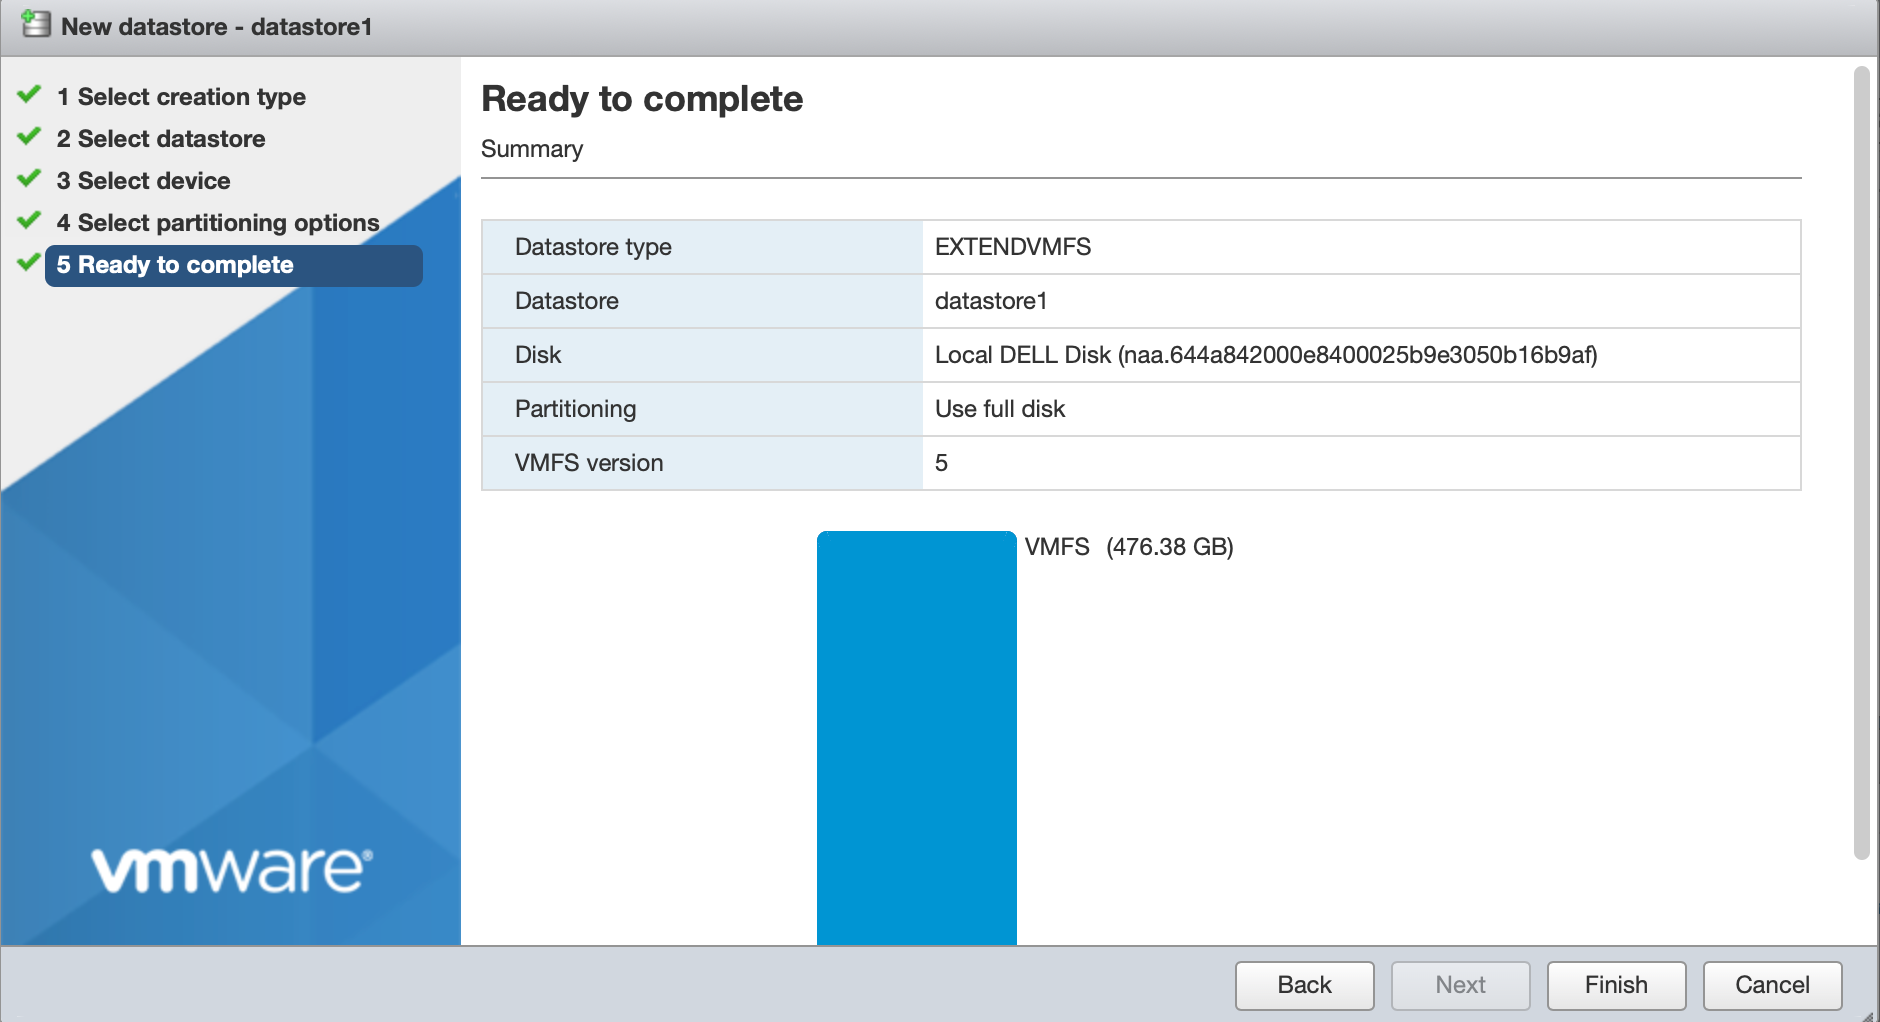
The disk is added to the datastore and the total storage capacity of the datastore is increased.
For more information on managing your virtual machines using the ESXi hypervisor, refer to our dedicated documentation.
Visit our Help Center and find the answers to your most frequent questions.
Visit Help Center