How to transfer a domain name
You can transfer any domain bought or renewed at another registrar to Scaleway as long as you meet the conditions shown below.
Before you start
To complete the actions presented below, you must have:
- A Dedibox account logged into the console
- An unlocked domain at an external registrar (not Scaleway) and access to its authorization key
- A domain name that:
- Has at least 15 days until its expiration
- Was created at least 60 days ago or renewed at least 45 days ago
- Up-to-date contact information with your current registrar
- A domain that is not a premium domain
- An email address provided in the whois of the domain that is not protected with an antispam
- In your browser, navigate to the Scaleway domain name order page.
- Enter your domain name in the search bar, and click search a domain. The Domain name choice page opens, showing that the domain is not available for buy.
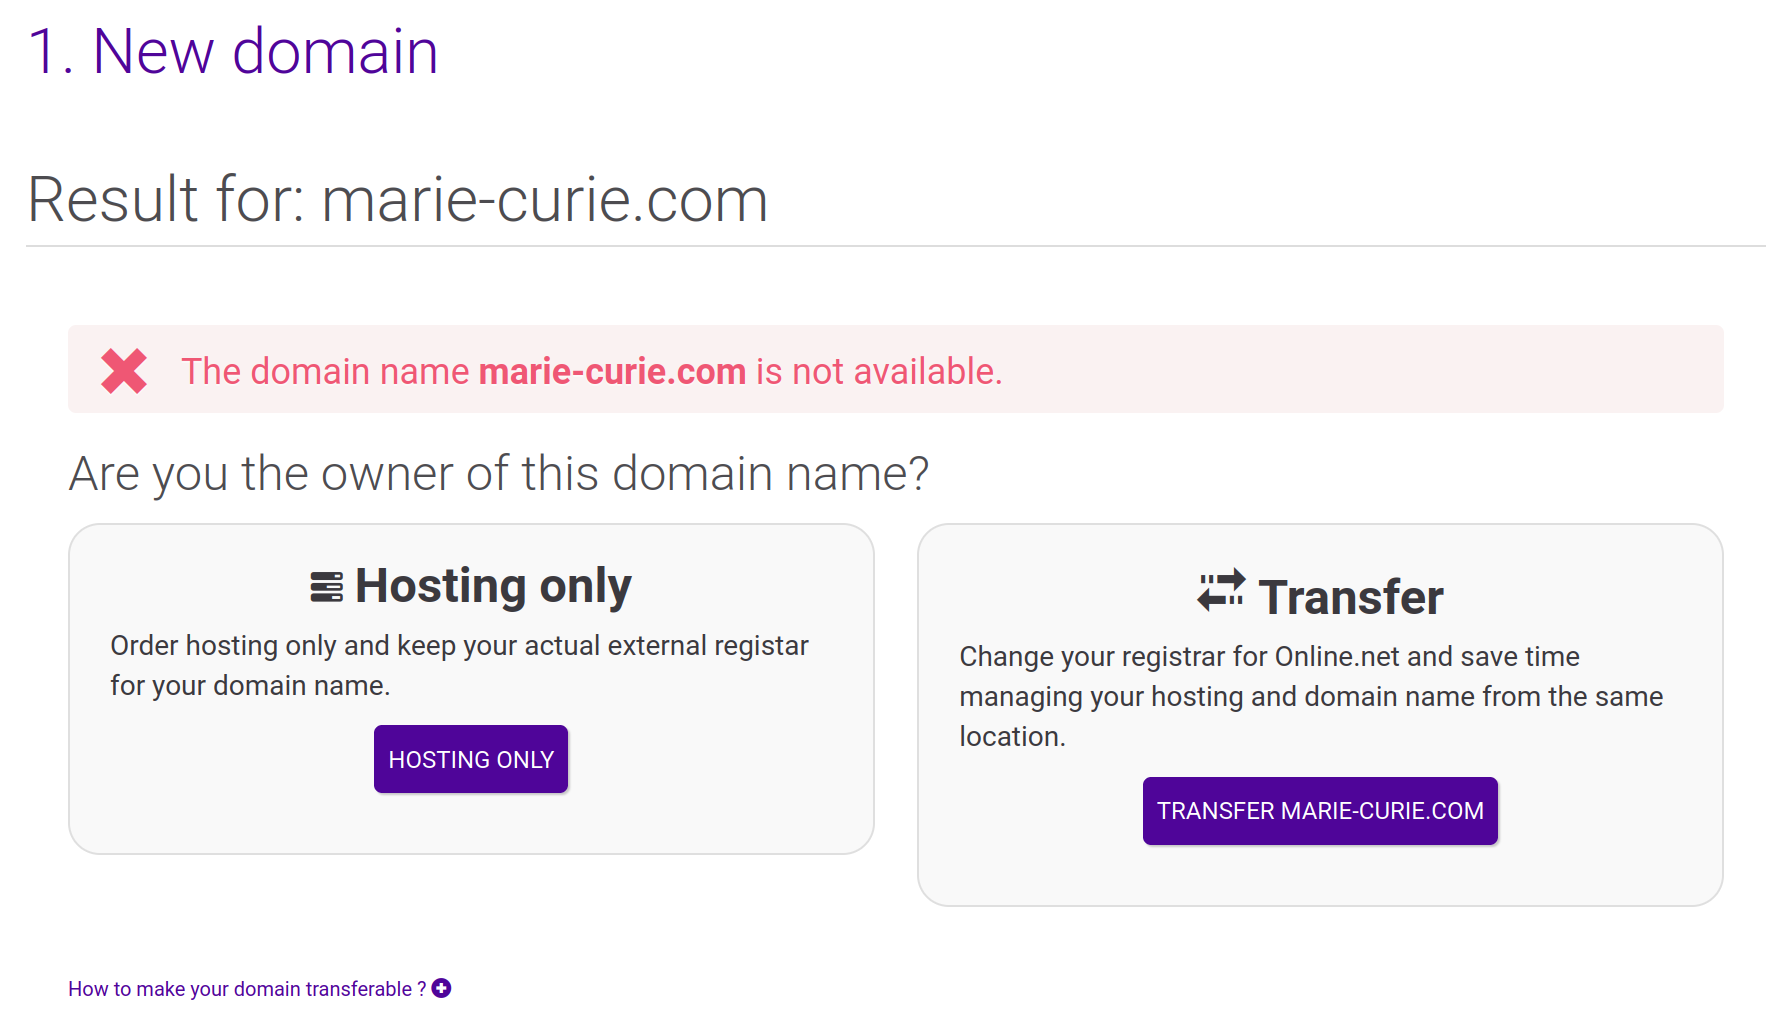
- Scroll to the Are you the owner of this domain name? section and, under Transfer, click Transfer yourdomain.ext. You are directed to the transfer form.
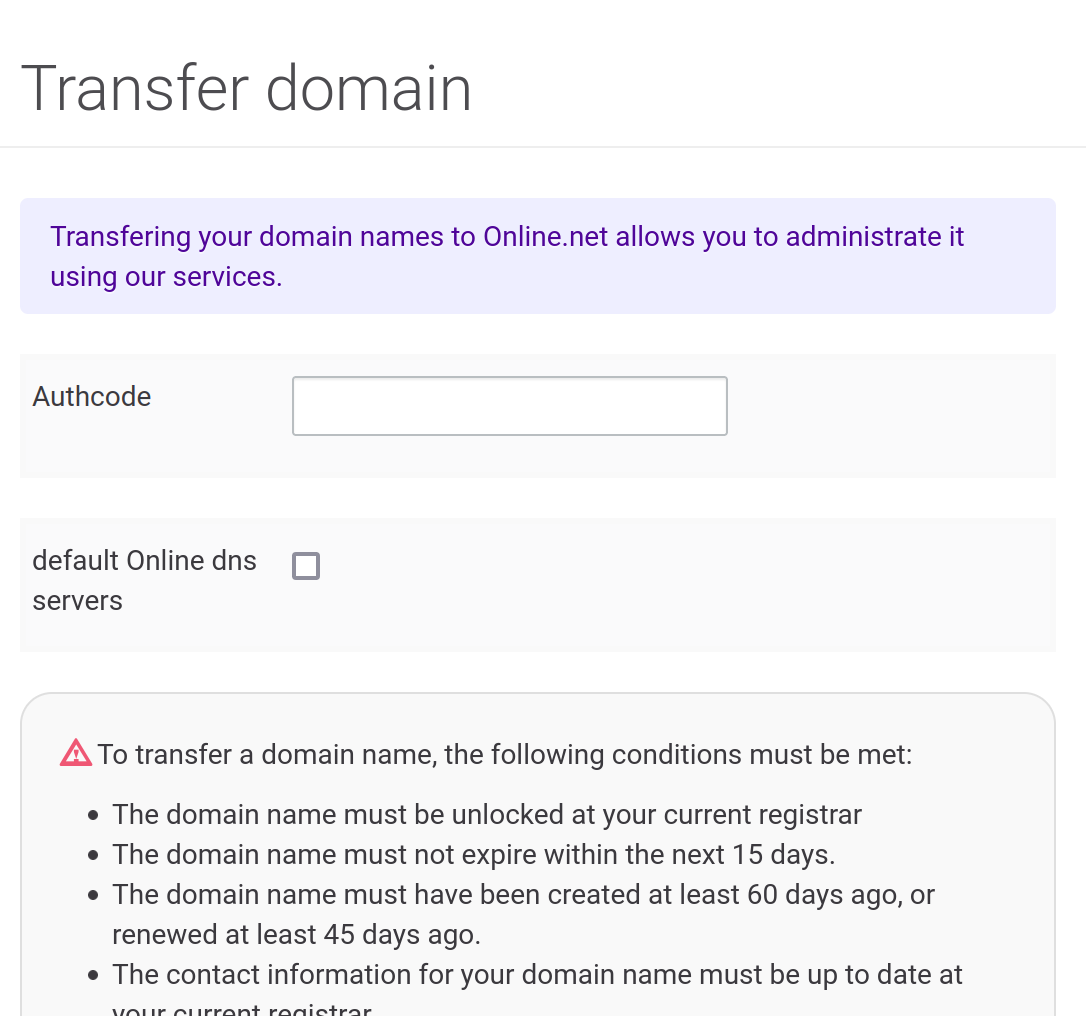
- Enter the Authcode provided by your current registrar (if it is required: this depends on the domain extension).
- Read the information about the conditions of the transfer, and click Confirm to state that you comply with them. You are directed to the hosting page.
- Select a hosting package, or click No hosting. You can also add a hosting backup, if you wish.
- Scroll down to the bottom of the page and click Order.
- If you did not select a hosting backup, a confirmation dialog box may appear. Click Continue without backup or Add backup. The Contact information page appears.
- Complete the contact information for the domain name.
- Scroll down to the bottom of the page and click Confirm. The Summary page opens.
- Check the summary of your order and select a payment mode from the dropdown. You must also agree to the terms of service as well as the web hosting specific terms, and choose whether to activate automatic renewal of your domain.
- Scroll down to the bottom of the page and click Confirm my command. You are redirected to the payment gateway to complete your payment.
See Also
Still need help?Create a support ticket