Deploying Laravel 10.x on Serverless Containers
This tutorial provides a step-by-step guide for deploying a containerized Laravel application on the Scaleway cloud platform. It covers the entire process, from setting up the required infrastructure to building and deploying the application using Docker and Scaleway services. The tutorial aims to help developers easily deploy their Laravel applications on Scaleway by providing clear instructions and best practices.
Before you start
To complete the actions presented below, you must have:
- A Scaleway account logged into the console
- Owner status or IAM permissions allowing you to perform actions in the intended Organization
- Installed Docker on your local computer
Why Scaleway is suitable for deploying containerized applications
Scaleway provides a seamless environment for running and managing containers, offering features such as Container Registry, Serverless Containers, Queues and Observability. By combining the benefits of containerization with Scaleway's platform, developers should be able to easily deploy, scale, and manage their applications efficiently.
Creating a queue
Laravel applications make use of queues to process long-running jobs in the background. As this feature of the Laravel framework is nearly always used, we will configure it and leverage the Scaleway Queues product from Scaleway. The Scaleway documentation provides clear information on how this managed service works and can be configured.
-
Create a queue. In this example, we create a
Standardqueue (At-least-once delivery, the order of messages is not preserved) with the default parameters. This queue will be the default queue used by our application.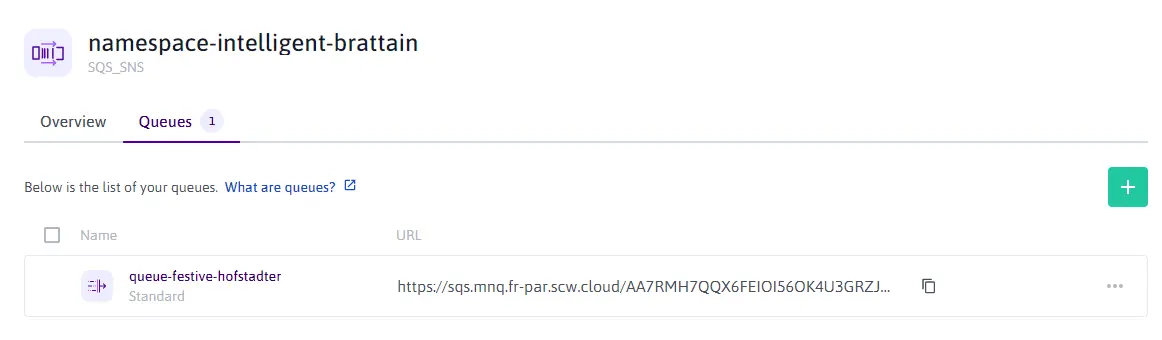
-
Generate credentials. In this example, we generate the credentials with
readandwriteaccess.
Building the Laravel Docker image
In this section, we will focus on building the containerized image. With Docker, we have a convenient way to package our application along with its dependencies and configurations, ensuring consistency and portability across different environments.
-
Create the Dockerfile: we create a
Dockerfilewhich is a text file that contains instructions for Docker to build the image. In this example, we specify the base image asphp:fpm-alpine, install and enable the necessary php dependencies withinstall-php-extensions, and determine the commands to be executed at startup.# Dockerfile FROM php:8.2.6-fpm-alpine3.18 ARG IPE_GD_WITHOUTAVIF=1 ADD https://github.com/mlocati/docker-php-extension-installer/releases/latest/download/install-php-extensions /usr/local/bin/ RUN chmod +x /usr/local/bin/install-php-extensions && \ install-php-extensions bcmath gd gettext intl mcrypt mysqli opcache pcntl pdo_mysql pdo_pgsql soap sockets redis xsl zip RUN apk --update add \ supervisor \ nginx &&\ rm /var/cache/apk/* COPY . /var/www/html COPY stubs/nginx /etc/nginx COPY stubs/php /usr/local/etc COPY stubs/supervisor /etc/supervisor RUN mkdir -p /var/run/php RUN php artisan config:cache EXPOSE 80 CMD ["/usr/bin/supervisord", "-c", "/etc/supervisor/conf.d/supervisord.conf"] -
Create the supervisor configuration file. Supervisor is a reliable and efficient process control system for managing and monitoring processes. This is used as multiple processes are running within the container. In this example, we create a
stubs/supervisor/supervisord.conffile with the following configuration to start the web server Nginx, the php-fpm pool, and 5 workers:# stubs/supervisor/supervisord.conf [supervisord] nodaemon=true logfile=/dev/null logfile_maxbytes=0 pidfile=/run/supervisord.pid [program:php-fpm] command=php-fpm -F stdout_logfile=/dev/stdout stdout_logfile_maxbytes=0 stderr_logfile=/dev/stderr stderr_logfile_maxbytes=0 autorestart=false startretries=0 [program:nginx] command=nginx -g 'daemon off;' stdout_logfile=/dev/stdout stdout_logfile_maxbytes=0 stderr_logfile=/dev/stderr stderr_logfile_maxbytes=0 autorestart=false startretries=0 [program:worker] process_name=%(program_name)s_%(process_num)02d command=php /var/www/html/artisan queue:work sqs --sleep=3 --tries=3 --max-time=3600 stdout_logfile=/dev/stdout stdout_logfile_maxbytes=0 stderr_logfile=/dev/stderr stderr_logfile_maxbytes=0 autostart=true autorestart=true stopasgroup=true killasgroup=true user=www-data numprocs=5 stopwaitsecs=3600 -
Create web server configuration files. Nginx will be used to serve the static assets and to forward the requests to the php-fpm pool for processing. In this example, we create the following configuration files
stubs/nginx/http.d/default.confandstubs/nginx/nginx.conf.# stubs/nginx/http.d/default.conf server { listen 80; listen [::]:80; server_name _; root /var/www/html/public; add_header X-Frame-Options "SAMEORIGIN"; add_header X-Content-Type-Options "nosniff"; index index.php; charset utf-8; location / { try_files $uri $uri/ /index.php?$query_string; } location = /favicon.ico { access_log off; log_not_found off; } location = /robots.txt { access_log off; log_not_found off; } error_page 404 /index.php; location ~ \.php$ { fastcgi_pass unix:/var/run/php/php8.2-fpm.sock; fastcgi_param SCRIPT_FILENAME $realpath_root$fastcgi_script_name; include fastcgi_params; } location ~ /\.(?!well-known).* { deny all; } }# stubs/nginx/nginx.conf error_log /var/log/nginx/error.log notice; events { worker_connections 1024; } http { default_type application/octet-stream; gzip on; include /etc/nginx/mime.types; include /etc/nginx/http.d/*.conf; keepalive_timeout 65; log_format main '$remote_addr - $remote_user [$time_local "$request" ' '$status $body_bytes_sent "$http_referer" ' '"$http_user_agent" "$http_x_forwarded_for"'; access_log /var/log/nginx/access.log main; sendfile on; } pid /var/run/nginx.pid; user nginx; worker_processes auto; -
Create the php-fpm configuration file. The configuration
stubs/php/php-fpm.d/zz-docker.conffile should be created, and the php-fpm pool configured to render the dynamic pages of the Laravel application. Depending on the needs of your application, you might have to fine-tune the configuration of the process manager. Further information is available in the php manual.[global] daemonize = no [www] listen = /var/run/php/php8.2-fpm.sock listen.owner = www-data listen.group = www-data listen.mode = 0660 pm = dynamic pm.max_children = 75 pm.start_servers = 10 pm.min_spare_servers = 5 pm.max_spare_servers = 20 pm.process_idle_timeout = 10s -
Build the docker image.
docker build -t my-image .
Creating Container Registry
-
Create a Scaleway Container Registry namespace in the
PARregion. Set the visibility toPrivateto avoid having your container retrieved without proper authentication and authorization.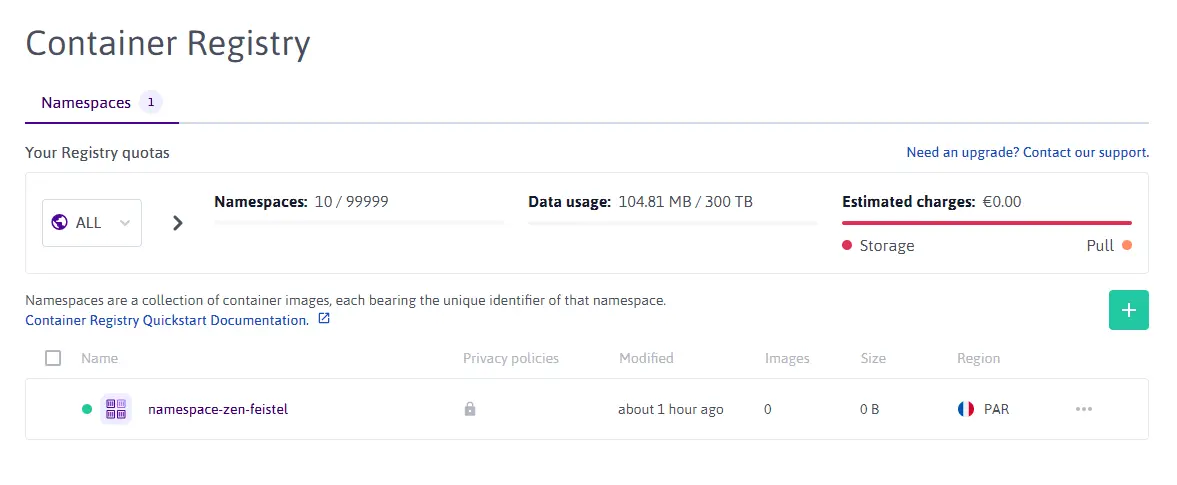
-
Run the following command in your local terminal to log in to the newly created Container Registry.
docker login rg.fr-par.scw.cloud/namespace-zen-feistel -u nologin --password-stdin <<< "$SCW_SECRET_KEY" -
Tag the image and push it to the Container Registry namespace.
docker tag my-image rg.fr-par.scw.cloud/namespace-zen-feistel/my-image:v1
docker push rg.fr-par.scw.cloud/namespace-zen-feistel/my-image:v1
Deploying the Serverless Container
The Scaleway documentation website provides a Quickstart on how to create and manage a Serverless Container Namespace.
-
Create a Serverless Containers namespace. In this example, we create the
my-laravel-applicationnamespace and configure the environment variables and secrets necessary for our application. In particular, we must add all the variables needed to connect to the previously created SQS/SNS queue.By default, Laravel expects the following environment variables/secrets to be filled in for queues:
AWS_ACCESS_KEY_ID,AWS_SECRET_ACCESS_KEY,AWS_DEFAULT_REGION,QUEUE_CONNECTION,SQS_PREFIXandSQS_QUEUE. -
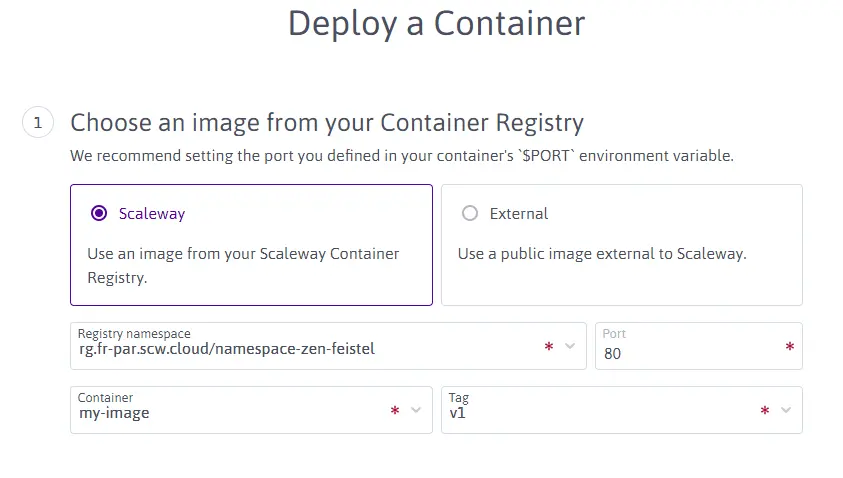
Deploy the application. Click + Deploy a Container once the namespace is created, and follow the instructions of the creation wizard. Select the registry namespace and the previously uploaded Docker image and configure the listening port (the Nginx web server is listening on port 80). For the CPU and memory, define at least 560mVPCU and 256 MB respectively. To reduce the limitations due to cold start, we will run at least 1 instance.
-
Review the logs to confirm that our application is running as expected, and review the logs to check if the supervisor started and spawned nginx, php-fpm, and workers. This step is optional.
INFO spawned: 'worker_00' with pid 4
INFO spawned: 'php-fpm' with pid 3
INFO spawned: 'nginx' with pid 2
INFO supervisord started with pid 1
Customizing the endpoint name (optionally)
Serverless Containers come with a default endpoint name. You can customize this to a name of your choice using the Endpoints feature.
-
Click the Endpoints tab. The endpoint information displays.
-
Click + Add new Endpoints. A pop-up displays.
-
Enter the name of your endpoint. You can use any domain or subdomain that you already own. Click Add Endpoint to validate.

A new endpoint displays in the list of endpoints. You can now access the application using your custom endpoint name.

Enabling monitoring and load testing (optionally)
By default, some metrics will be available in the Scaleway console. However, to better understand how your application behaves under load, you can use Scaleway Cockpit.
To test the load on the application, there is a basic test route that pushes a job into the queue and returns the welcome page.
# routes/web.php
use App\Jobs\ProcessPodcast;

Route::get('/test', function () {

    ProcessPodcast::dispatch();

    return view('welcome');
});
The job does nothing but wait for a couple of seconds.
# app/Jobs/ProcessPodcast

class ProcessPodcast implements ShouldQueue
{
    public function handle(): void
    {
        sleep(2);
    }
}
Then, use hey to send 400 requests (20 concurrent requests) to this route.
hey -n 400 -q 20 https://example.com/testWe can see that our deployment is not sufficiently sized to handle such workload and the response times are far from ideal.
Response time histogram:
  0.032 [1]     |
  1.890 [280]   |■■■■■■■■■■■■■■■■■■■■■■■■■■■■■■■■■■■■■■■■
  3.747 [8]     |■
  5.605 [14]    |■■
  7.463 [3]     |
  9.321 [2]     |
  11.179 [3]    |
  13.037 [9]    |■
  14.894 [40]   |■■■■■■
  16.752 [8]    |■
  18.610 [6]    |■

Status code distribution:
  [200] 155 responses
  [502] 219 responses
However, in the background, the infrastructure starts to scale up and the number of containers becomes enough to handle new requests.
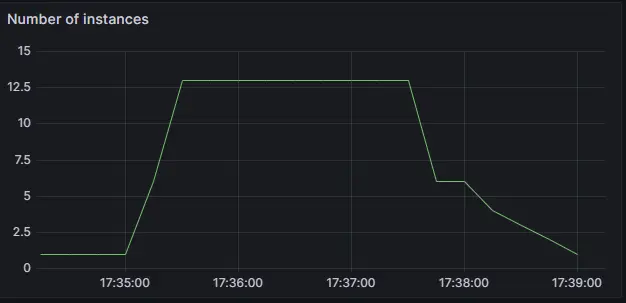
Relaunch the test to confirm that all requests have succeeded thanks to autoscaling.
Response time histogram:
0.089 [1] |
0.366 [174] |■■■■■■■■■■■■■■■■■■■■■■■■■■■■■■■■■■■■■■■■
0.643 [115] |■■■■■■■■■■■■■■■■■■■■■■■■■■
0.920 [36] |■■■■■■■■
1.197 [18] |■■■■
1.474 [17] |■■■■
1.751 [12] |■■■
2.029 [4] |■
2.306 [14] |■■■
2.583 [3] |■
2.860 [6] |■
Status code distribution:
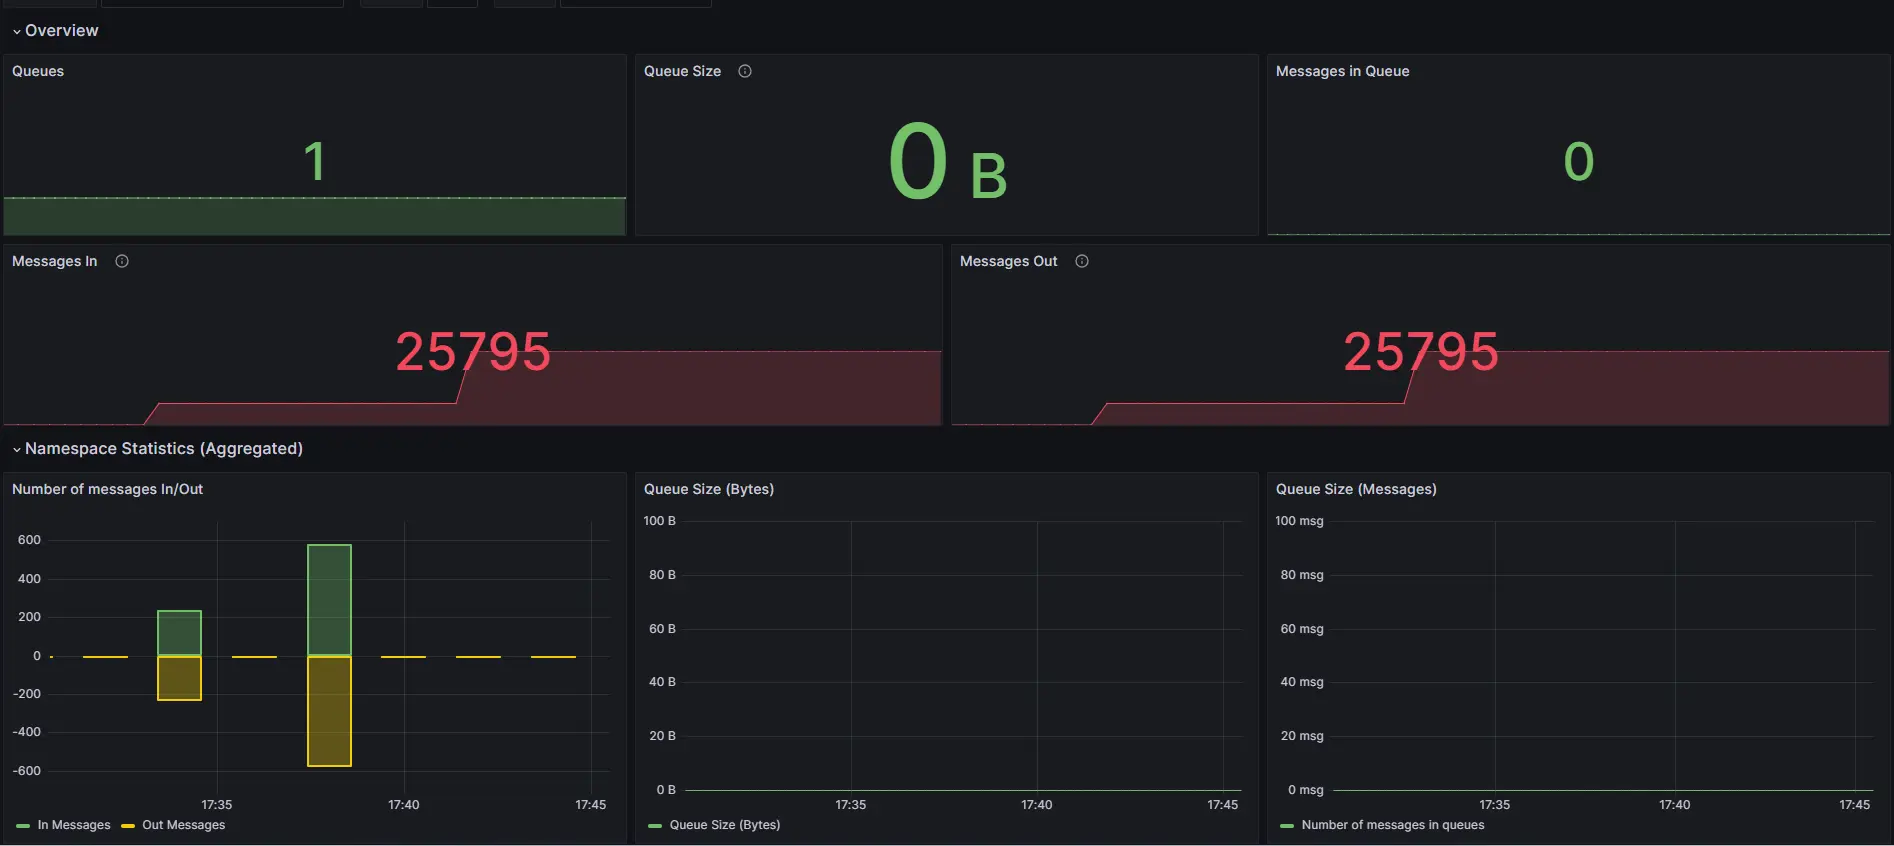
[200] 400 responsesCheck the Queues overview within Cockpit to also confirm that all jobs have been handled correctly and that the queue is now empty.
Visit our Help Center and find the answers to your most frequent questions.
Visit Help Center