Setting up a Proxmox cluster on Elastic Metal servers using Private Networks
Proxmox Virtual Environment (Proxmox VE) is a server virtualization platform, based on Debian Linux. It allows the deployment and management of KVM-based virtual machines or LXC containers. The tool provides a REST API and a graphical web interface to manage the virtual machines. It is also licensed under the GNU Affero General Public License, version 3.
Before you start
To complete the actions presented below, you must have:
- A Scaleway account logged into the console
- Owner status or IAM permissions allowing you to perform actions in the intended Organization
- At least two Elastic Metal servers compatible with Proxmox OS
- Created a Private Network and attached your Elastic Metal servers to it
Installing Proxmox
- In the Bare Metal section of the console side menu, click Elastic Metal to select your Elastic Metal server.
- From the list, select the Proxmox-compatible server you want to install and click its name to open the server dashboard.
- Select Proxmox from the list of available images.
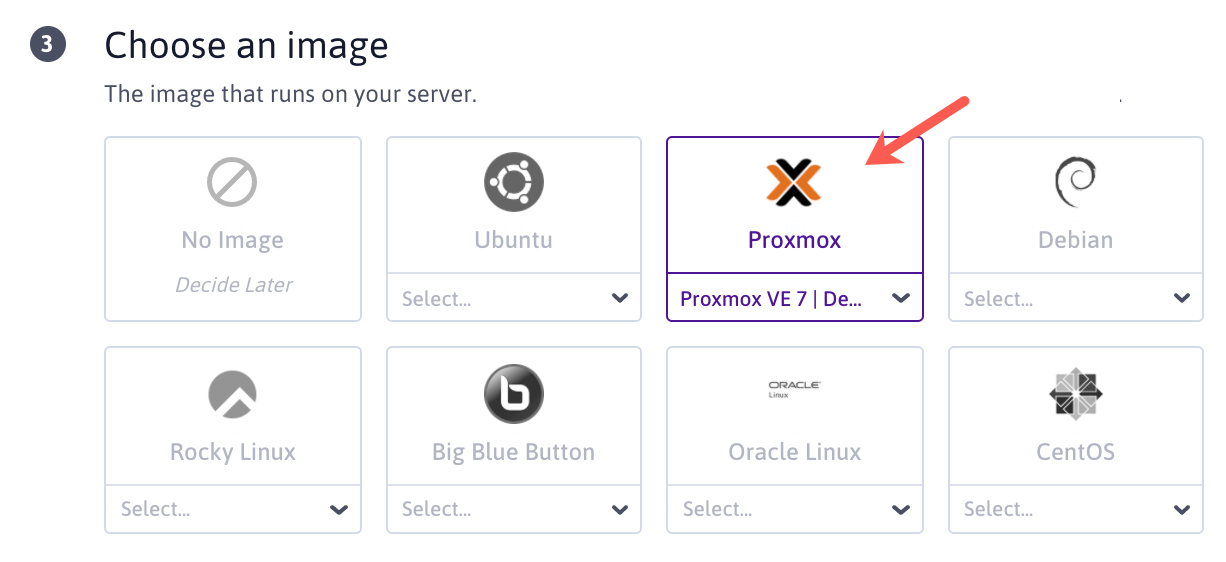
- Enter your credentials. The service username is
root. The service password must be at least eight characters long. - Enter a name and optional tags for your server.
- Enable the Private Networks feature for the server.
- Click Create Elastic Metal server to launch the installation.
Accessing Proxmox
Once the server has rebooted, the Proxmox web interface is available.
-
Open a web browser and go to
https://your_elastic_metal_server_ip:8006/. The Proxmox login screen opens. -
Enter your credentials and click Login.
Enter the credentials to log in:
- User name:
root - Password: The password set during the installation of Proxmox
- Realm:
Linux PAM standard authentication - Language: The display language of the Proxmox interface (i.e.,
English)
The Proxmox dashboard displays.
- User name:
Configuring the Private Network
You must configure the Private Network interface from the Proxmox interface, not from your server's command line.
-
In the Data center menu on the left, click the Proxmox host. The server's dashboard appears.
-
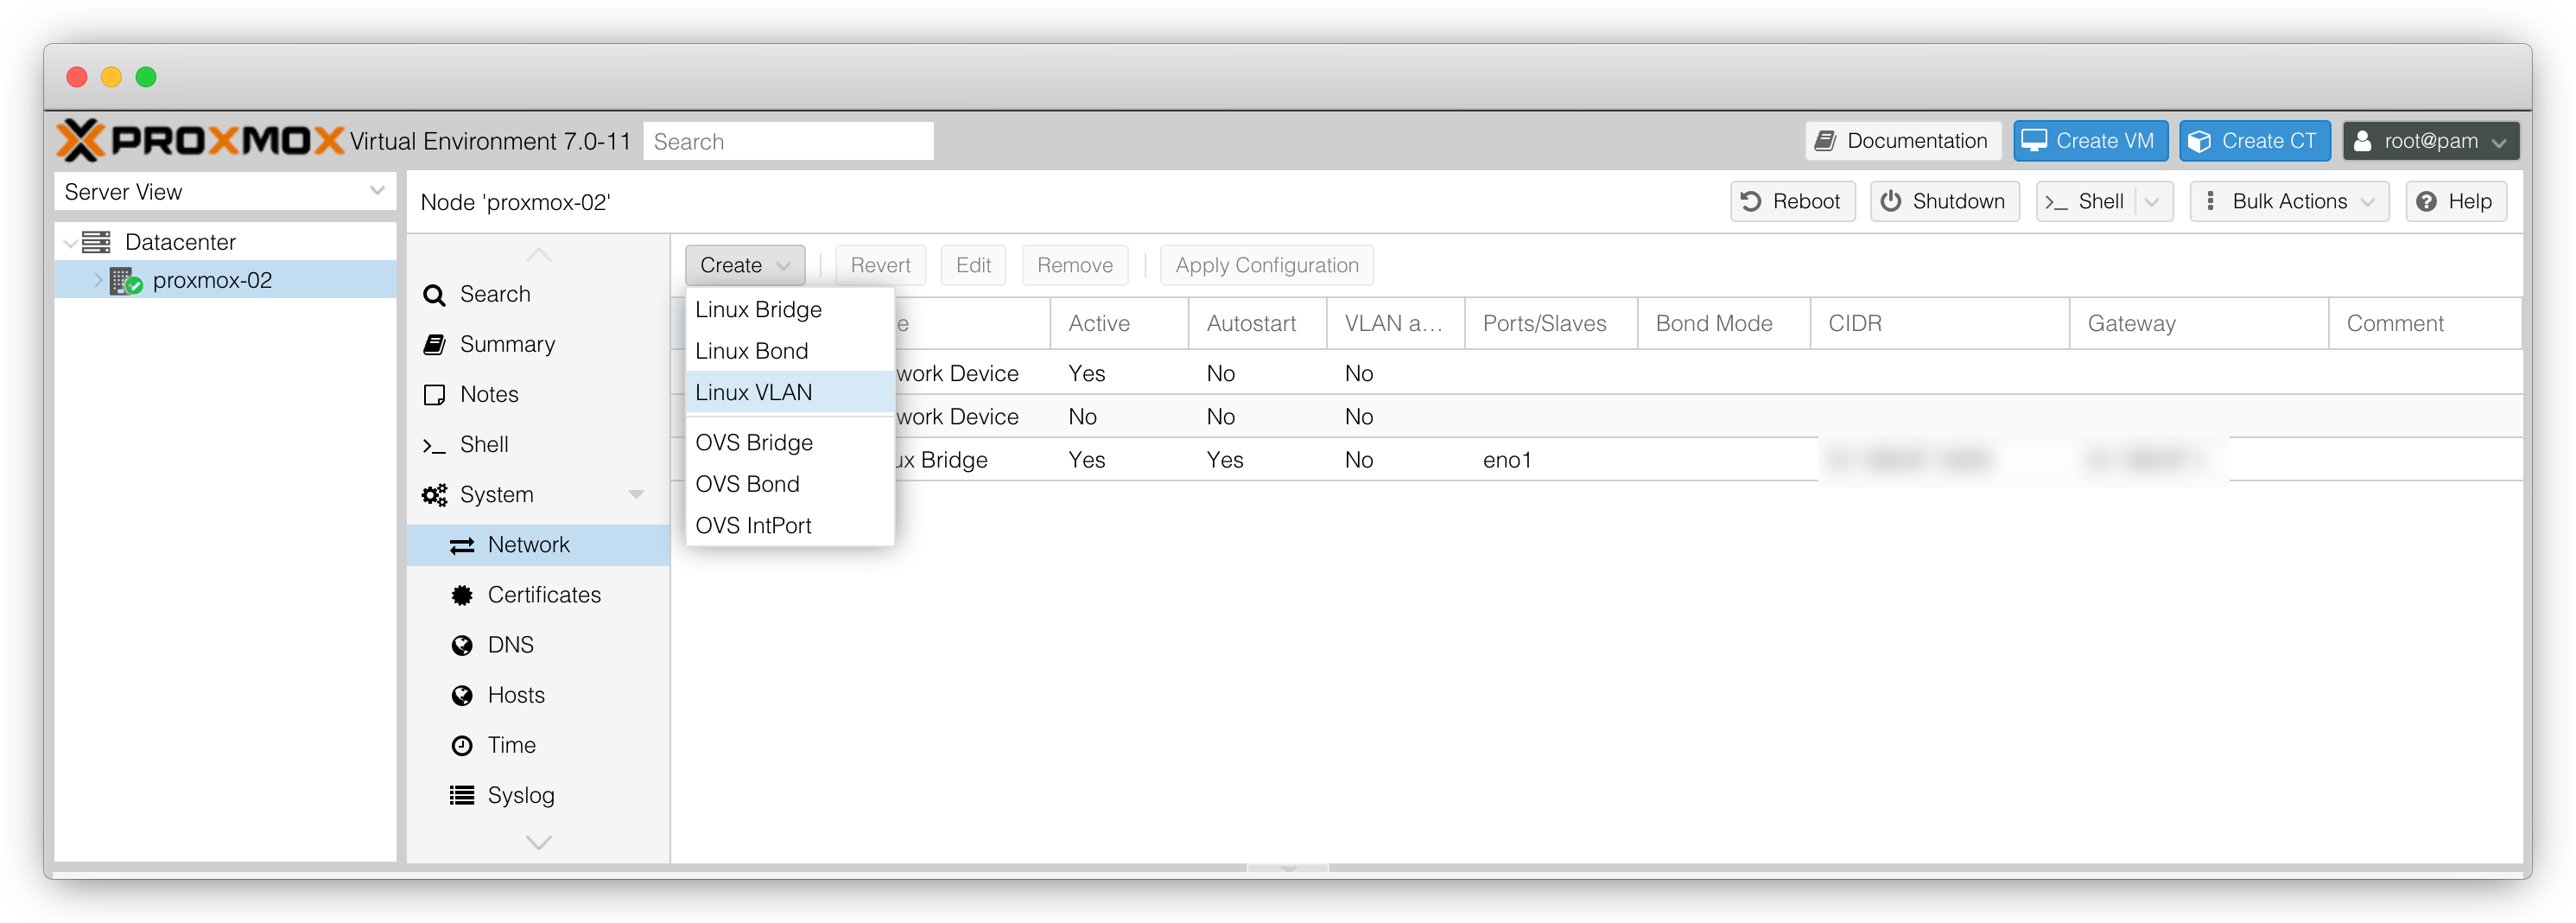
In the System section of the menu, click Network. The network dashboard appears.
-
Click Create > Linux VLAN.
-
Enter the VLAN details for your Private Network:
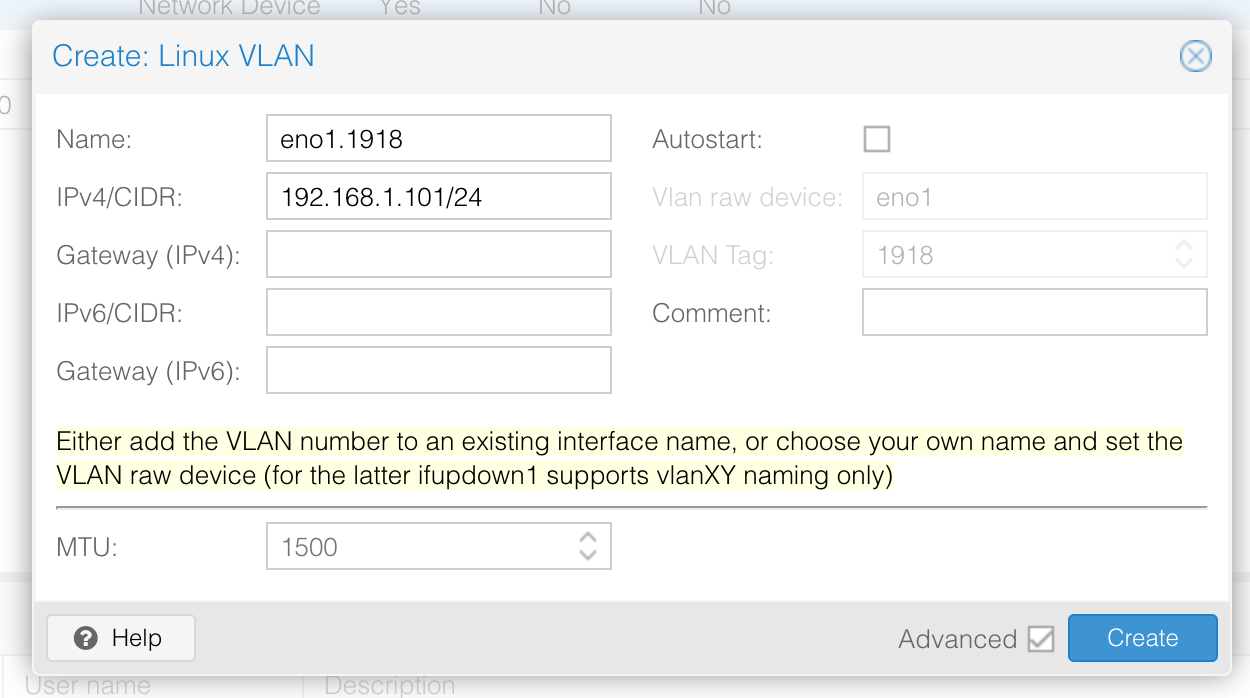
- Name: The name of your primary network interface followed by a dot and the VLAN ID of your Private Network (e.g.,
eno1.1918for the primary network interfaceeno1and the VLAN ID1918) - (Optional) IPv4/CIDR: The private IP of your server will be configured through DHCP if IPAM is configured correctly. Optionally, set the IP address of the machine in your Private Network followed by its CIDR netmask (e.g.,
192.168.1.101/24). - (Optional) Gateway (IPv4): The IP address of your Public Gateway, if you want to use one.
- Autostart: Tick this box to automatically bring up the interface during system startup.
- Name: The name of your primary network interface followed by a dot and the VLAN ID of your Private Network (e.g.,
-
Click Create to create the Private Network interface.
-
Click Apply configuration to activate the Private Network and to save the configuration.
Network configuration on the console
- Open the file
/etc/network/interfacesin a text editor and update any lines generated by Proxmox. Change lines such asiface eno1.3010 inet manualtoiface eno1.3010 inet dhcp. - In the same file, ensure that all lines generated by the Proxmox web UI are placed after the
vmbr0interface declaration. Failing to do so will prevent both static and DHCP configurations from working correctly. - Save the file and exit the text editor.
- Example of a
/etc/network/interfacesfile:
auto lo iface lo inet loopback iface eno1 inet manual iface eno2 inet manual iface eno3 inet manual iface eno4 inet manual auto vmbr0 iface vmbr0 inet static address 51.159.111.2/24 gateway 51.159.111.1 bridge-ports eno1 bridge-stp off bridge-fd 0 hwaddress 44:a8:42:44:38:b4 # generated configuration that must be after vmbr0 declaration auto eno1.3010 iface eno1.3010 inet dhcp - Example of a
Creating a cluster
- In the data center view of the Proxmox interface of your first node, click Cluster. The cluster dashboard displays.
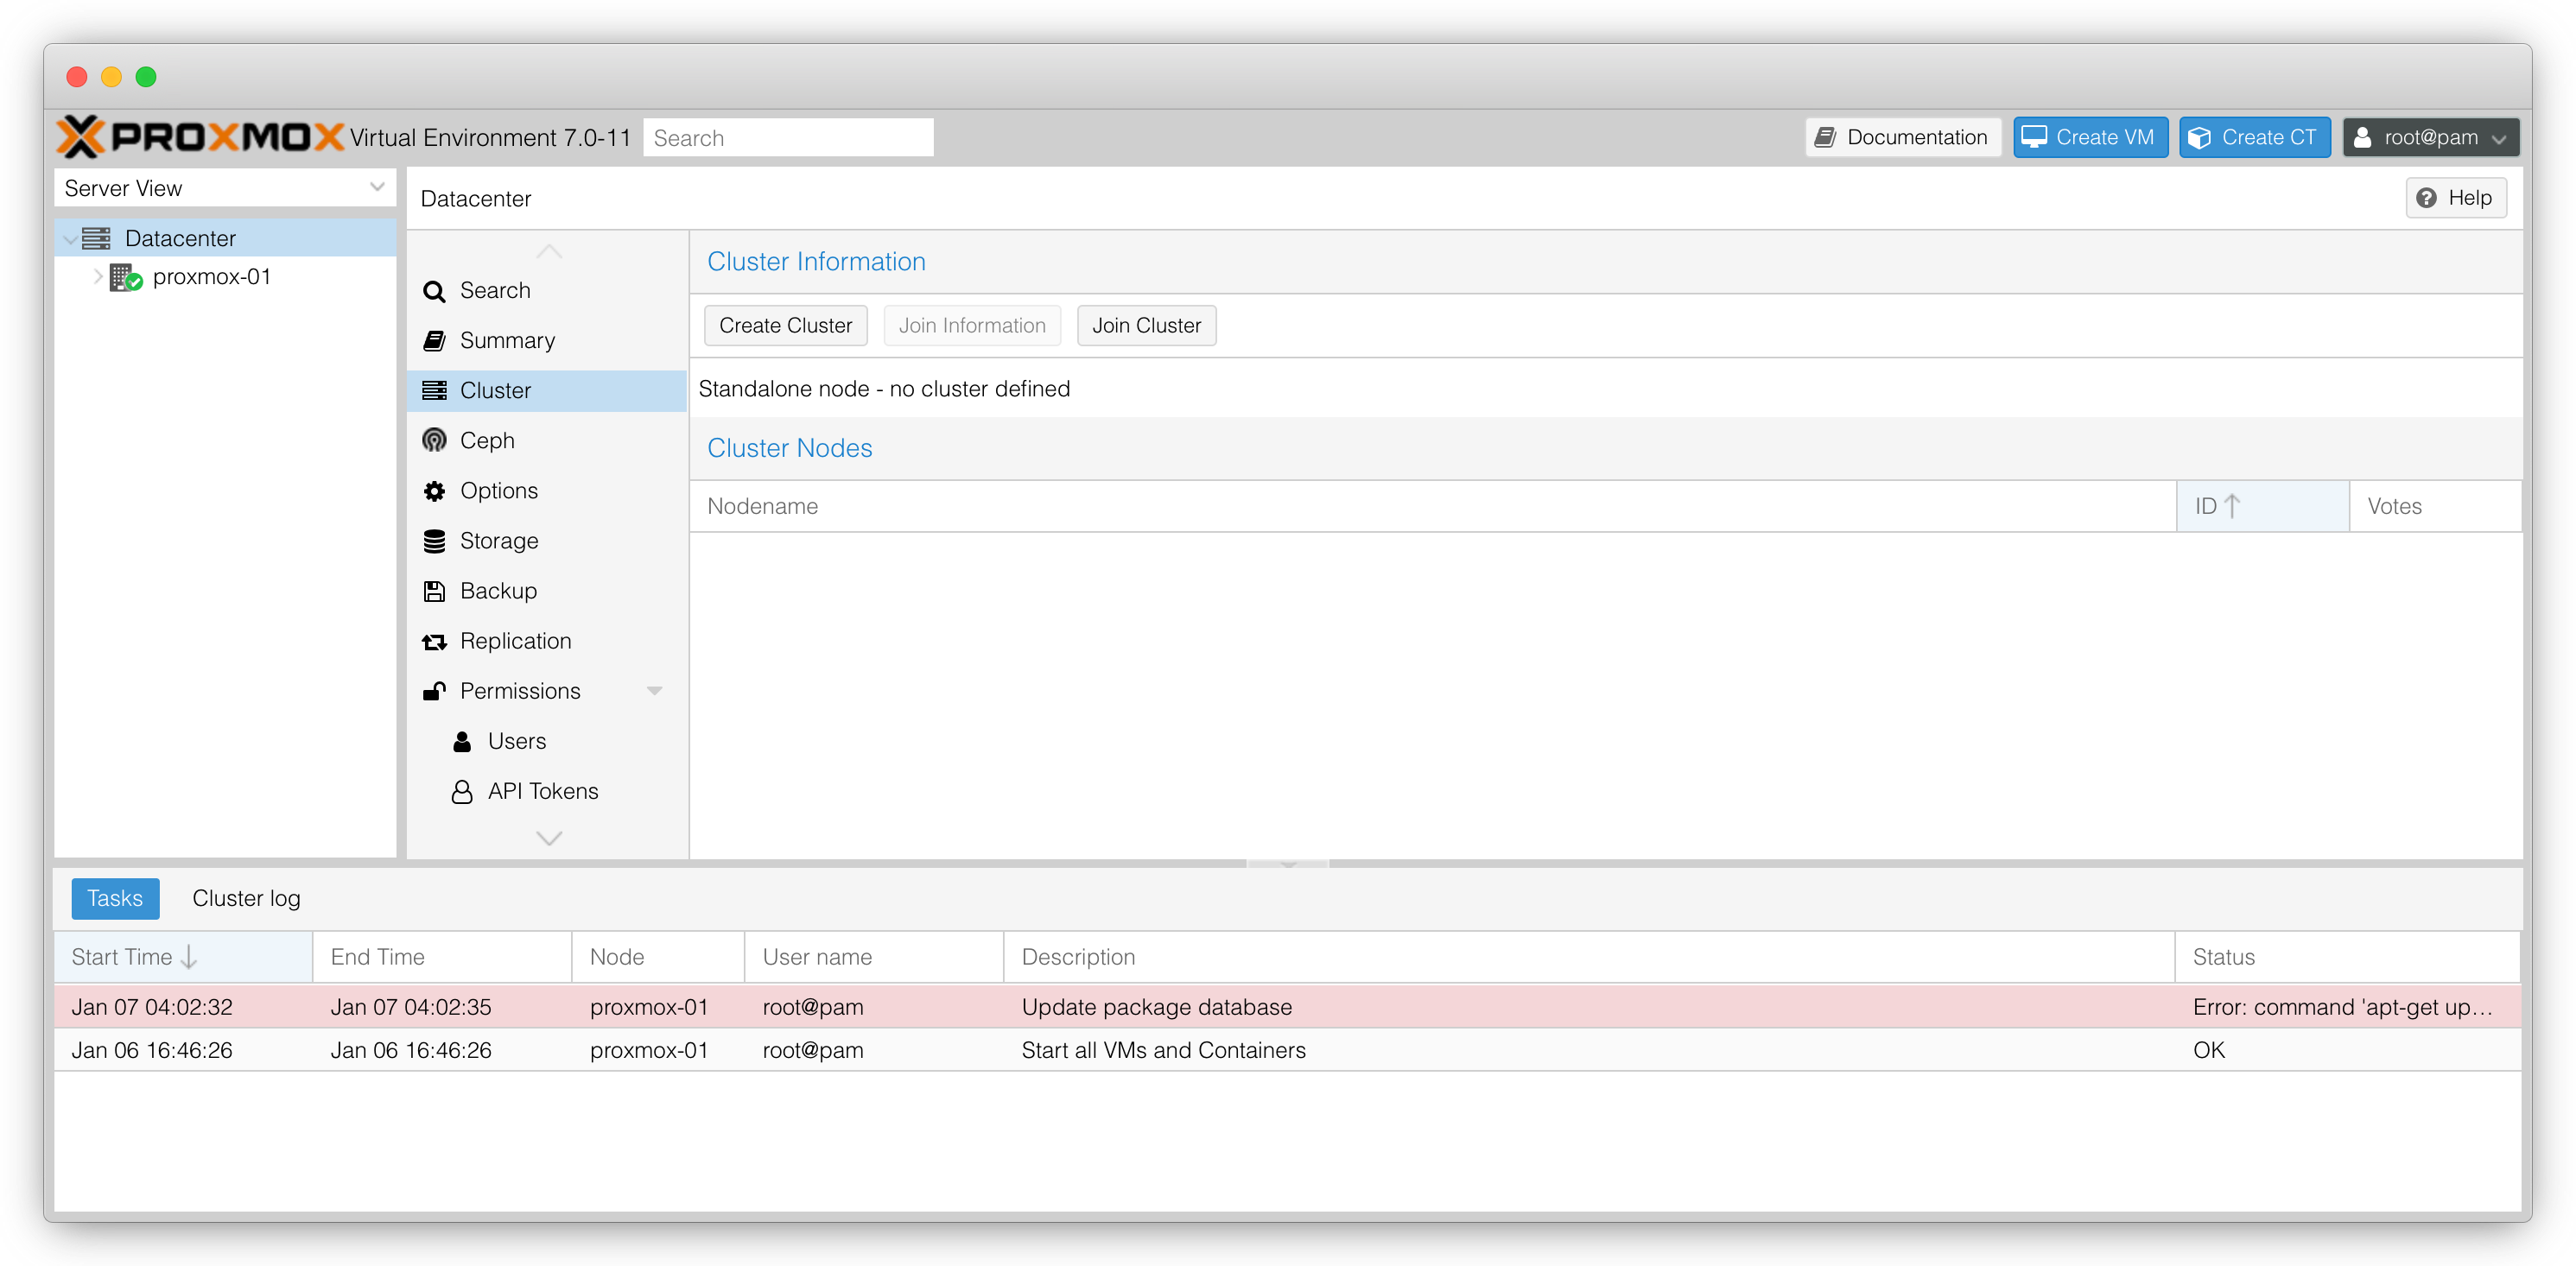
- Click Create cluster.
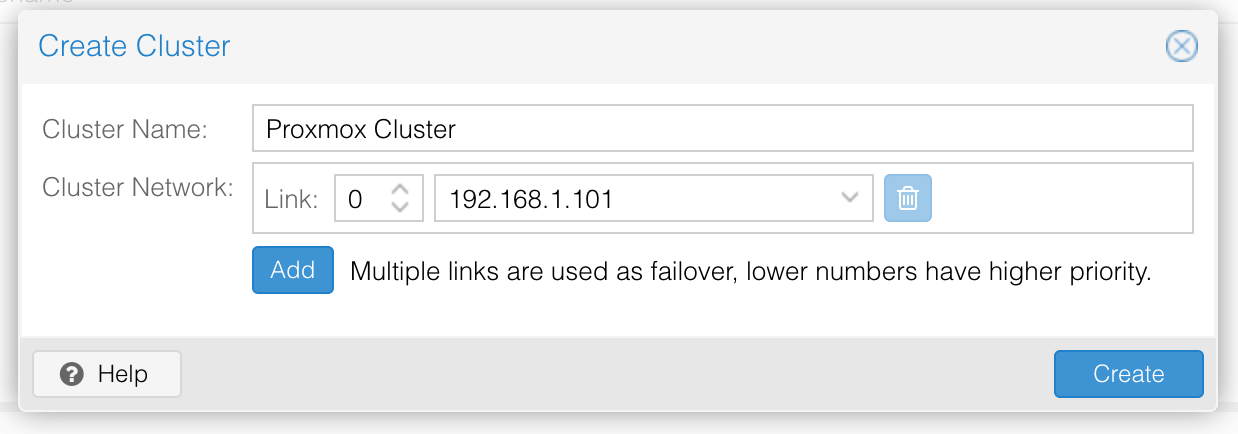
- Enter a name for the cluster and select your Private Network as the cluster network. Then click Create.
- Select the cluster in the list and click Join Information. The cluster join information displays.
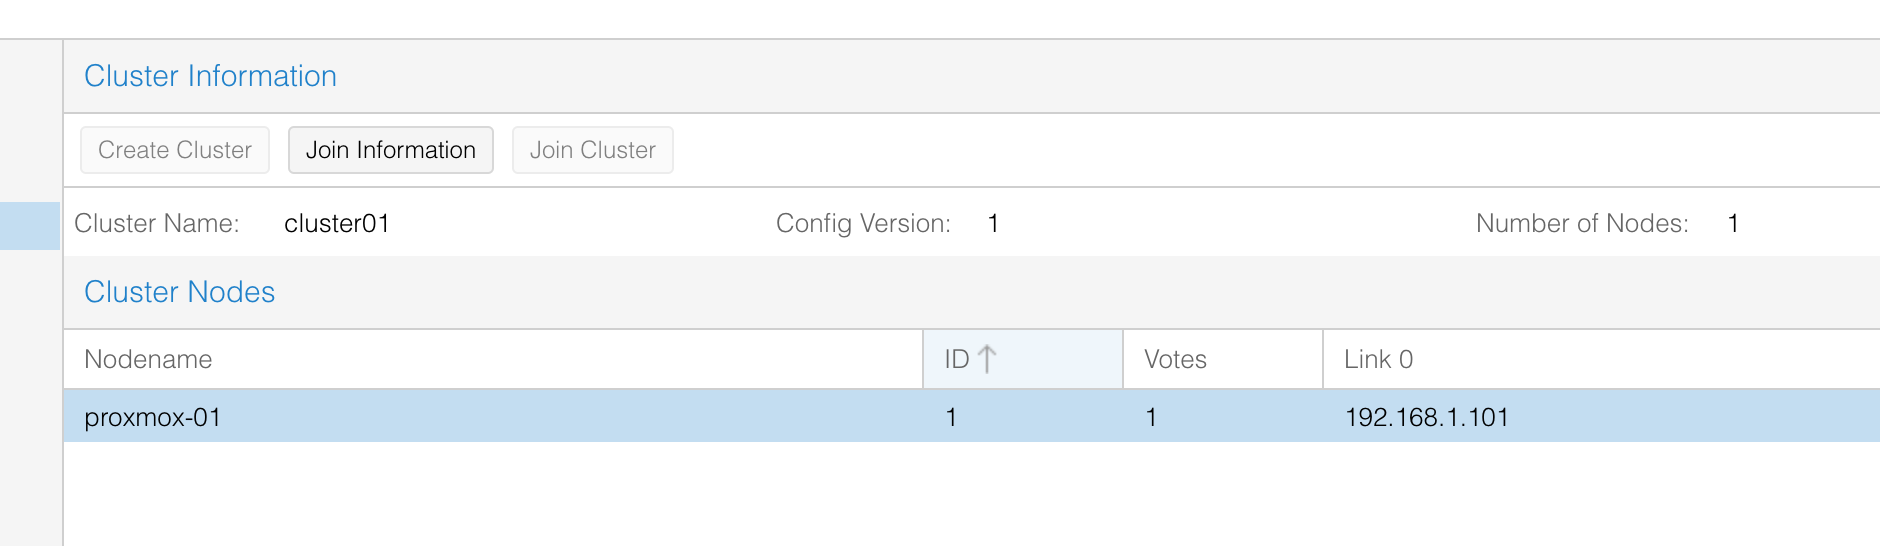
- Click Copy Information to copy the cluster join information into the clipboard.
- Go to the Proxmox interface of your second node and click Cluster to enter the cluster configuration from the data center view of the machine.
- Click Join cluster and paste the cluster join information in the form.
- Enter your first node's
rootpassword and click Join to link the machine to the cluster.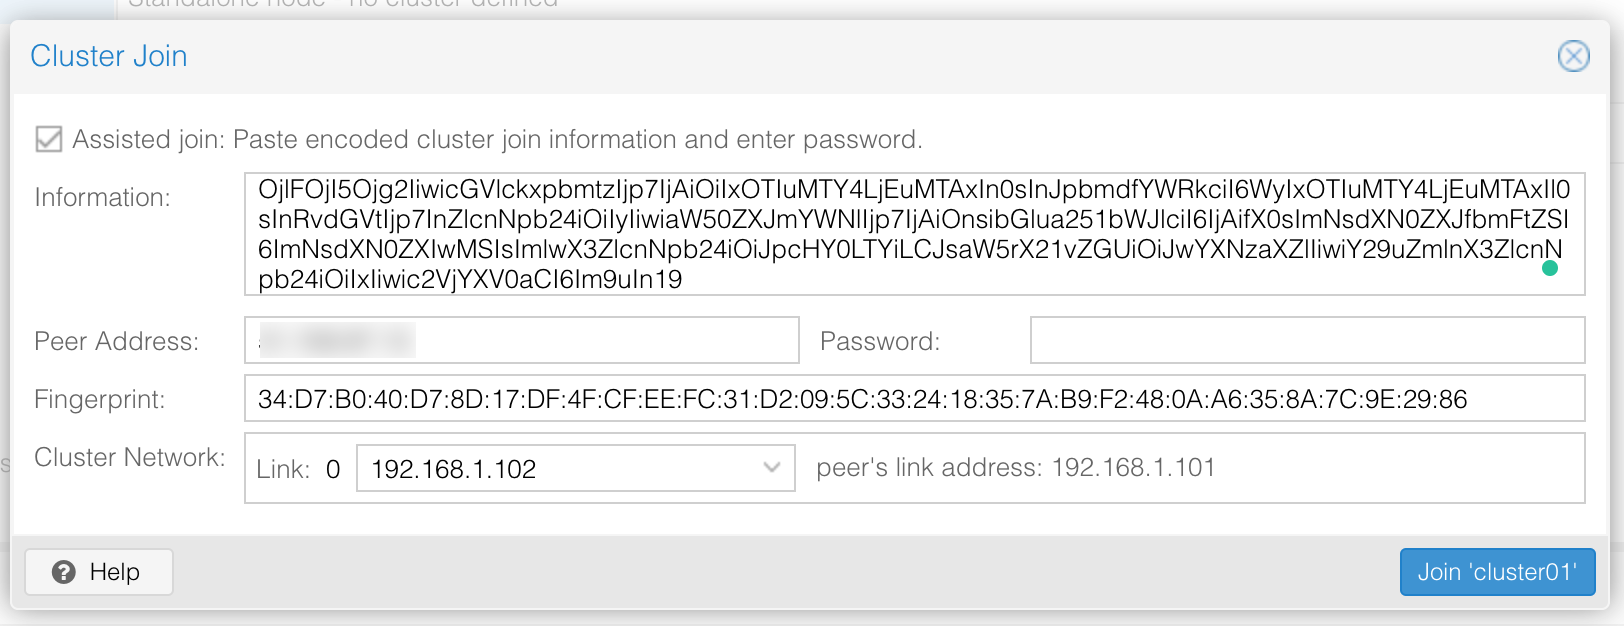
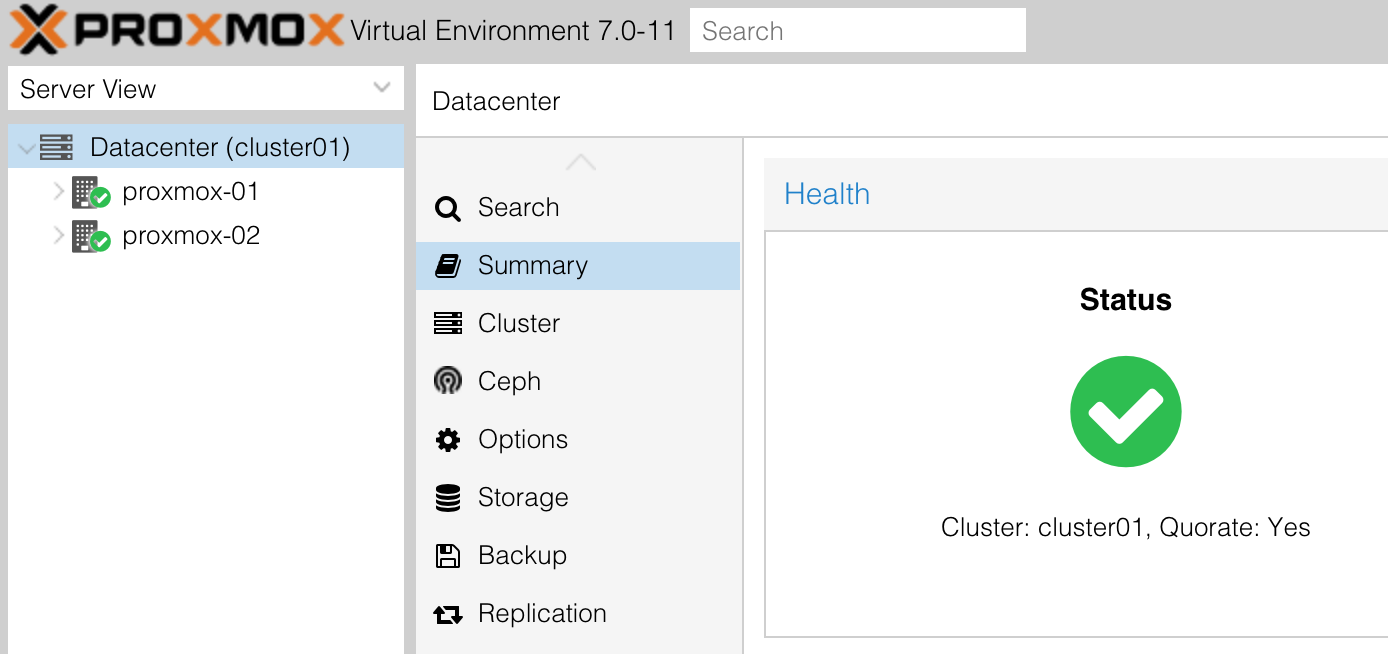
The second node now appears in the cluster in the Data center view of Proxmox. You can manage both machines using a single interface. The communication between members of the cluster is entirely in your Private Network, ensuring the highest level of security and the lowest latency.
Visit our Help Center and find the answers to your most frequent questions.
Visit Help Center