Configuring Real-time Alerting with IoT Hub and Slack
Nowadays, most companies use real-time messaging systems to have their teams communicate together from any location. Slack is one of the most popular such systems.
An interesting use case for Slack is alerting. You can set up "Slack applications" to send messages to team members and notify them about ongoing problems. As team members tend to keep a constant eye on their Slack workspace, they can be very quickly informed of ongoing problems.
In this article, we are going to show you how to enable device-to-Slack messaging through IoT Hub.
There are three steps to achieve this:
- Create a Slack workspace and a Slack application
- Create an IoT Hub and add a Device
- Set up an IoT Hub Route to the Slack application
- Publish messages on the IoT Hub and see the messages on the Slack channel
Before you start
To complete the actions presented below, you must have:
- Owner status or IAM permissions allowing you to perform actions in the intended Organization
Creating a Slack workspace and application
- Create a Slack workspace to be our sandbox. To do so, follow the instructions available on the Slack website.
- To create the application, go to this page, type in any name, and select your Slack workspace.
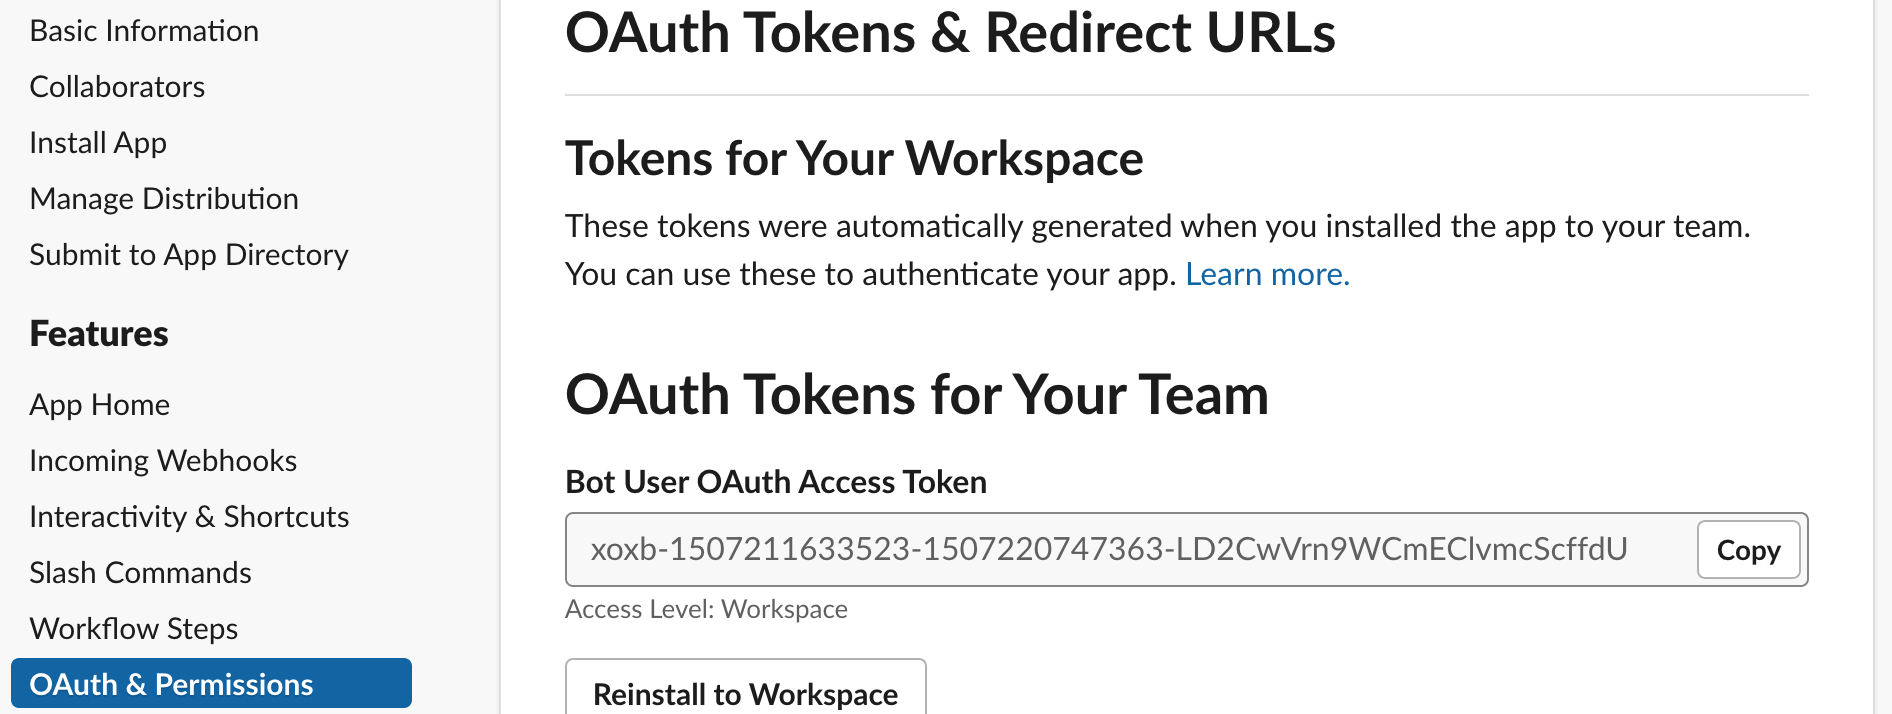
- Once created, enable the application to send messages to your workspace's channels. Head to the
OAuth & Permissionspage, underScopes > Bot Token Scopes, and add an OAuth scope namedchat:write. It should look like the following.
- Finally, install the application in your workspace: scroll up the page and click the install button.

- Once authorized, the token used to publish messages from IoT Hub should appear. Write down the token, we will need it for the next step.
- Add your application to a Slack channel.
- Find the channel ID. To get this ID get the link for any message in the channel (it should look something like
https://iot-sandbox.slack.com/archives/C01FLQXBJF2/p1605613307000200) and copy the code displayed right afterarchives(hereC01FLQXBJF2). This is your Slack channel ID, which will be used in a later step.
Creating an IoT Hub
Now that we have the Slack application ready, we need to create an IoT Hub. This will be where our simulated IoT Device will publish messages to be sent to our Slack workspace.
Follow this procedure to create an IoT Hub. Select your name and plan of choice, and click the Create Hub and Add a Device button.
Setting up an IoT Route to our Slack application
Here is where the magic happens: We will instruct our IoT Hub to call our Slack application when a message is published on the alert/high topic. To do so we will use an IoT Hub REST Route.
- In the Scaleway console, head to the Routes tab of your IoT Hub.
- Create a new route with the settings as follows:
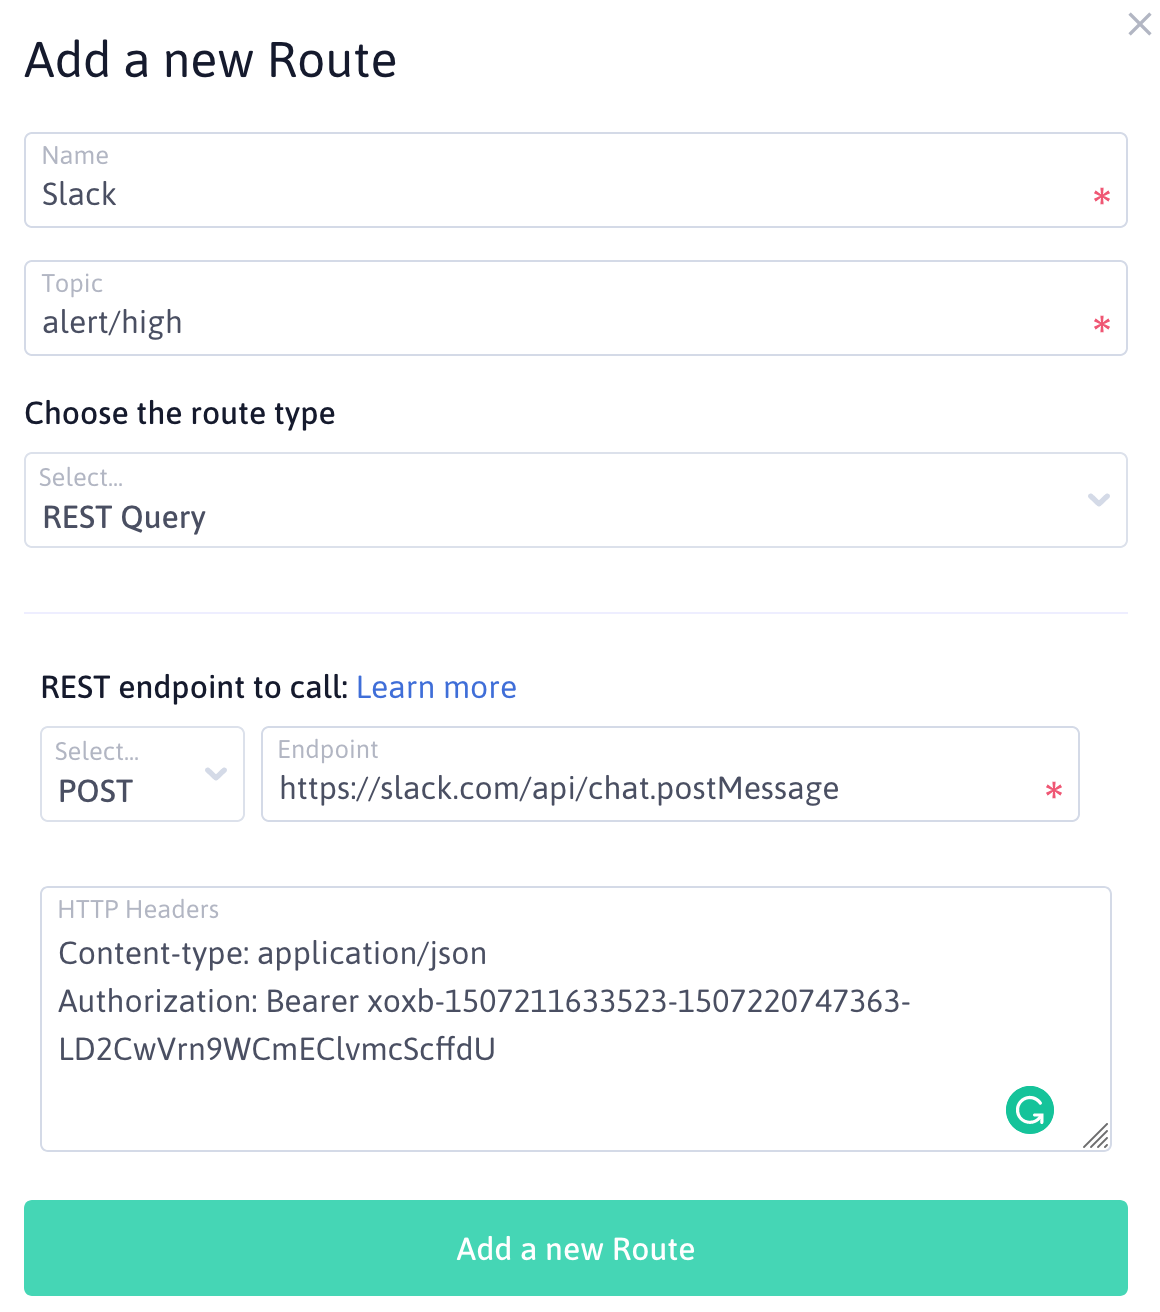
Replace the authorization token with the one you got for your Slack application in the headers.
Sending messages to your Slack workspace
Now that we have everything set up, let's add a Device and send a message to trigger a Slack alert message.
-
Go to the Devices tab of your IoT Hub.
-
Add a new device and make sure to select the Allow insecure connections option.
-
Click Back to devices. Then, click the name of your device. The device information page displays.
-
Click MQTT Webclient on the device overview page. The client will open and automatically connect.
-
Publish a message to the
alert/hightopic, in thePublishblock:- Write
alert/highas the topic - Write
{ "channel": "<Slack channel ID>", "text": "Hi from IoT Hub!" }as the message (replace<Slack channel ID>with the one you collected earlier) - Click
Publish(no confirmation will be issued)
- Write
The message appears in the Slack workspace.

Congratulations, you sent your first Slack message from a (simulated) device.
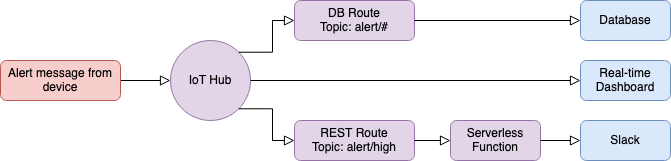
Using Serverless Functions to do it the smart way
When you use this tutorial in a production setting, we recommend that you:
- store all alerts in a database to keep a history.
- send the alerts to an on-premises real-time dashboard.
- for important alerts, depending on the content of the alert, notify the right Slack channel using a Serverless Function to make this choice.
You can set up your architecture in the following manner:
Learn more about Scaleway IoT Hub, discover how to add Devices to the hub, or check the IoT Hub metrics.
Visit our Help Center and find the answers to your most frequent questions.
Visit Help Center