NavigationContentFooter
Jump toSuggest an edit

How to upgrade the Kubernetes version on a Kapsule cluster

Reviewed on 13 December 2023Published on 21 December 2022

You can either upgrade your Kubernetes Kapsule cluster directly from the Scaleway console, or upgrade your cluster to the next minor version by using the CLI. The CLI section of this how-to guide also provides additional mandatory information for checking important components before proceeding with the upgrade of your cluster.

Upgrading a Kapsule cluster from the Scaleway console

Before you start

To complete the actions presented below, you must have:

  • A Scaleway account logged into the console
  • Owner status or IAM permissions allowing you to perform actions in the intended Organization
  • Created a Kubernetes Kapsule cluster running on a Kubernetes version older than the latest release
  1. Click Kubernetes under Containers on the side menu. A list of your Kubernetes Kapsule clusters displays.
  2. Click the cluster name you wish to upgrade the Kubernetes version for. The cluster information page displays.
  3. Click Upgrade next to the Kubernetes version of your cluster. A pop-up displays.
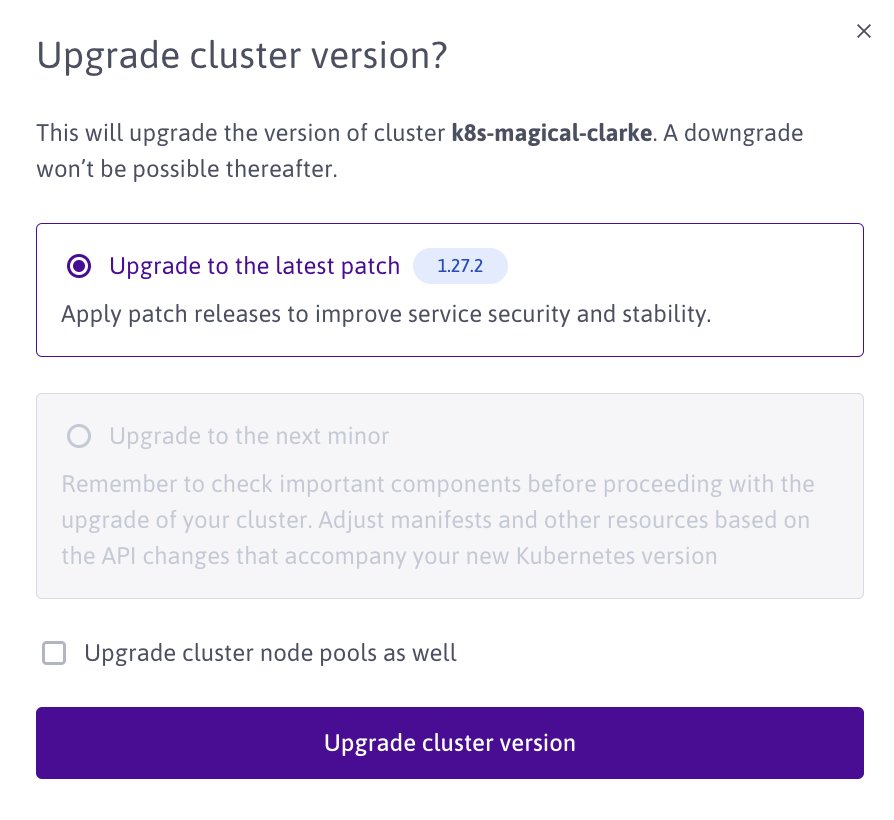
  4. Select the latest patch or next minor version to upgrade to. Tick the Upgrade cluster node pools as well checkbox if you want to upgrade the version of Kubernetes on the node pools in your cluster to the same version.
    Important

    Be careful when upgrading the Kubernetes versions of your node pools, as it may lead to data loss on data stored locally on any node.

  5. Click Upgrade.
    Note

    It is not possible to downgrade your Kubernetes version once it has been upgraded.

Upgrading a Kapsule cluster to the next minor version using the CLI

Before you start

To complete the actions presented below, you must have:

  • A working CLI with your credentials set up

    This procedure will upgrade your Kubernetes Kapsule cluster to the latest k8s version available on the Kapsule API.

First, it is essential to verify that the most recent version of Kapsule adequately supports your workload. We maintain a compatibility matrix for various components, as your current cluster might use components that are deprecated or unavailable in the latest version.

For further details, consult our version policy.

We recommend you read the Kubernetes changelog to stay informed on the latest version upgrades.

Checking which components must be changed

Run the following command into your terminal to retrieve a list of the components that need to be changed.

scw k8s version list

You should get an output similar to the following, providing a list of all relevant components:

NAME AVAILABLE CNIS AVAILABLE CONTAINER RUNTIMES
1.28.2 [cilium calico kilo] [containerd]
1.27.6 [cilium calico kilo] [containerd]
1.26.9 [cilium calico kilo] [containerd]
1.25.14 [cilium calico kilo] [containerd]
1.24.17 [cilium calico weave flannel kilo] [containerd]

CNIs

If your cluster currently uses a deprecated Container Network Interface (CNI) and you are willing to upgrade to a more recent Kubernetes version, the recommended approach is to create a new Kapsule cluster. Unfortunately, at present, there isn’t a straightforward method to modify the CNI since it is tightly integrated within each cluster node, making the transition a complex process. For more help, check out the following resources:

  • The #k8s channel on our Slack community
  • Our support ticketing system

Container runtimes

We only provide support for containerd from version 1.25 and above. To migrate your existing pools, you must create new Kapsule pools with containerd as a runtime. Complete the following steps to do so:

  1. Create the pool:
    scw k8s pool create container-runtime=containerd zone=$POOL_ZONE size=$SIZE_OF_YOUR_OLD_POOL version=$YOUR_CLUSTER_VERSION cluster-id=$CLUSTER_ID
  2. Wait for the nodes to be provisioned:
    scw k8s pool wait $POOL_ID
  3. In parallel, you can start cordoning nodes using the old runtime. This way, the workload will get rescheduled directly on the containerd nodes.
    kubectl cordon $OLD_NODE_A $OLD_NODE_B $OLD_NODE_C ...
  4. Start draining the old nodes once the new nodes are ready:
    Note

    You may need to add the option --delete-emptydir-data if you used local disk as a scratchpad.

    kubectl drain --ignore-daemonsets $NODE_TO_DRAIN
    Important

    Do not drain all the nodes simultaneously. Make sure to do it sequentially, while checking whether your workload is behaving as expected.

  5. Delete nodes from your old pool, since at this point, they should be emptied of any workload:
    kubectl delete node $OLD_NODE_A $OLD_NODE_B $OLD_NODE_C ...
  6. Delete your old pool:
    scw k8s pool delete $OLD_POOL_ID

Effective upgrade

From here, two options are available: you are either upgrading one minor version or multiple ones.

One minor version

This option is the most straightforward and requires you to first upgrade your control plane.

scw k8s cluster upgrade $CLUSTER_ID version=$NEW_K8S_VERSION
Tip

You can also upgrade the pools by appending the previous command with upgrade-pools=true.

Additionally, you can upgrade one pool independently by running the following command:

scw k8s pool upgrade $POOL_ID version=$NEW_K8S_VERSION

If you wish to migrate your workload manually, you can do so by following the steps described in the runtimes section.

Important

Make sure to adapt the pool creation step.

scw k8s pool create zone=$OLD_POOL_ZONE size=$SIZE_OF_YOUR_OLD_POOL version=$NEW_CLUSTER_VERSION cluster-id=$CLUSTER_ID

Multiple minor versions

The process is quite similar to the previous one except you need to repeat the steps for each minor version.

See also
How to access the Kubernetes dashboardHow to use the NVIDIA GPU operator on Kapsule and Kosmos with GPU Instances
Docs APIScaleway consoleDedibox consoleScaleway LearningScaleway.comPricingBlogCarreer
© 2023-2024 – Scaleway